Monday, December 31, 2012

End of the Year Goals Progress

Photobucket

As 2013 rapidly approaches, I plan on spending much of the day working on the list of goals that I shared a few weeks ago. I will probably not post everything I finish today, but will schedule posts for the new year. To review, here are my three goals and my status thus far:

Goals For the Last Days of 2012
1) Clean out the drafts folder and get posted whatever I can, picture or no picture. I've been working on this for a bit this morning and am almost through the 8-10 posts that have been hanging out in various stages of incompletion. Look for a bunch of those posts in the coming days. DONE!

2) Post all the recipes that I have pictures for. That includes ones for Kalbi (Korean beef short ribs), beef stock, apple cinnamon pancakes, smoked gouda mac and cheese, turkey wild rice soup, cranberry-walnut caramels, and cheddar potato soup.

3) Update the recipe index!

It's about 9:00 a.m. EST. Let's see what I can do before midnight!

Sunday, December 30, 2012

Martha Stewart Cinnamon-Oat Pancakes

I'd been looking for a good oatmeal pancake recipe for quite some time. Earlier attempts such as this one or this one were good, but not quite right. This one from Martha Stewart is both tasty and has the consistency I was looking for--hearty enough that you know you're eating oatmeal. Although this recipe is a bit labor intensive for regular pancakes, in my opinion it's more than worth it. I served these with a super simple apple compote which I made by sauteing a large diced apple in a small amount of butter until softened, then sprinkled with a little bit of brown sugar and cinnamon.

Photobucket

Martha Stewart Cinnamon-Oat Pancakes
2 cups all-purpose flour
1/4 cup packed brown sugar
1 tablespoon baking powder
1 teaspoon salt
1/2 teaspoon ground cinnamon
2 cups old-fashioned rolled oats
2 cups milk
2 eggs
1/4 cup vegetable oil or apple sauce

In a food processor, combine flour, sugar, baking powder, salt, cinnamon, and 1 cup oats and pulse a few times to coarsely grind oats.

In a large bowl, whisk together milk, eggs, and oil or apple sauce. Stir in dry ingredients and 1 cup oats and whisk just until moistened.

Heat skillet or griddle over medium. Lightly oil. Cook 1-2 minutes until a few bubbles have burst. Flip and cook until browned, 1 to 2 minutes more. Repeat with more oil and batter.

Serves 4-6 Photobucket

Friday, December 28, 2012

Smoked Gouda Mac 'N Cheese

Photobucket

At a farmers' market, we stumbled across very tasty smoked gouda. Though it would have been far healthier to have it with fruit or on a salad, I had a craving for a "grown-up" mac 'n cheese. This recipe, modified from an Allrecipes.com recipe, fit the bill perfectly. Definitely a yummy keeper!

Smoked Gouda Mac 'N Cheese
16 ounces dry pasta (e.g. macaroni, penne)
6 tablespoons butter
1/2 cup all-purpose flour
5 1/2 cups milk, divided
2 1/2 cups shredded smoked Gouda
2-3 cups shredded Cheddar cheese
1 cup grated Parmesan cheese
1/2 cup bread crumbs
1 teaspoon cayenne pepper
olive oil, salt, pepper

1. Preheat oven to 350 degrees F (175 degrees C). Spray or butter a 9 x 13" pan.

2. Cook pasta according to the package directions until just shy of al dente (it will cook a little more in the oven).

3. Melt the butter in a large pot over medium heat. Add the flour to the melted butter and whisk continually for 1 to 2 minutes to make a roux. Whisk 2 cups of the milk into the roux until smooth and then add the remaining milk. Raise the heat to medium-high and continue cooking and stirring until thickened, but not boiling.

4. Stir the Gouda, Cheddar, and 1/2 cup Parmesan cheese into the mixture until melted completely. Season with salt and pepper. Fold the pasta into the sauce to coat. Pour the mixture into a 9x13 "baking dish.

5. Stir 1/2 cup Parmesan cheese, the bread crumbs, and cayenne pepper together in a small bowl; sprinkle over the macaroni. Drizzle the olive oil over the bread crumbs.

6. Bake in the preheated oven until golden and bubbly, about 30 minutes. Allow to rest 10 minutes before cutting.

Serves 6

Photobucket

Thursday, December 27, 2012

Beef Kalbi Ribs

Photobucket

Since we're having these for dinner tonight, I figured I should finally post the recipe. One of my favorite Korean takeout dishes is kalbi beef ribs. They're marinated in soy sauce mixture, then fired on the grill. I've made them using an indoor grill pan with great results (albeit with a smokey house). This recipe from Allrecipes.com is super easy and pretty near the flavor I was aiming for. I would have liked a little heat, but my husband thought they were perfect. As you can see from the picture, they're a tad greasy but that just adds flavor to the rice :) In the grocery stores at home in Hawaii, the ribs are labeled "kalbi," but you might have to have them cut by the butcher as described below. Enjoy with brown rice and something green.

Beef Kalbi Ribs
3/4 cup soy sauce
3/4 cup brown sugar
3/4 cup water
1 garlic clove, minced
2 green onions, chopped
1 tablespoon Asian (toasted) sesame oil
2 pounds Korean-style short ribs (beef chuck flanken, cut 1/3 to 1/2 inch thick across bones)

Briskly whisk together all ingredients except ribs until sugar has dissolved.

Marinate ribs in the refrigerator for 3 hours to overnight.

Preheat an outdoor grill for medium-high heat, and lightly oil the grate. Before placing ribs on grill, shake off excess marinade and discard rest. Grill until cooked to your liking, about 3-5 minutes per side, preferably with a nice char.

Serves 4

Photobucket

Friday, December 21, 2012

Egg (Wheat) Sandwich Bread

As you know, I adore my Zojirushi Bread Machine. I have one like this. It's a bit pricey, but I highly recommend it and the brand in general. My rice cooker of the same brand has been with me since sometime in college, approximately 13-14 years. As you know, several weeks ago, I decided to check out a handful of bread machine cookbooks from the library. We enjoyed several recipes from the Better Homes and Gardens Bread Machine Cookbook such as cornmeal pizza dough and french bread baguettes but it was finally time to try another book. This recipe comes from Bread Machine Magic which has some yummy-sounding recipes, though no pictures. Each recipe offers variations for small, medium, and large loaves. This recipe is for a medium loaf, which I think is 2 lbs. Despite the fairly large amount of sugar, the bread isn't noticeably sweet and makes a soft and moist sandwich bread. Plus, it's awesome for grilled cheese.

Egg Sandwich Bread
Photobucket

3/4 c milk
2 eggs
1.5 tsp salt
3 TBS butter
1/4 c sugar
3 c bread flour (I use 1.5 c bread flour and 1/5 c white whole wheat)
2 tsp yeast

Combine ingredients in the order recommended by your bread machine. Set to regular or white bread setting, light crust.

After dough enters kneading cycle, check on it after 5-10 minutes. If it's dry, add more liquid, 1 TBS at a time.

Cool on a wire rack before slicing.

Photobucket

Thursday, December 20, 2012

Sourdough Dinner Rolls

I made these when I was on my sourdough kick earlier this year. I mistakenly thought that they would be like mini loaves of sourdough, but I did not brush them with water or anything that would allow them to crisp up so they had the texture of hamburger buns. Thus, when I'm in the mood for something different with my classic cookout food, I make these instead of my usual hamburger and hot dog buns. I've seen this recipe on a number of blogs, but likely found it at the Sourdough Diva.

(sorry, no pictures!)

1 cup sourdough starter
1 1/2 cups warm water
1 tablespoon yeast
1 tablespoon salt 2 tablespoons sugar
2 tablespoons olive oil
3-4 cups flour
2 TBS butter, melted

In the bowl of your stand mixer, combine all ingredients except flour and butter. Turn on the mixer and add flour 1/2 cup at a time, kneading until dough is smooth but not sticky.

In a greased bowl, cover and let rise in a warm place until doubled.

Punch down dough and form rolls. Let rise until doubled.

Bake in a 375 degree oven for 20 minutes. In the last 5 minutes, brush with melted butter and return to oven.

Last 5 minutes of baking, brush with melted butter and return to oven.

Wednesday, December 19, 2012

Chicken Enchiladas with Black Beans

Argh, another post that was drafted nearly a year ago but hung out in my draft folder due to a lack of pictures....

I love Mexican food, but we haven't found a good restaurant nearby just yet. Plus, we eat out quite enough as it is. This recipe is adapted from one I found on a blog I recently stumbled upon called The Happy Housewife. The only step I skipped was the frying of the corn tortillas prior to baking. It seemed like unnecessary work and calories, although the tortillas would probably have stood up better to all the sauce and cheese. Oh, and I omitted the cilantro because I find it too much. Still, a yummy recipe, which I will make again.

Chicken Enchiladas
1 medium onion, diced
3 cloves garlic, minced
1/2 cup chicken broth
1 cup Rotel tomatoes
2 1/2 cups chopped chicken (I used raw thighs)--shredded might better
2 cups shredded cheese (I used a mix)
16 oz can enchilada sauce
olive oil, salt, pepper
10 corn tortillas
1/2 cup oil (if desired)

Preheat oven to 350 degrees.

Saute onion in olive oil. If using raw chicken, when onions are beginning to soften, add chicken. Sprinkle with salt and pepper. Cook until chicken is nearly cooked through, adding garlic in last few minutes of cooking.

If using cooked chicken, add once onions have finished cooking. Stir in tomatoes and broth. Simmer on low for 15 minutes.

If desired, fry corn tortillas in 1" of oil. Toni recommends 20 seconds on one side and 15 on the other. Dry on paper towels.

In a baking pan (9 x 13"), spread a thin layer of enchilada sauce on bottom. Fill and roll your tortillas with a bit of meat, sprinkle of cheese, and a drizzle of enchilada sauce. Continue filling until all ingredients are spent.

Cover with remaining enchilada sauce and cheese. Bake, covered in foil, for 20 minutes. Remove foil and brown cheese (another 5-6 minutes).

Black Beans
2 cups black beans
1 medium onion, thinly diced
2 cloves garlic, minced
1/4 c chicken broth
1 tsp cumin
salt, pepper, olive oil

cheese for serving

Saute onion in olive oil until tender. In last minute, add garlic. Sprinkle with salt, pepper, and cumin. Add beans and chicken broth. Bring to a near boil, then simmer on low for 15 minutes.

Sprinkle with cheese for serving. (I used mozzarella.)

Serves 3-4.

Monday, December 17, 2012

Walnut Cherry Brownies

Ugh, another completely drafted post of a yummy treat just missing pictures...

For the 4th of July, I wanted to make a fun but simple dessert for a bbq. On a whim, I searched for a brownie recipe that included dried cherries. This one from Epicurious.com (originally published in Gourmet, June 2008) fit the bill perfectly. Other than lightening the recipe slightly by swapping egg whites for some of the eggs, I left the recipe in tact. They were a hit at the party, however I think I prefer to keep my dried fruit and chocolate separate as I felt the dried cherries were a bit out of place. One plus is that this recipe makes a full 9 x 12" pan as opposed to the typical 9 x 9" that most recipes tend to make.

Walnut Cherry Brownies
3/ c butter
6 ounces unsweetened chocolate
1 1/2 cups packed light brown sugar
1 teaspoon vanilla extract
4 large eggs
1 cup all-purpose flour
1/2 teaspoon salt
1 1/2 cups dried cherries
1 1/2 cups walnuts, chopped and toasted

Preheat oven to 350 degrees. Prepare 9 x 13" pan by spraying and flouring it.

Melt butter and chocolate together over low heat until smooth. Cool to lukewarm and whisk in sugar and vanilla. Add eggs one at a time.

In a separate bowl, whisk together dry ingredients (except for cherries and walnuts). Mix into chocolate mixture until combined.

Stir in dried fruit and walnuts.

Pour into prepared pan and bake for 25 - 30 minutes or until tooth pick in center comes out with crumbs.

Cool completely before slicing.

Makes approx 32 (2") squares.

Sunday, December 16, 2012

Roasted Red Pepper Hummus

Still cleaning out the drafts folder...

This hummus recipe was made to go with the homemade pita bread I posted a few days ago, which is also missing pictures. Unfortunately, I no longer remember where I found it. I do remember that I made this at least a couple of times, varying the amount of lemon juice, salt and pepper each time. My husband generally liked it but the sesame paste flavor was way too overwhelming for me so I gave for awhile. I think when I do try it again, I'll either try a different brand of sesame paste or omit it entirely.

Roasted Red Pepper Hummus
2 large garlic cloves, chopped
1 15-ounce can garbanzo beans (chick-peas), drained
1/3 cup tahini (sesame seed paste)
1/3 cup fresh lemon juice
1/2 cup chopped drained roasted red peppers from jar
salt and pepper to taste

With processor running, drop garlic through feed tube and mince. Scrape down sides of work bowl. Add chick-peas, tahini and lemon juice; process until mixture is smooth. Add roasted peppers; process until peppers are finely chopped. Season with salt and pepper. Transfer hummus to small bowl. (Can be made 1 day ahead. Cover and chill. Bring to room temperature before serving.)

Saturday, December 15, 2012

Chocolate Truffle Ice Cream

Still going through my drafts folder...How could I not share a chocolate ice cream recipe?!!!. This recipe comes from The Ultimate Ice Cream Book by Bruce Weinstein. If I remember correctly this one was a bit grainy due to improperly melted cheap chocolate but otherwise tasty. The finer the chocolate, usually the smoother your final product. I'll definitely have to try this again in the summer (or whenever my annual ice-cream making kick begins.)

Chocolate Truffle Ice Cream
1/2 c sugar
2 egg yolks
1 c milk
1/4 c cocoa powder
1.5 c heavy cream
6 oz bittersweet chocolate, chopped
1 tsp vanilla

In a mixing bowl, beat egg yolks and sugar until a pale yellow color is reached (this will take a few minutes).

Bring the milk (only) to a simmer in a medium saucepan. Whisk in cocoa and simmer 3 minutes.

Slowly beat hot milk/chocolate into egg/sugar mixture. Return the entire mixture to the stove over low heat. Cook stirring constantly until custard thickens slightly.

Remove from heat and pour into a clean bowl. (Strain, if desired (i.e. if you scrambled some eggs).

Bring the cream to a simmer and melt chopped chocolate. (I did this right on the stove, although the recipe assumed the hot milk would be hot enough to melt the chocolate.)

Combine the chocolate mixtures, then stir in the vanilla.

Cover and chill completely (overnight is safest bet) before making the ice cream according to your ice cream machine's directions.

Makes 1 quart

Friday, December 14, 2012

Homemade Beef Stock

I've been making my own chicken stock for some time now. But I've never made beef stock.

Why, you ask? Well, unlike chicken (or turkey) stock, which I use several times a week, I use beef stock so infrequently that a store-bought box lasts me ages. Plus, I knew that making it wasn't as simple as chucking everything in a pot. Then one day I had the urge for french onion soup. A pot of french onion soup requires anywhere from 4-8 cups of beef broth/stock at a minimum so I decided it was the excuse I needed to give beef stock a try.

Photobucket

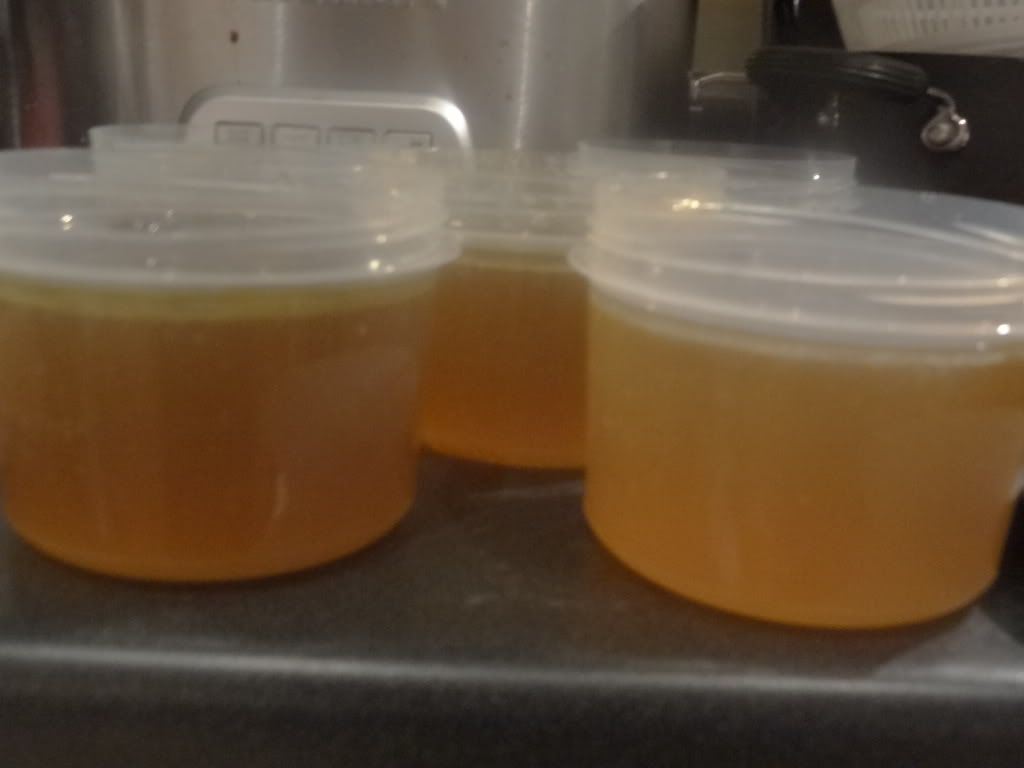
It was nearly as simple as chicken stock--just an extra step of roasting the bones to bring out their flavor. Plus, I found beef marrow bones, which I'd never heard of, for just a couple of dollars at the commissary. I also threw in a package of stew meat which was another few dollars. Thus, for a total cost of $5-6 I got 16 cups of gorgeous beef stock without out any fillers or excess sodium. After browsing the web for a how-to, I generally followed this recipe from Tasty Kitchen.

Homemade Beef Stock
2-4 pounds beef marrow bones (they're huge--ask the butcher if you can't find them)
1-2 lbs beef stew meat, or any cheap cut cut into cubes.
2 large carrots, cut into big pieces
1 large onion, cut into big pieces
olive oil
salt and pepper

3 stalks of celery, cut into big pieces
1 bay leaf
2 TBS parsley or 1/2 c fresh
1 TBS black peppercorns
4 cloves garlic, smashed
water

Heat oven to 400°F. In a dutch oven or roasting pan toss the bones, meat, carrots, and onion with olive oil. Sprinkle with salt and pepper. Roast for an hour, making sure that nothing burns by flipping halfway through the roasting process.

If using a dutch oven, after roasting the meat and veggies add the remaining ingredients and fill with water. Turn to medium high and gently scrape the bottom to deglaze. (Alternatively, you could remove the meat and veggies and deglaze the pot or pan using 1/2 white wine and 1 c water.).

Bring to a boil, then cover and reduce heat and simmer for as long as possible. Skim off any fat that may foam on the top. (You can also put everything in a crock pot for 8-10 hours).

Strain broth and skim fat before storing. I usually let the broth come to room temperature, then refrigerate overnight. The fat will solidify on top and be easily removed before use or freezing.

Photobucket

Thursday, December 13, 2012

Our Best Bites: Black Bean Soup

Still going through recipes in my draft folder which went unposted due to lack of pictures or time. Grrr...I was looking for this not too long ago when I made black bean soup for my husband. I wound up making this slower cooker version which my husband likes but I find rather bland. This recipe from the first Our Best Bites cookbook if I remember correctly was very tasty and had just enough heat for me.

Black Bean Soup (Our Best Bites cookbook)

3/4 c carrots, diced
3/4 c celery, diced
1 c onion, diced
4 cloves garlic
2-15 oz can black beans, rinsed and drained
1-3.5 oz c diced green chilies
2-15 oz c beef broth
1 tsp kosher salt
1/8 tsp pepper
1/2 tsp chili powder
1/4 tsp cumin
1/2 tsp oregano
1 bay leaf
1 lime, juiced

Saute carrots, celery, onion and garlic and saute for 4-5 minutes.

Add black beans, chilies, and broth. Stir to combine. Add spices. Simmer uncovered 20-25 min until carrots are tender

Puree soup. If the soup is too thick, thin with a little water or broth. Squeeze in lime juice.

Wednesday, December 12, 2012

Bread Machine Pita Bread

Wow, three posts in one day. Unimaginable!

As I related in my previous post, I'm determined to clean out my drafts folder. I tried this recipe for homemade pita bread back in February after being inspired by The Happy Housewife who regularly posted roasted red pepper hummus and pita bread on her lunch menus. This recipe comes from Good Cheap Eats. To my recollection it whipped up easily enough but the rounds did not poof as I expected them to so they were a bit hard to stuff. That being said, there weren't any left to take pictures of and we enjoyed them both with hummus and tuna fish salad. I might try making them on the grill.

Bread Machine Pita Bread
1 1/4 cups water
1 teaspoon honey
3 cups unbleached flour
1 cup whole wheat flour
1/2 teaspoon salt
2 1/4 teaspoons yeast

In the bread machine pan, place ingredients in the order recommended by the manufacturer. In my case, that means liquids first, then dry ingredients, and yeast in a little volcano in the middle. Select dough cycle. When dough cycle ends, remove dough to lightly floured surface.

Preheat oven to 450 °. Divide into 12 equal-sized pieces. Roll into balls. Roll each ball into a 5-inch circle and rest on floured kitchen towel. I left them about 1/4 inch thick. Continue process. until all 12 pieces are rolled.

Place rounds on lightly floured cookie sheet and bake for 2 minutes. Flip and bake another 1 1/2 to 2 minutes. Do not brown. Dough should puff during baking, but it didn't much for me.

Cleaning House For the New Year

As the new year approaches, one of my goals will be to get back in the swing of blogging on all my blogs. I've been fairly good about Project Little Blueberry but have neglected this blog quite a bit and all bit abandoned my crafts blog since the baby was born. In most cases, particularly in my kitchen, I have material but haven't made the time to write up the recipes or have gotten lazy about picture-taking. However, I'm coming to terms with the fact that not every recipe needs a picture. Heck, I bet a number of recipes on the blog would seem more appetizing if not accompanied by a poorly lit and staged picture given my photography talents. Thus, my goals between now and the end of the year are as follows:

Goals For the Last Days of 2012
1) Clean out the drafts folder and get posted whatever I can, picture or no picture. I've been working on this for a bit this morning and am almost through the 8-10 posts that have been hanging out in various stages of incompletion. Look for a bunch of those posts in the coming days.

2) Post all the recipes that I have pictures for that I made during the last three weeks. That includes a yummy one for Kalbi (Korean beef short ribs), beef stock, apple cinnamon pancakes, smoked gouda mac and cheese, turkey wild rice soup, cranberry-walnut caramels, and cheddar potato soup. I'm pretty sure I have pictures for nearly all of those.

3) Update the recipe index! This is a continuous struggle of mine, but I hope to get it done. I've also realized that some of my oldies but goodies recipes which were imported from the old Geocities blog never made it onto the index so I'll work to rectify that.

Wow, that's a lot more than I thought to do but here's hoping...

French Bread Baguettes

Sorry for the major lack of posts lately. Thanksgiving came and went and in a flash. I did a fair amount of cooking but mostly tried and true familiar recipes. We did try a couple new things which will definitely be going in the recipe box to make again. First, there's this french bread. It's from the Better Homes and Garden Bread Machine Cookbook, which I checked out from the library and sadly may be out of print. This is the third or fourth really nice recipe I've tried from this book, so I recommend picking it up if you see it at your local library or in a used book store. With only four ingredients and only a minimal amount of shaping, this bread recipe whips up fairly quickly. It's flaky and is great for sandwiches or snacking. We even used it in our stuffing in place of the usual store-bought loaf with great success. On to the recipe.

Photobucket

French Bread Baguettes

1 c water
3 c bread flour
3/4 tsp salt
1 tsp active dry yeast

Egg wash: 1 slightly beaten egg white + 1 TBS water cornmeal for dusting

Add first 4 ingredients to bread maker according to manufacture's directions. Select dough cycle.

When cycle is complete, punch dough down. Cover and let rest for 10 minutes.

Divide dough in half and roll into a 10 x 8" rectangle. Starting from long side, roll into a spiral. Pinch ends to taper.

Place loaves, seams down on a greased baking pan dusted with cornmeal (we made this 3-4 times and forgot this step every time). Brush with egg wash. Cover and let rise in a warm place for 35 to 45 minutes or until nearly double. Using a sharp knife make 3-4 diagonal slits about 1/4" deep across the top of each loaf.

Bake in a 375 degree oven for 22 minutes. Brush with remaining egg white mixture and bake for 12-15 minutes until loaves sound hollow when lightly tapped.

Cool on a wire rack.

Makes 2 three-fourth pound loaves.

Photobucket