Monday, September 24, 2012

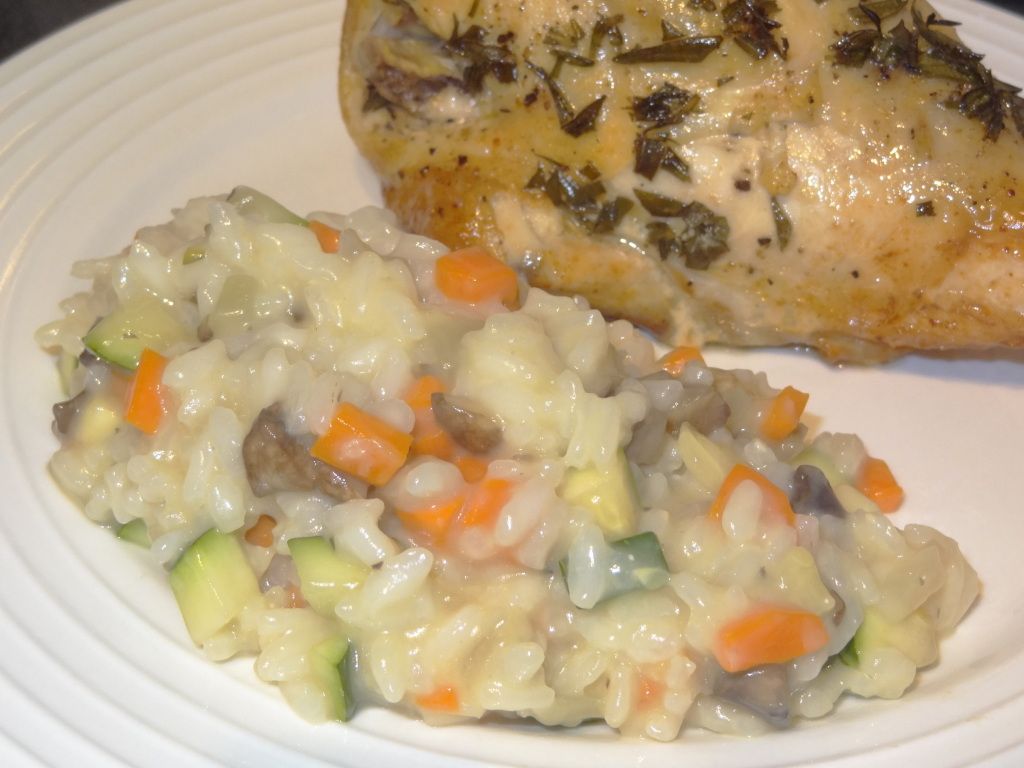
Risotto Primavera

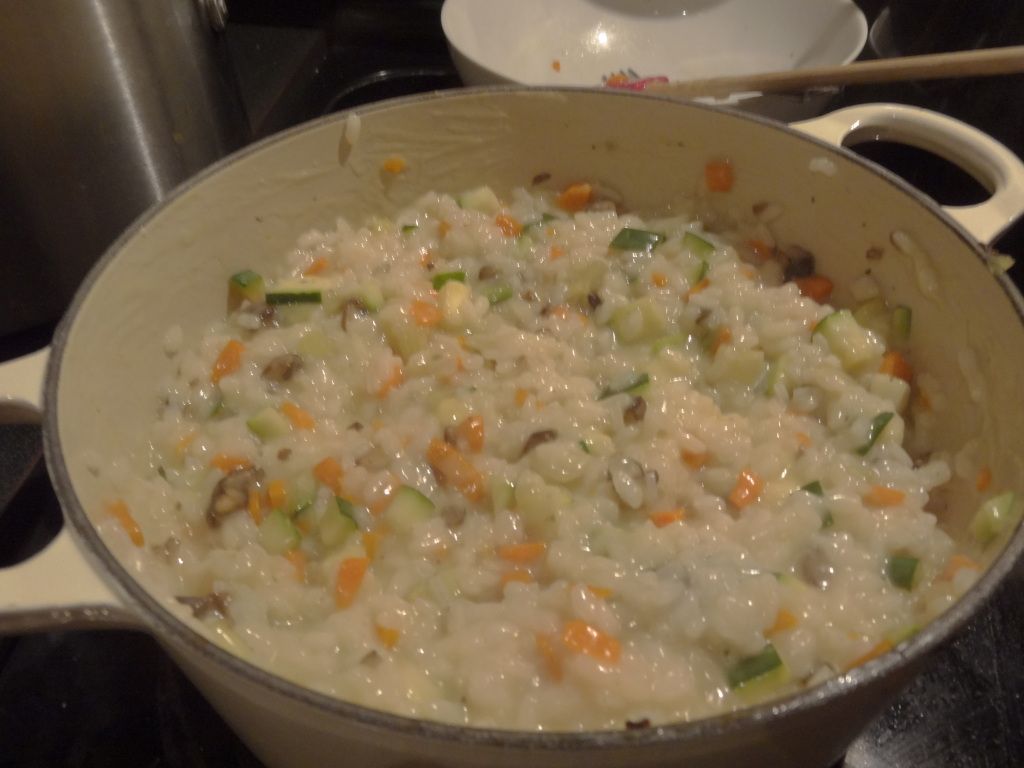
I finally made risotto by myself!!! It's one of my auntie's specialties and I've seen her make several varieties many times, but I've always been intimidated of making the dish on my own. It was about time that ended. While browsing my food blogs, I stumbled across this recipe from Ree at the Pioneer Woman. With a veggie drawer full of goodies, I decided to try it. For the most part, it was a roaring success and my husband and I both had several portions. It took exactly 5 cups of broth, although I will reduce the wine in the future as the flavor was too strong. (Ree's recipe calls for 1.5 cups of wine; I reduced that to 3/4 cup but that was still too much.) Also, I used all Parmesan cheese instead of half goat cheese.

Here's the recipe as I plan to make it next time. Yes, there will be a next time.

Photobucket

Ingredients
5 cups Low Sodium Chicken Broth
1/2 whole Large Yellow Onion Finely Diced
3 whole Carrots, Peeled And Finely Diced
1 Zucchini or Yellow Squash, Finely Diced
1 cup Mushrooms, Finely Diced
1-1/2 cup Arborio Rice
1/2 cup Dry White Wine
Butter, Olive Oil, Kosher salt
1 cup Grated Parmesan Cheese
Optional Vegetables To Substitute For Any Of The Above: Broccoli, Cauliflower, Red Bell Pepper, Zucchini, Asparagus Pieces

Directions
Pour chicken broth into a small saucepan. Heat to a simmer.

In a large Dutch oven, heat 2 tablespoons olive oil and 2 tablespoons butter. Add diced onions and diced carrots. Stir and cook for a minute or two. Add rest of veggies in order of decreasing tenderness. Sprinkle in salt and stir. Remove from pan and set aside.

Add 1 tablespoons olive oil and 1 tablespoon butter to the same pan. Heat over medium-low heat. Add rice and stir, cooking for 1 minute. Add half the wine and 1 1/2 teaspoons kosher salt. Stir and cook until liquid is absorbed. Over the next 30 to 45 minutes, add 1 cup of simmering broth at a time, stirring and cooking until each addition of broth has absorbed. Add other half of wine and cook until absorbed.

Taste to make sure rice is the right texture. It should not be mushy. Add another helping of broth if rice has too much bite to it. Check seasoning.

Once rice is cooked, remove from heat. Stir in cheese and vegetables until all cheese is combined.

Photobucket

Serves 4-6

Tuesday, September 18, 2012

Homemade Taco Seasoning (Taco Salad)

As you may have noticed, I make taco salad quite often. It's an incredibly simple, filling, and relatively nutritious dish, particularly if you ignore the salt element. Today, I'm going to share my recipe for taco seasoning, as well as my "method" for making a taco salad. Unfortunately, I don't have any pictures even though we just had this last evening. However, I'll do my to grab a snap next week. First a little bit on how this dish made its way into my regular menu.

At a Superbowl party in January (? - I have no idea when the Superbowl rolls around), the host served a make-your-own taco salad with melted cheese bubbling in the crock pot, a big bowl of seasoned ground beef, lettuce, tomatoes, salsa, sour cream, and chips. It was so simple, casual, and tasty! I had to try it at home.

Since a blog I regularly follow had been featuring ground beef recipes since last fall when Lynn's Kitchen Adventures, I turned to her blog for inspiration. I modified this recipe to my tastes. (Basically, I just use her seasoning and omit the tomato step which allows her recipe to more closely replicate a packaged variety.)

Here's my version. It works with both ground beef and ground turkey. Moreover, it freezes beautifully--as the ground meat doesn't clump together, you just remove however much you need.

Taco Seasoning
1 TBS chili powder
1 tsp cumin
1/2 tsp oregano
1/2 tsp salt
1 tsp garlic powder

To prepare seasoned ground meat, use 1.5 TBS taco seasoning and 1/2 tsp salt per pound of ground meat (beef or turkey). Sprinkle seasoning over raw meat, then break up into crumbles using a silicon or wooden spoon. Cook until completely browned. Drain, if necessary. Allow to cool completely before freezing.

Taco Salad
seasoned ground meat
lettuce
cheese (melted or shredded)
other veggies (diced bell peppers, tomatoes, avocados)
salsa
sour cream
tortilla chips

To prepare salad, heat meat and melt cheese, if necessary. Crumble chips and layer on bottom of a deep bowl. Sprinkle with (in this order works best for me) meat, cheese, lettuce, and other veggies. Top with a generous dollop of salsa and cream cheese.

Monday, September 17, 2012

Menu Plan for Week of September 17th

Another Monday rolls around. Can you believe that September's more than half over? Time flies! Last week's menu plan wasn't quite as successful as the week before, though everything we ate was on the menu plan except for steaks which we had with the wild rice I'd originally planned to go with the garlic balsamic chicken. We ate buttermilk oven-fried chicken, pasta with turkey meatballs, garlic balsamic chicken, hearty chicken noodle soup, and pizza. I also tried a new french bread recipe in my bread machine and made more ice cream and yogurt. Once again, we did not get to the stroganoff or hamburger helper so they are being carried over to this week's menu:

Monday - Taco Salad

Tuesday - Chicken Brown Rice Bake

Wednesday - Homemade Hamburger Helper with salad or other green veg.
For next day: Defrost chicken and marinate.

Thursday - Chicken Tikka Masala
For next day: make pizza dough; defrost wings

Friday - Homemade Pizza (using my trustworthy dough recipe) and wings.
For next day: Defrost chicken

Saturday - Chicken Florentine (pan-seared chicken breast served with sauteed spinach, pine nuts, parmesan)
For next day: Defrost stroganoff.

Sunday - Beef Stroganoff (freezer) with salad or other green veg.

Thursday, September 13, 2012

Bread Machine French Bread

Warning: This recipe still needs some tweaking, but it is so tasty that I'm posting it despite its flaws.

Photobucket

With the new baby and life in general, I've been more than a little behind on my blog reading. Let's just say that the Google Reader count of unread posts probably surpasses the GDP of many a developing nation and probably one or two industrialized ones. The other day, I stumbled across this recipe for French Bread at the Naptime Chef. It sounded super easy and we love French bread, so I pinned it immediately. (Check out my Pinterest boards.) I tried it Tuesday night and we had large slices with big bowls of my hearty chicken noodle soup. Soft and chewy with a nice crunch in the crust, it tasted fantastic fresh out of the machine and I'm still snacking on it nearly two days later.

On to the problem...

When I pinned the original recipe, I thought it a bit strange that the picture is oddly staged for a loaf of bread--neat little slices, sure, but they looked too trimmed. The Naptime Chef usually demonstrates a fair amount of photography expertise. Sure enough, there was an obvious reason that became apparent once the loaf began baking--it makes a HUGE loaf of bread! Way too big for my Zojirushi bread machine which accommodates a 2 pound loaf. The loaf rose all the way to the roof of my machine where it can't cook completely and makes a bit of a mess if you open the lid like I did during baking. Unfortunately, I'm not good with bread troubleshooting but according to my bread machine user manual, the problem could be too much flour, yeast, liquid or sugar. Helpful, right? My guess is that it's the yeast and the flour as most of my other recipes require only 1.5 tsp of yeast and 3 cups of flour. But, did I mention this bread is tasty? As such, I'm posting the recipe as written--for all i know, you might have a large enough bread machine or I measured incorrectly. (I'm thinking that next time I'll use the "dough" setting and then bake the bread in the oven, possibly in two loaves. If I'm successful, I'll be sure to post an update.)

Photobucket

Photobucket

Bread Machine French Bread
1 1/3 cup warm water
1 ½ tablespoons olive oil
4 cups bread flour
1 ½ teaspoons salt
2 tablespoons sugar
2 teaspoons yeast

Combine ingredients in the order listed or as required by your bread machine. Set machine to a french bread setting if you have one. I used "Basic" with a medium crust.

Tuesday, September 11, 2012

Automatic Yogurt Maker (Homemade Vanilla Yogurt)

Sometime in June on one of the many food blogs I follow, I stumbled across a recipe for homemade yogurt using a slowcooker. Fascinated, I searched for more recipes and found that people make their own yogurt in all sorts of ways, including a curious-sounding plastic cooler method. Though the ideas sounded neat and super economical as we eat yogurt daily, I shared SnoWhite's (Finding Joy in My Kitchen) apprehension about making yogurt using such methods and I set about to find a yogurt maker. At the Williams Sonoma outlet in Leesburg, Virginia, we found this automatic yogurt maker by Euro Cuisine for a great deal (under $40, I think).


It took a couple of tries to get a good product, but now I'm hooked! I just wish it made more than the seven six-ounce servings because its so yummy both my husband and I eat it during the week. Depending upon yogurt sales, it may not be a money-saver. However, being able to control the quality and content of the ingredients is a huge plus for me. Here's the vanilla yogurt recipe that we've been using for the last 5-6 batches:

Homemade Vanilla Yogurt
1 quart skim or 2% milk
6 tbs granulated sugar
1.5 TBS vanilla
6 oz commercial plain nonfat yogurt

Over medium, heat milk until it reaches 180 degrees. Remove commercial yogurt from fridge while you wait for the milk to boil.

Whisk sugar and vanilla into the milk and cook for 2 minutes.

Remove from heat and cool in a water bath until temperature reaches 110 degrees.

Stir in commercial yogurt and pour into glass jars. Place jars, uncovered, in your yogurt maker. Follow the directions for your yogurt maker for cooking time--mine is 9 hours for 2% milk and 10 hours for skim.

Cover and refrigerate for at least 3-4 hours before enjoying.

Yogurt lasts about 10 days.

Monday, September 10, 2012

Menu Plan for Week of September 10th

Last week's menu plan went fairly well. Of the seven dinners I'd planned, I prepared all five of the meals scheduled for Monday through Friday, though we had taco salad on Thursday and the turkey bolognese on Saturday. Sunday was leftovers which leaves two meals to carry over to this week.

I also made all three ice creams, although only the Coffee Chocolate Ice Cream from MyRecipes.Com was a hit out of the ice cream maker. The Chocolate Ice Cream from Tracey's Culinary Adventures is good but a bit grainy even though I was certain my chocolate melted completely. Finally, I will give the Brownie Batter Frozen Yogurt another shot as I think the fault lay with my using Yoplait yogurt rather than Dannon (or generic) as my base--Yoplait has a really strong taste which out-shined the chocolate.

Here's what's cooking this week. In addition to listing the meals I expect to prepare for dinner, I'm also noting what I need to do the evening before which will hopefully help me remember. Below you'll also find an assortment of desserts and other goodies which I hope to make to finish ingredients on hand or for the freezer.


Monday - Buttermilk Oven Fried Chicken with mashed potatoes and broccoli.
For next day: Defrost ground turkey.

Tuesday - Pasta with Turkey Meatballs and broccoli
For next day: Defrost shredded beef.

Wednesday - Beef Enchiladas (shredded meat in freezer), will try with flour tortillas instead of corn, and salad.
For next day: Defrost chicken breasts and marinate

Thursday - Garlic Balsamic Crusted Chicken with Wild Rice and Zucchini.
For next day: make pizza dough; defrost wings

Friday - Homemade Pizza (using my trustworthy dough recipe) and wings.
For next day: Defrost ground beef

Saturday - Homemade Hamburger Helper with salad or other green veg.
For next day: Defrost stroganoff

Sunday - Beef Stroganoff (freezer) with salad or other green veg.

Also Cooking:
Hearty Chicken Noodle Soup
Blueberry Corn Muffins
Vanilla Yogurt in my awesome yogurt maker (recipe to come)
Make more Coffee Chocolate Ice Cream and maybe try Dark & Delicious Chocolate Ice Cream

I hope everyone has a great week!

Monday, September 3, 2012

Menu Plan for Week of September 3rd

As you may know, my attempts at meal planning have met with sporadic success at best (see last fall). However, with a new baby and the departure of my wonderful auntie who prepared nearly all our meals for over a month, my days of shopping every other day and leisurely deciding what we'll have for dinner are things of the past. Thus, before she left I wrote my very first month-long meal plan. Sort of. Rather than plan the meals, e.g., Day 1 - roast chicken, Day 2 - lasagna, etc., I made a list of 31 meals to prepare taking into account what provisions I had on hand and in the freezer, recipes I wanted to try, and tried and true favorites. Then when preparing to shop for the week, which I have to do because perishables such as milk and produce must be restocked weekly, all I do is select a week's worth of meals from the list to make my menu. Here is what's on the agenda for this week:

Monday - Shredded Beef Chili (slow cooker) with cornbread muffins and salad.

Tuesday - Sweet and Sour Chicken with sauteed zucchini.

Wednesday - Beef Broccoli (slow cooker)

Thursday - Turkey Bolognese (sauce in freezer)

Friday - Homemade Pizza (using my trustworthy dough recipe)

Saturday - Buttermilk Oven Fried Chicken with mashed potatoes and broccoli

Sunday - Beef Enchiladas (shredded meat in freezer)

I also plan to try one or more of the following frozen goodies now that I finally have room to store my ice cream bowl as well as ice cream in the freezer:

Coffee Chocolate Ice Cream

Brownie Batter Frozen Yogurt

Chocolate Ice Cream