I had intended to make another dish with the head of cauliflower that I purchased a few days before (okay, maybe it was a week), but that wouldn't have used the entire thing and I was definitely worried about rotting food. Thus, since we have been on a soup kick I searched for recipes for cauliflower soup. I came across a recipe from Bakeaholic Mama for Cream of Cauliflower and Leek Soup. Just the title sounded really good, but I was out of leeks. Thus, I used an onion and for added flavor, I roasted the cauliflower--I love roasted cauliflower and frankly would have had more in the soup had I stopped nibbling. Using leeks will definitely make it more flavorful, as well as using more cauliflower (I'm writing 2 heads in the recipe but maybe 1 that's not half-nibbled would work), but this was quite tasty.
Sorry I forgot to take any pictures, but it was too good not to post.
Roasted Cauliflower Soup
1-2 large heads cauliflower
1 large leek or medium onion
2 cloves garlic, minced
4 c chicken broth
1/2 c half and half
sprig of fresh thyme (or 1 tsp dried)
salt, pepper, olive oil
Preheat oven to 425 degrees. Chop cauliflower into even pieces. Toss lightly in olive oil and sprinkle with salt and pepper. Roast for 20-25 minutes until cauliflower is tender and lightly browned. (I'd do a taste test here.)
In a medium dutch oven or pot, saute onion or leek in olive oil until tender. Add garlic and cook for another minute or two.
Add roasted cauliflower, thyme, and chicken broth and simmer for about 20 minutes.
Remove thyme sprig. Puree mixture using blender or stick blender until you have a nice smooth consistency. Add half and half and cook over medium low for another 10 minutes. Adjust seasonings.
Serves 4

Saturday, November 26, 2011
Friday, November 25, 2011
Roasted Carrot and Potato Soup
Happy day after Thanksgiving! If you're like me, you probably have big plans for Black Friday shopping. Actually, our plan is to make it to Walmart for the 10pm Thursday sales then go to bed and get up for the 6am sales. Here's a recipe that would be perfect for those leftover roasted vegetables from Thanksgiving. Roasting vegetables makes them sweet and tender without drying them out. I made this last week after having about 1/2 a pound of roasted carrots leftover from a previous meal and just didn't feel like serving them as-is. Super simple, super yummy. (My husband said he thought was was eating potato soup, which annoyed me greatly because it's orange! That being said, you might want to err on the side of more carrots than less.)
Tomorrow I have a recipe for roasted cauliflower soup planned. Are you seeing a trend here?

1/2 - 1 lb carrots (I used about half a small bag of baby carrots), cut into sticks
3 large potatoes (or 4-5 smaller ones), cubed
2 c chicken broth
2 c water
1/2 c half and half
1 tsp thyme or a couple fresh sprigs
salt, pepper, olive oil
Toss carrots in olive oil, salt, pepper, and thyme. Roast in a 425 degree oven for about 20-25 minutes until tender and a little browned.
Place potatoes, chicken broth, and water into a medium soup pot. Bring to a boil, then simmer until potatoes are tender, about 20 minutes.
Add roasted carrots and simmer for 10 minutes.
Using an immersion blender, puree soup. Add half and half and simmer for 15 minutes. Adjust seasoning to taste.

Serves 4-6
Wednesday, November 23, 2011
Weekly Menu (Week 5)
I never managed to post the Week 4 menu, did I? Basically we finished the menu from the week before except for the eggplant bolognese. We had (eggplant parmesan and creamed spinach with chicken teriyaki. Then we wound up eating out two evenings--once in Fairfax and then for the Marine Birthday celebration. Finally, I had a craving for pizza on Friday.
This week's menu started on Saturday. I'm already a day behind as we had leftovers on Monday because I'm trying to make fridge and freezer space for Thanksgiving leftovers. Oh well. Here's the plan. My goal is to make it through item 7 tomorrow and then freeze the pesto sauce. I already posted my Thanksgiving menu, which you can see here.
I don't remember if I have a post scheduled for Thanksgiving and don't know whether I'll have a chance to write one. Thus, best wishes for a wonderful Thanksgiving filled with quality time with family (and then lots of good Black Friday shopping afterwards).
1. Quick and Easy Beef and Rice (Lynn's Kitchen Adventures)


3. Baked Lemon Chicken


This week's menu started on Saturday. I'm already a day behind as we had leftovers on Monday because I'm trying to make fridge and freezer space for Thanksgiving leftovers. Oh well. Here's the plan. My goal is to make it through item 7 tomorrow and then freeze the pesto sauce. I already posted my Thanksgiving menu, which you can see here.
I don't remember if I have a post scheduled for Thanksgiving and don't know whether I'll have a chance to write one. Thus, best wishes for a wonderful Thanksgiving filled with quality time with family (and then lots of good Black Friday shopping afterwards).
1. Quick and Easy Beef and Rice (Lynn's Kitchen Adventures)
Source: lynnskitchenadventures.com via thefishie on Pinterest
2. Eggplant Bolognese
Source: myrecipes.com via thefishie on Pinterest
3. Baked Lemon Chicken
Source: barefootcontessa.com via thefishie on Pinterest
4. Beef Broccoli
Source: thefishieskitchen.blogspot.com via thefishie on Pinterest
5. Black Bean Soup (Our Best Bites cookbook)
6. Chicken stock (I need lots for Thanksgiving)
7. Pesto Pasta with Roasted Tomatoes (Our Best Bites cookbook)
Monday, November 21, 2011
Thanksgiving Menu 2011
Happy Monday before Thanksgiving! If you're like me, you might be still working on your Thanksgiving shopping today (and tomorrow). This Thanksgiving will be somewhat more modest than years past as it should just be a few of us this year. That's the plan anyway. My husband has threatened to show up with 10 people at the last minute, but we'll see. In light of the smaller guest list and with Black Friday shopping starting at 10pm on Thursday, I'm opting for a simple menu. Mind you that this might change once I hit the stores, particularly if other veggies look good or if I get inspired. Here's what I'm planning (most of the pictures are from last year):
1. Herb-Butter Roasted Turkey


1. Herb-Butter Roasted Turkey
Source: thefishieskitchen.blogspot.com via thefishie on Pinterest
Source: thefishieskitchen.blogspot.com via thefishie on Pinterest
3. Caramelized Onion Balsamic Gravy - An absolute must!
Source: thefishieskitchen.blogspot.com via thefishie on Pinterest
4. Roasted Butternut Squash with Thyme
Source: thefishieskitchen.blogspot.com via thefishie on Pinterest
5. Roasted Green Beans with Mushrooms (or possibly Roasted Asparagus with Balsamic Browned Butter)

6. Apple Cider Cranberry Sauce
Source: myrecipes.com via thefishie on Pinterest
7. Apple Pie or Apple Pie Pockets
Source: thefishieskitchen.blogspot.com via thefishie on Pinterest
8. Pumpkin Pie

What's on your menu?
Sunday, November 20, 2011
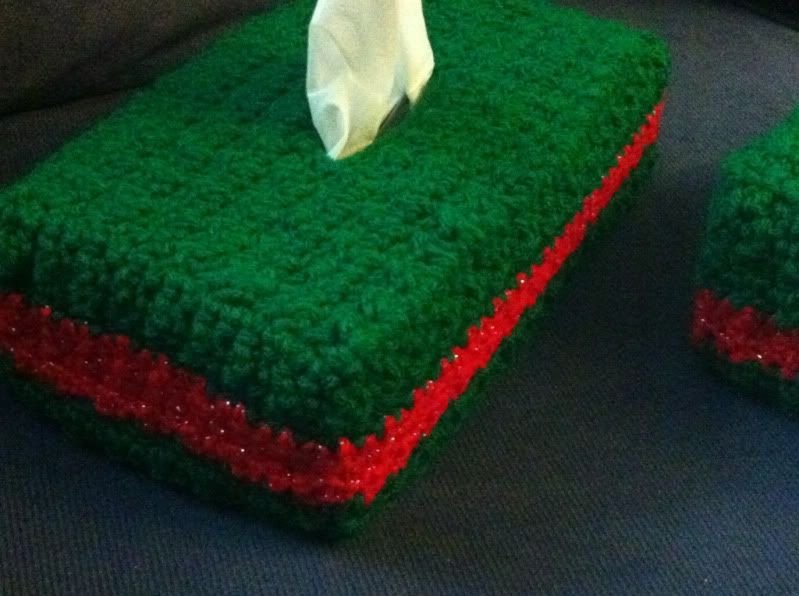
Holiday Tissue Boxes
I should be sleeping, but I wanted to share what I whipped up this evening. No, I haven't started decorating for Christmas, but these guys will go out right away as my tissue boxes looked naked. I modified a pattern in the February 2010 Crochet World magazine to add a holiday stripe. Here they are:


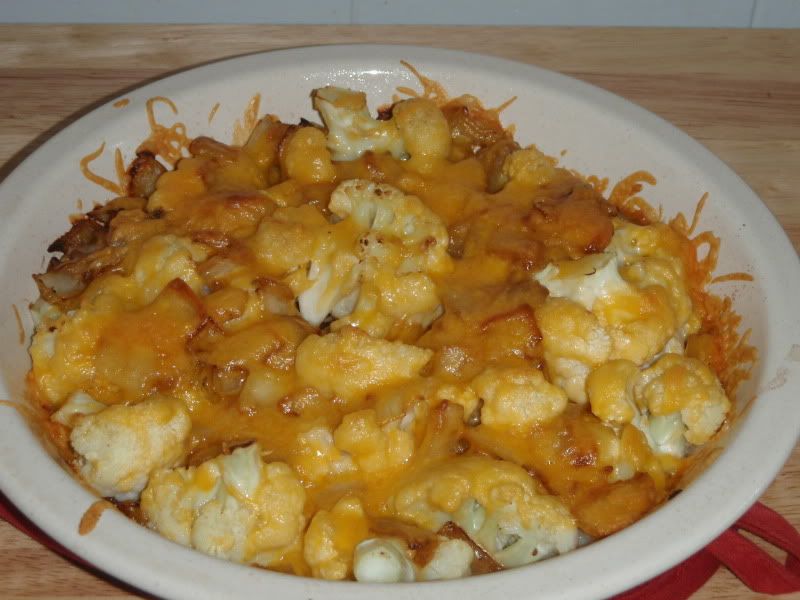
Roasted Cheesey Cauliflower
I made this last summer, but somehow forgot to post it. However, as you may be thinking about thanksgiving side dishes, now seems appropriate.
I discovered not too long ago that I love roasted cauliflower. We'd have it each week if I had my way. However, my husband expressed mixed feelings about it when I mentioned it so I knew I had to hide it in something. This was my first success. This recipe came from Lynn's Kitchen Adventures. I made a few minor changes including pre-steaming the cauliflower for extra tenderness and adding a bit more cheese. You could also roast the cauliflower for extra sweetness.
1 onion, chopped
1 clove garlic, minced
2 tablespoons butter
2 tablespoons oil
1 large head of cauliflower or 16 oz frozen
1/2 teaspoon salt
1/8 teaspoon pepper
1 cup cheddar cheese, shredded
Preheat oven to 400 degrees.
In a large skillet saute onion in oil until tender. Add butter and garlic and cook for one more minute.
Add cauliflower, salt, and pepper.
Pour into an oven proof dish and sprinkle with cheese. Bake for 15-20 minutes or until tender and slightly browned.
Serves 4
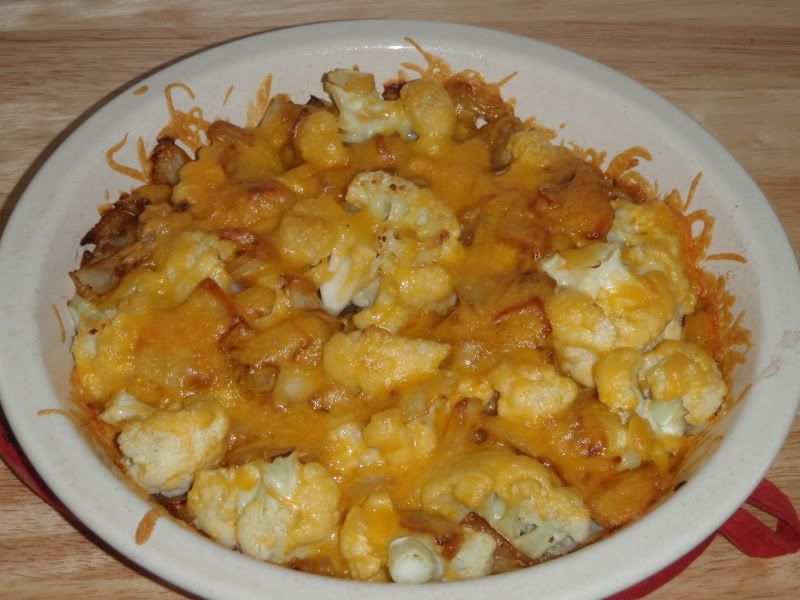
I discovered not too long ago that I love roasted cauliflower. We'd have it each week if I had my way. However, my husband expressed mixed feelings about it when I mentioned it so I knew I had to hide it in something. This was my first success. This recipe came from Lynn's Kitchen Adventures. I made a few minor changes including pre-steaming the cauliflower for extra tenderness and adding a bit more cheese. You could also roast the cauliflower for extra sweetness.

1 onion, chopped
1 clove garlic, minced
2 tablespoons butter
2 tablespoons oil
1 large head of cauliflower or 16 oz frozen
1/2 teaspoon salt
1/8 teaspoon pepper
1 cup cheddar cheese, shredded
Preheat oven to 400 degrees.
In a large skillet saute onion in oil until tender. Add butter and garlic and cook for one more minute.
Add cauliflower, salt, and pepper.
Pour into an oven proof dish and sprinkle with cheese. Bake for 15-20 minutes or until tender and slightly browned.
Serves 4

Saturday, November 19, 2011
Homemade Instant Oatmeal Packets
Another success! I'm on a premade mixes kick. I started with premade baking mixes for things like muffins, scones, and pancakes which I stored in my freezer. This week I tried homemade oatmeal packets. Inspired by a plethora of posts around the web such as this one from Homemade Iowa Life and this one from Noel's Kitchen Tips, I made four packets to start using this recipe. Many recipes call for dry milk powder with the intent that water can be added. However, since I always make oatmeal with milk, I omitted that step.
Updated: My husband reported positive results without the powdered milk. I haven't tried it yet, but trust his judgment and for next week will make another batch again without the powdered milk.
Homemade Instant Oatmeal
1/3 c quick oats
Pinch of salt (~1/8 ts)
2 tsp brown sugar
1/4 tsp cinnamon
1-2 tbs dried fruit such as raisins (optional)
(If mixing with water, instead of milk, add 1 tsp powdered nonfat milk)
In a microwave safe dish, mix with 2/3 c milk. Cook the normal amount of time to make instant oatmeal in your microwave. (~ 1 min in an 1100 watt and 2-3 min in a 900 watt or less).
Friday, November 18, 2011
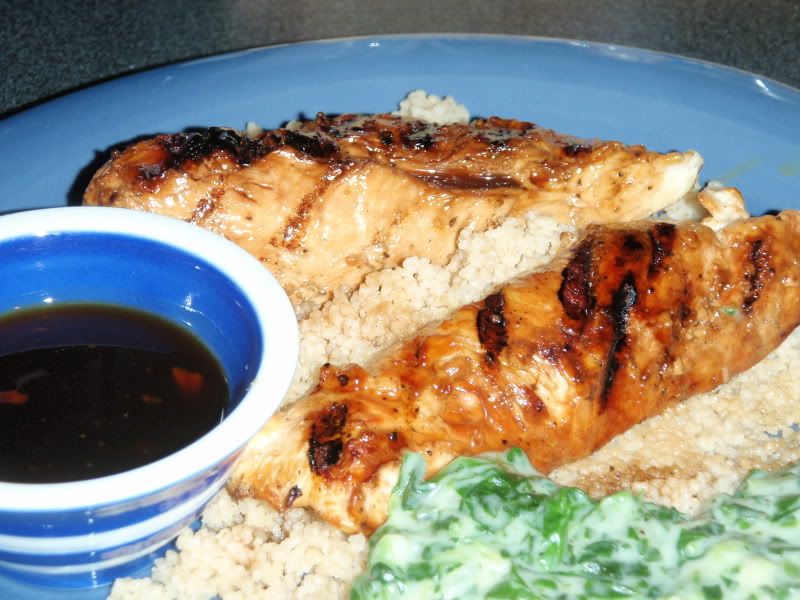
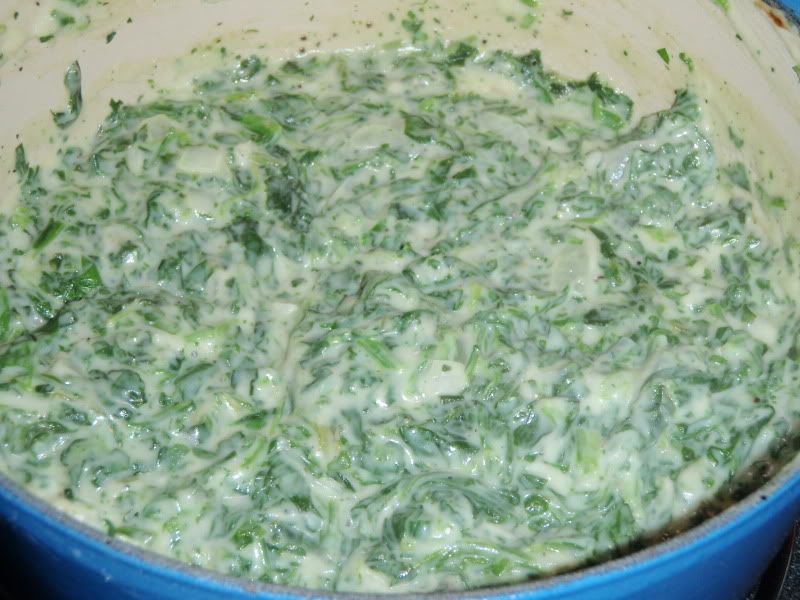
Creamed Spinach and Teriyaki Chicken
Happy Friday! Today is a two-for-one recipe. From last week's menu, one of the few dishes I had yet to try was the creamed spinach recipe from One Perfect Bite. But you can't have creamed spinach by itself, now can you? Having already grilled the flank steak with roasted parmesan potatoes the night before, I opted for simple grilled chicken breasts with couscous. As I was waiting for the chicken to defrost, I started thumbing through the Our Best Bites cookbook, which is quite a nice basic cookbook. In it was a very simple recipe for teriyaki sauce. Ta-da, dinner!
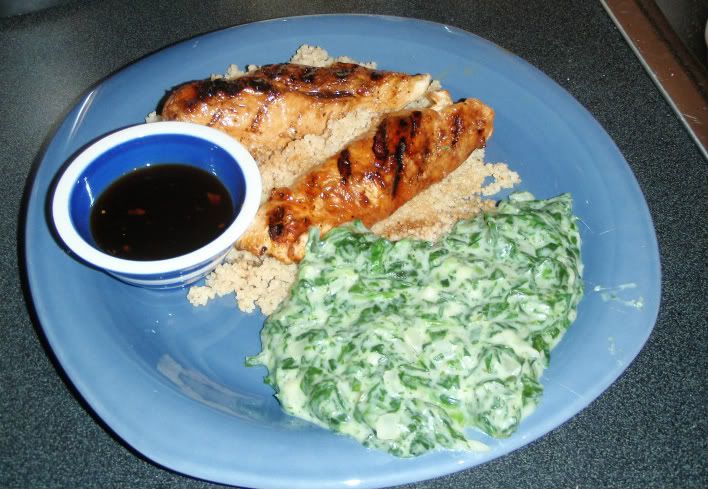
Both recipes whipped up very simply with minimal prep-work. I made the creamed spinach exactly except I used frozen spinach and added a handful of parmesan cheese. Quite yummy. As for the teriyaki sauce, I was missing the powdered ginger so I added a pinch of crushed red pepper. The end result was tasty, but a trifle sweet, so when I make it again, I will cut the amount of sugar by a third to a half.
Easy Teriyaki Sauce (from Our Best Bites)
1/4 c sugar
1/2 c soy sauce
1/4 c cider vinegar
2 cloves garlic, minced
1/2 tsp ground ginger
1/4 tsp crushed red pepper
1/4 tsp black pepper
1 tbs cornstarch
1 tbs cold water
Bring sugar, soy sauce, vinegar, and spices in a saucepan over medium high heat to a boil until sugar is completely dissolved.
Meanwhile, combine cornstarch and cold water with a whisk. Stir into sauce once you've got a full boil. Lower heat and cook until thickened.
Use as a marinade, brush sauce for grilling, or dipping sauce.
Creamed Spinach (from One Perfect Bite)

1/2 c butter
8 tablespoons flour
1/2 of a medium medium onion, finely diced
3 cloves garlic, finely minced
2 cups milk
Salt and pepper, to taste
1 pinch ground nutmeg
24 ounces baby spinach
1/2 c parmesan, shredded
Melt 1 stick of butter in a pot. Sprinkle in flour and whisk together. Cook over medium heat for five minutes or until light golden brown. Add onion and garlic and stir together, cooking for another minute. (Note: The next time I try this recipe, I may saute the onion and garlic first.) Pour in milk, whisking constantly, and cook for another five minutes until a thick sauce has formed.
Stir in spinach and nutmeg. (If spinach is raw, cook in 3 tbs of butter until wilted. If frozen, cook in microwave with a few tbs of water, then drain thoroughly before adding). Melt in cheese.
Season with salt and pepper.
Serves 4-6

Both recipes whipped up very simply with minimal prep-work. I made the creamed spinach exactly except I used frozen spinach and added a handful of parmesan cheese. Quite yummy. As for the teriyaki sauce, I was missing the powdered ginger so I added a pinch of crushed red pepper. The end result was tasty, but a trifle sweet, so when I make it again, I will cut the amount of sugar by a third to a half.

Easy Teriyaki Sauce (from Our Best Bites)
1/4 c sugar
1/2 c soy sauce
1/4 c cider vinegar
2 cloves garlic, minced
1/2 tsp ground ginger
1/4 tsp crushed red pepper
1/4 tsp black pepper
1 tbs cornstarch
1 tbs cold water
Bring sugar, soy sauce, vinegar, and spices in a saucepan over medium high heat to a boil until sugar is completely dissolved.
Meanwhile, combine cornstarch and cold water with a whisk. Stir into sauce once you've got a full boil. Lower heat and cook until thickened.
Use as a marinade, brush sauce for grilling, or dipping sauce.
Creamed Spinach (from One Perfect Bite)

1/2 c butter
8 tablespoons flour
1/2 of a medium medium onion, finely diced
3 cloves garlic, finely minced
2 cups milk
Salt and pepper, to taste
1 pinch ground nutmeg
24 ounces baby spinach
1/2 c parmesan, shredded
Melt 1 stick of butter in a pot. Sprinkle in flour and whisk together. Cook over medium heat for five minutes or until light golden brown. Add onion and garlic and stir together, cooking for another minute. (Note: The next time I try this recipe, I may saute the onion and garlic first.) Pour in milk, whisking constantly, and cook for another five minutes until a thick sauce has formed.
Stir in spinach and nutmeg. (If spinach is raw, cook in 3 tbs of butter until wilted. If frozen, cook in microwave with a few tbs of water, then drain thoroughly before adding). Melt in cheese.
Season with salt and pepper.

Serves 4-6
Thursday, November 17, 2011
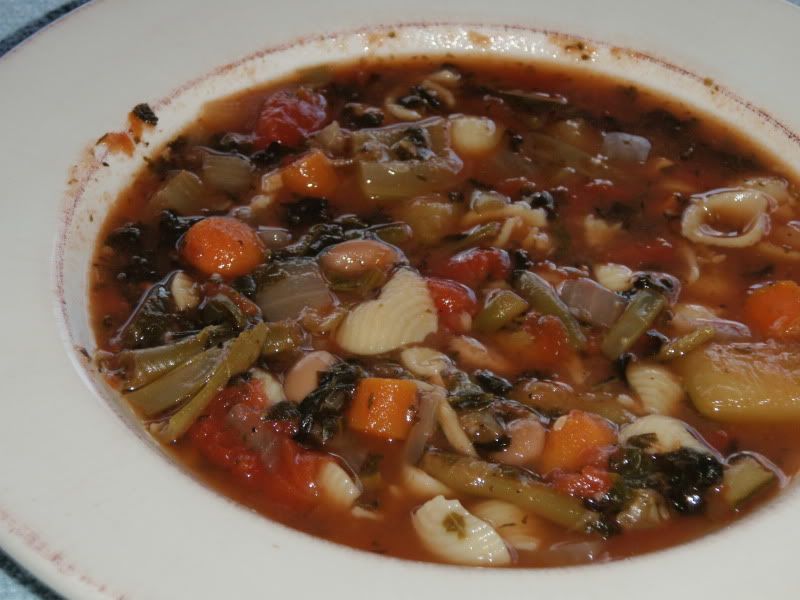
Slowcooker Garden Minestrone
Well, it's Thursday and thunderstorms are on the way. Thus, this awesome soup recipe which I found at Finding Joy in My Kitchen fits the bill. This soup whips up with minimal chopping and makes soup for a couple meals plus more for the freezer (I'd guess about 8-10 cups). I made a few minor changes such as using chicken broth instead of veggie broth and using more carrots and tomatoes. Plus, I had some nice tomato paste so only used a couple tablespoons rather than the entire can (which you must do if you used the cheap stuff). Definitely a tasty dish.
Slowcooker Garden Minestrone
1 medium onion, diced
1 medium zucchini, diced
1 C frozen green beans
1 stalk celery, diced
4 garlic cloves, minced
3 C chicken broth
1 can Great White Northern Beans, rinsed and drained
28 oz can diced tomatoes, undrained
2-3 tbs good quality tomato paste
1/2 c carrots, chopped
1/2 tsp. parsley
1 1/4 tsp. oregano
1/2 tsp. salt
1/2 tsp. pepper
1/2 tsp. basil
1/4 tsp. thyme
1 c water
1/4 C red wine
8 oz frozen spinach
1/2 C small shell pasta
In 5-6 qt slowcooker (5 qt will be completely filled) add all ingredients except spinach and pasta. Cook on low for 7-8 hours until veggies are tender.
Turn slowcooker to high and stir in pasta and spinach. Cook for 30 minutes or until pasta is tender.
Serve with crusty bread. 8-10 cups.

Wednesday, November 16, 2011
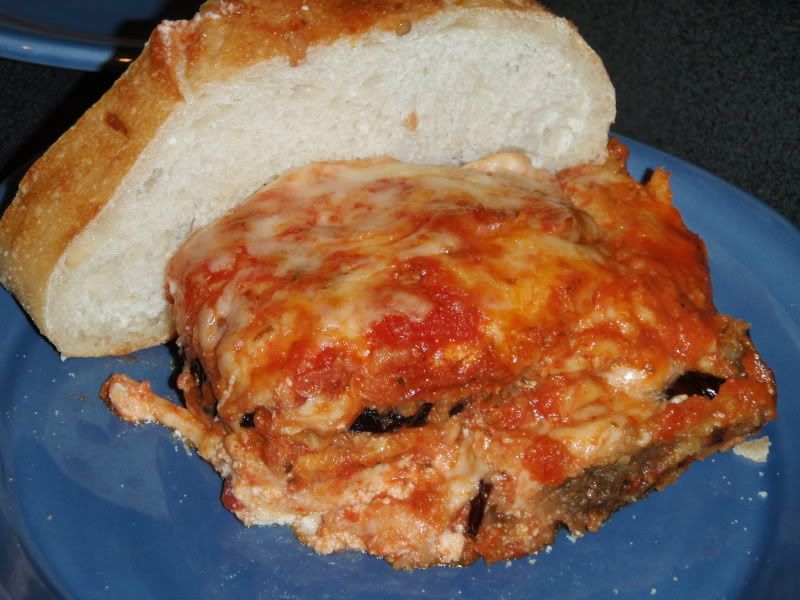
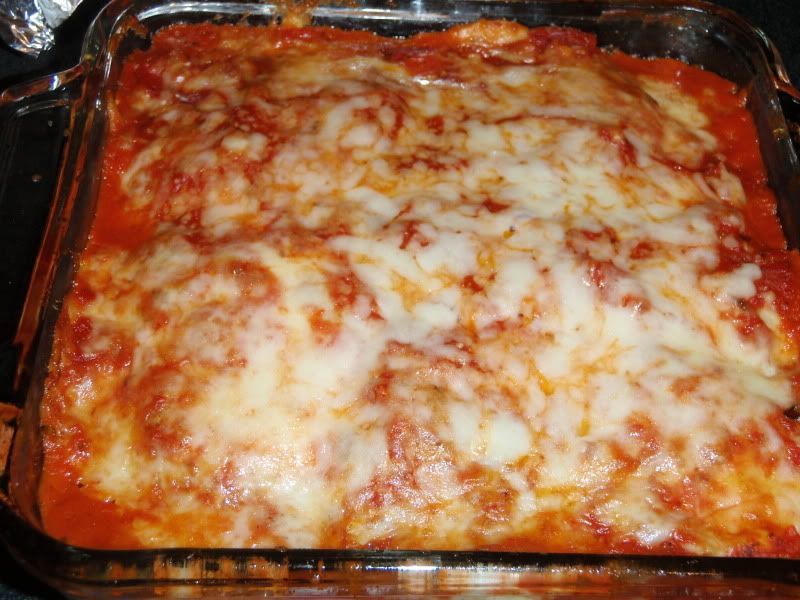
Eggplant Parmesan (and a rant on Wegmans)
We've been eating a whole lot of cheese lately, from pre-schredded to the gourmet. Since they're quick and easy, quesadillas have been a go-to snack of mine for much of this year. Affordable prices at the commissary has made those bagged, pre-shredded cheeses irresistible.
As for the fancier cheeses, on Saturday, I explored our local Wegmans and after much effort, purchased a selection of interesting snacking cheeses of which I don't remember the names but believe two were French (a double-creme brie and something else) and the third a Machengo, domestic, I think. I also bought the usual Fontina, Mozzarella, and Parmesan-Reggiano for this dish. This was my first visit to a Wegmans since I'd lived in Baltimore several years ago. This location, and possibly all Wegmans these days, is a peculiar mix of a Whole Foods and a Safeway on steroids. Like a Whole Foods, the produce section was excellent with a good mix of organic and non-organic at quite decent prices. The cheese and meat counters were on a smaller scale than most Whole Foods, but still quite nice. There were bulk grains, teas, and spices. Then came the Safeway-esque part--cosmetics, tolietries, bulk paper goods, and random household goods littered the store. Also, most frustratingly, everything seemed to be in multiple places--e.g. eggs, cheeses, grains. I could understand separating the the organics from the ordinary, but this was just random. Suffice it to say that despite my relatively short shopping list, I was forced to go up and down many aisles. Though I found many nice things, I'm not sure I will be making the effort again too soon.
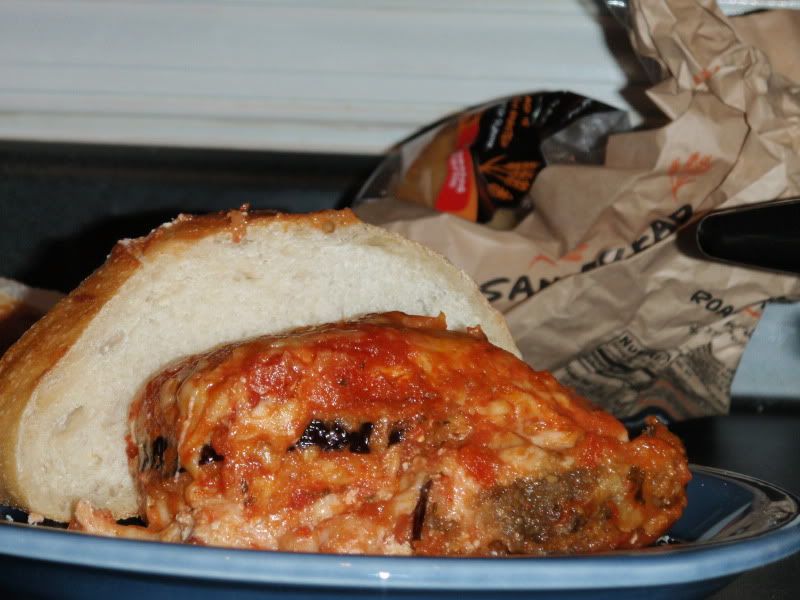
On to today's recipe which is adapted this recipe at MyRecipes.com. After purchasing a couple of eggplants on an impulse buy as they were flagged as the "Manager's Special", I included two eggplant dishes on last week's menu. If you're wondering why there hasn't been a Week 4 menu yet, that's because we're still working on last week's. Anyway, this dish was fantastic! I'm not sure how much of it was this recipe or the Classico Roasted Garlic pasta sauce I used, but I couldn't get enough of this dish.
Eggplant Parmesan
For the Eggplant:
2 large eggs, lightly beaten with 1 tablespoon water
1 c panko breadcrumbs, whole wheat if available
1/4 cup (1 ounce) grated fresh Parmigiano-Reggiano cheese
1-2 large eggplant(s) (about 1 lb), sliced into 1/2-inch-thick
Filling:
1/2 cup fresh basil or 1/2 tsp dried
1/4 cup (1 ounce) grated fresh Parmigiano-Reggiano cheese
1/2 teaspoon crushed red pepper
1 large clove garlic, minced
8 oz ricotta cheese
1 large egg, lightly beaten
2 cups favorite pasta sauce
1/4 teaspoon salt
8 ounces thinly sliced mozzarella cheese
3/4 cup (3 ounces) grated fontina cheese
1. Preheat oven to 375°.
2. Combine 2 eggs and 1 tablespoon water in a shallow dish. Combine panko and 1/4 cup Parmigiano-Reggiano in a second shallow dish. Dip eggplant in egg mixture; dredge in panko mixture, pressing gently to adhere and shaking off excess. Place eggplant 1 inch apart on baking sheets coated with cooking spray. Bake at 375° for 15 minutes or until golden, turn and bake for another 15 minutes.
3. To make filling, combine basil and next ingredients (through egg).
4. To assemble, spoon 1/2 cup pasta sauce in bottom of a square glass baking dish (9") coated with cooking spray. Layer half of eggplant slices over pasta sauce. Sprinkle eggplant with 1/8 teaspoon salt. Top with about 1/2 cup pasta sauce; spread half of ricotta mixture over sauce, and top with a third of mozzarella and 1/4 cup fontina. Repeat layers once, ending with about 1 cup pasta sauce.
5. Cover tightly with aluminum foil coated with cooking spray. Bake at 375° for 35 minutes. Remove foil; top with remaining fontina. Bake at 375° for 10 minutes or until sauce is bubbly and cheese melts; cool 10 minutes.
Serves 4
As for the fancier cheeses, on Saturday, I explored our local Wegmans and after much effort, purchased a selection of interesting snacking cheeses of which I don't remember the names but believe two were French (a double-creme brie and something else) and the third a Machengo, domestic, I think. I also bought the usual Fontina, Mozzarella, and Parmesan-Reggiano for this dish. This was my first visit to a Wegmans since I'd lived in Baltimore several years ago. This location, and possibly all Wegmans these days, is a peculiar mix of a Whole Foods and a Safeway on steroids. Like a Whole Foods, the produce section was excellent with a good mix of organic and non-organic at quite decent prices. The cheese and meat counters were on a smaller scale than most Whole Foods, but still quite nice. There were bulk grains, teas, and spices. Then came the Safeway-esque part--cosmetics, tolietries, bulk paper goods, and random household goods littered the store. Also, most frustratingly, everything seemed to be in multiple places--e.g. eggs, cheeses, grains. I could understand separating the the organics from the ordinary, but this was just random. Suffice it to say that despite my relatively short shopping list, I was forced to go up and down many aisles. Though I found many nice things, I'm not sure I will be making the effort again too soon.
On to today's recipe which is adapted this recipe at MyRecipes.com. After purchasing a couple of eggplants on an impulse buy as they were flagged as the "Manager's Special", I included two eggplant dishes on last week's menu. If you're wondering why there hasn't been a Week 4 menu yet, that's because we're still working on last week's. Anyway, this dish was fantastic! I'm not sure how much of it was this recipe or the Classico Roasted Garlic pasta sauce I used, but I couldn't get enough of this dish.
Eggplant Parmesan

For the Eggplant:
2 large eggs, lightly beaten with 1 tablespoon water
1 c panko breadcrumbs, whole wheat if available
1/4 cup (1 ounce) grated fresh Parmigiano-Reggiano cheese
1-2 large eggplant(s) (about 1 lb), sliced into 1/2-inch-thick
Filling:
1/2 cup fresh basil or 1/2 tsp dried
1/4 cup (1 ounce) grated fresh Parmigiano-Reggiano cheese
1/2 teaspoon crushed red pepper
1 large clove garlic, minced
8 oz ricotta cheese
1 large egg, lightly beaten
2 cups favorite pasta sauce
1/4 teaspoon salt
8 ounces thinly sliced mozzarella cheese
3/4 cup (3 ounces) grated fontina cheese
1. Preheat oven to 375°.
2. Combine 2 eggs and 1 tablespoon water in a shallow dish. Combine panko and 1/4 cup Parmigiano-Reggiano in a second shallow dish. Dip eggplant in egg mixture; dredge in panko mixture, pressing gently to adhere and shaking off excess. Place eggplant 1 inch apart on baking sheets coated with cooking spray. Bake at 375° for 15 minutes or until golden, turn and bake for another 15 minutes.
3. To make filling, combine basil and next ingredients (through egg).
4. To assemble, spoon 1/2 cup pasta sauce in bottom of a square glass baking dish (9") coated with cooking spray. Layer half of eggplant slices over pasta sauce. Sprinkle eggplant with 1/8 teaspoon salt. Top with about 1/2 cup pasta sauce; spread half of ricotta mixture over sauce, and top with a third of mozzarella and 1/4 cup fontina. Repeat layers once, ending with about 1 cup pasta sauce.
5. Cover tightly with aluminum foil coated with cooking spray. Bake at 375° for 35 minutes. Remove foil; top with remaining fontina. Bake at 375° for 10 minutes or until sauce is bubbly and cheese melts; cool 10 minutes.


Serves 4
Tuesday, November 15, 2011
Panetone (or really fancy raisin bread)

I wanted to make raisin bread, however I was intrigued by this recipe for Panettone in my Bread Machine Bible. The only familiarity I had with panettone was the packaged variety from Williams Sonoma which was $40+ for what seems like a glorified fruitcake with the peculiar ingredient of chestnuts. A little bit of research yielded that panettone is a traditional Italian Christmas bread, generally made with raisins (or sultanas), citrus peel, butter and eggs.
This recipe was simple enough with my trusty breadmaker, although it is a two-step bread--dough in the breadmaker and bakes in the oven. Not having any dried citrus peel (and really wanting to make a raisin bread), I used a full cup of raisins. Other than to make it more presentable for gift givng, I don't understand why it is baked in a round shape, thus I may in future try it in an ordinary bread pan or possibly cook it all the way in my breadmaker. My bread browned a bit more than I liked, which made for an extra crunchy crust at points (but the inside is soft and yummy). Although I have a thermometer in my oven (a must for baking), I didn't look at it too carefully and learned only later that my oven is 15 degrees cooler than it claims, not 25 degrees as I had been adjusting for until now. I'm not sure if that 10 degrees would really make such a difference, so it might be best to watch it closely during the initial browning stage. Still a nice-looking bread.

Panettone
3 eggs, slightly beaten
3 tbs milk
2 2/3 c bread flour
1/2 tsp salt
1/4 c sugar, superfine if available
1/2 c butter, diced and softened
2 tsp instant dry yeast
2/3 c raisins
1/3 c mixed candied peel
zest of small lemon
Extra handful of flour
1 tbs butter, melted
Mix eggs and milk and pour in base of bread pan. Cover with flour. Place salt and sugar in opposite corners. Dot with melted butter. Make well in center of flour and add yeast. Set bread machine to "Dough" cycle. When machine beeps, add in fruit and lemon zest.
Prepare a 7" round cake pan by greasing it lightly and lining with parchment paper. Tie a double layer of wax paper (or parchment) around the rim of pan about 3" higher than rim. (This will allow the bread to rise and maintain its shape.)
When dough cycle is complete, my machine takes about 2 hours with preheating, turn dough onto floured surface and punch down lightly. Shape into a ball and place in pan. Cover and leave to rise in a warm place until double in size (about 45 min).
Preheat oven to 400 degrees. Brush with melted butter and bake for 15 minutes. Reduce temperature to 350 and bake for 30-35 minutes until top is golden brown and crisp. Cool on a wire rack.
Monday, November 14, 2011
BBQ Chicken Pizza (Dough Recipe Included)

(*Sigh) I made this on Thursday and am just getting around to posting now even though it was fantastic! I really must devise a better method of blogging closer in time to when I actually do the cooking/baking, otherwise things will get lost and I'll forget to share my little tweaks. Anyway, last week while I was making a big batch of these cookies to send to my husband's friends, I decided to throw some dough in the breadmaker. Using a recipe from Bread Machine Bible, which was my first bread machine book (and favorite), I made dough for 2 large pizzas or 4 medium. Here's the recipe:
Breadmaker Pizza Dough
1 cup + 2 tbs water
2 tbs olive oil
3 1/4 c bread flour (I substituted about 1 1/2 c whole wheat)
1 tsp salt
2 tsp sugar
1 1/2 tsp instant dry yeast
Combine in the order listed or per the directions for your breadmaker. Put salt and sugar in separate corners. Make a well in the center of the flour and place your yeast. Set to "Dough" cycle.
My breadmaker's dough cycle takes just under 2 hours, including preheating time. After the dough was finished, I froze half and placed the other half in the fridge. The next day, I made my favorite bbq chicken pizza using my new method of shredding chicken.

BBQ Chicken Pizza
Note: This is a pizza making method, rather than a recipe. I recently discovered steaming and shredding chicken and am thrilled with the result of soaking it in a sauce. Ingredients and the quantity thereof are completely up to you.
1/2 - 1 lb chicken breasts, shredded
1 1/2 -2 c bbq sauce
3 large crowns broccoli (or 16 oz frozen), chopped
1 large onion, sliced
12 oz mozzarella cheese, shredded
Dough for 1 pizza
Olive oil, salt
Preheat oven to 425 degrees. Roll dough to shape of pizza pan. I used two quarter baking sheets. Liberally pierce dough with a fork (this will prevent dough from bubbling during the prebaking process). Brush with olive oil and sprinkle with salt, if desired. Bake dough for 10-12 minutes until light golden brown. (Note: If you use a pizza stone, this step may not be necessary.)
Meanwhile, saute onion in olive oil until tender. Sprinkle with salt. Depending upon the sweetness of your bbq sauce, you could caramelize the onion which will take 10-15 minutes longer. Stir in shredded chicken and broccoli(I pre-steamed my broccoli). Top with sauce, rinsing out bottle with up to 1/4 c water. Cook for 5 minutes until everything in the pan has reached the same temperature or the until the broccoli is tender. Make sure to moderate your heat as not to cause too much of the sauce to evaporate.
Spread meat/sauce/veggie mixture evenly over pizza dough. If you didn't prebake the dough, brush edges with olive oil for a nice browning.
Bake for 10-12 minutes until cheese is golden brown.
Makes 1 large pie or two smaller ones.
Friday, November 11, 2011
Today I'm unpacking my scraproom!!!
Why the long silence? The last three months have been overcome with moving--a move should never take that long, but this one has mainly because due to factors mostly beyond our control...mostly. Here's the long and torrid tale (and a card):
I packed up my apartment in late August and shipped off my Cricuts (and husband) to the mainland while I stayed behind, working throught mid-September. I did keep my Cricut Create and a few scraps of paper and cardstock, but crafting was a challenge. I had forgotten to keep useful tools like adhesives and sentiment stamps so wound up buying substandard items from Walmart and Ben Franklin. I was able to make this cute little guy using the Create a Critter cartridge and my gypsy.

Here's the inside. Unfortunately, I don't remember what the name of the stamps set is, but I believe it is from Hero Arts.

Next in mid-September, I left Hawaii for DC, arriving a good two weeks before my husband was scheduled to arrive and a good three weeks before our household items were scheduled to arrive from Hawaii--plenty of time to get things settled, right? Finding an apartment took only a weekend as there wasn't a whole lot to choose from in the geographic area north of Quantico that we wanted--most folks live south of the base where I am told the schools are better, but the congestion is terrible and the quality of schools isn't a concern at the moment. Plus, I'm far closer to good shopping where we're living now, yet still in a nice residential community. Anyway, after finding a place to live, I zipped over to Chicago to arrange movers for all my things which were packed up last October when I sadly left my apartment in Chicago with the wonderful lake view.
Source: smg.photobucket.com via thefishie on Pinterest
Source: smg.photobucket.com via thefishie on Pinterest
As I predicted, I was able to arrange for movers from Chicago to have my things delivered in Virginia in two weeks or the first week of October...the only probably was that the apartment would not be ready till mid-October. Here came the first delay, although theoretically that was fine as the Hawaii stuff was scheduled to arrive around then. Little did I know that the "required delivery date" on the household moving paperwork was a joke subject to at least two more delays.
After rescheduling my Chicago movers to late October, nearly a month after my arrival in Virginia, our first delivery of furniture arrived. Unfortunately, my craft room was not in this shipment and to say that I had enough stuff to fill an apartment one and a half times the size of the one we rented is an understatement. Thus, it took some creativity and a storage locker just to get a handle on those boxes.
Another two weeks later, and nearly a full month after the first "required by" delivery date, our things from Hawaii finally arrived, Cricuts included. Though we're still climbing over boxes in spots, a good handful from the Chicago delivery, the apartment fairly functional. Thus, today's the day to unpack the craftroom with the goal of getting in some quality crafting time tomorrow!
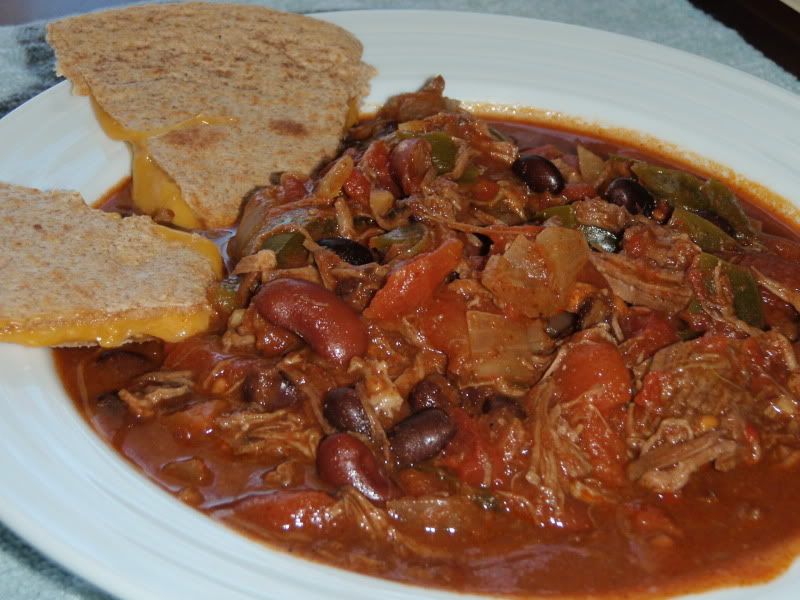
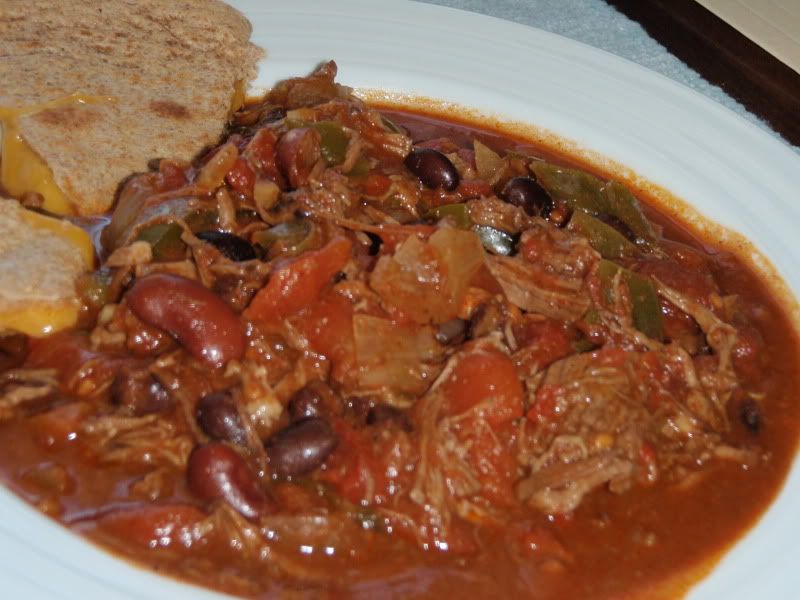
Slowcooker Chili with Shredded Beef
Happy Veterans/Armistice Day! It's a beautiful fall day here in Northern Virginia. Temps are in the 40s and I'm watching a flurry of red, yellow, and orange leaves blow past my window. Today's recipe comes from Lynn's Kitchen Adventures and is perfect for those chilly days when you just need a little of chili. :) My version is below. (See Lynn's original recipe here). Instead of cheese and chips, I served it with easy cheese whole wheat quesadillas which were perfect for dipping.
3 lb chuck roast, cut into about 4 large pieces
1 large onion, diced
2 green peppers, diced
4 cloves of garlic, minced
1/4 c chili powder
1 tablespoon cumin
1 teaspoon oregano
1 cup beef broth
2 – 28 oz cans tomatoes, diced
1- 15 ounce can kidney beans
1- 15 ounce can black beans
1/4 cup cornmeal*
Salt, pepper, olive oil
Shredded cheese for serving
1. Season meat liberally with salt and pepper. Brown in oil and place in bottom of a preheated crock pot.**
2. Add beans, tomatoes, onions, green peppers, garlic, and broth. Add cornmeal. Season with spices and give everything a good stir.
3. Cook on low for 7-8 hours until meat is tender and falling apart.
4. Remove beef and shred using two forks. Return to pot and adjust seasonings.
5. Serve in bowls with a sprinkle of cheese (or something cheesy like quesadillas).
Serves 6-8
*The cornmeal is for thickening--I used masa harina corn flour which was recommended in the comments to Lynn's recipe and is smoother. I didn't notice it at all. Alternatively, I might omit the cornmeal and reduce the beef broth as there is plenty of liquid from the veggies.
**I recently learned that you should put hot things in a hot pot and cold things in a cold pot to prevent growth of bacteria. There's a catchy rhyme, but I don't remember it.

Tuesday, November 8, 2011
Just a little update...

Source: thefishieskitchen.blogspot.com via thefishie on Pinterest
It's only Tuesday and I'm already changing my menu. First, last night I made a double batch of Chocolate Chip Oatmeal Cookies to send to my husband's former unit now deployed in Iraq. I think that is enough cookies for the week, so the pumpkin cranberry cookies will have to wait till next week.
While I was baking cookies, I decided to make a batch of pizza dough in my breadmaker (recipe to come). I froze half of the dough and have half in the fridge for bbq chicken pizza tomorrow (that reminds me that I should take chicken out of the freezer!).
Just put Garden Minestrone Soup in the slowcooker and I'm going to bed just as soon as I finish this post. It'll simmer in the crock overnight and tomorrow I'll add in the spinach and shells.
Since pizza is definitely on the menu, I'm bumping the eggplant bolognese until next week. Not only do I think the eggplant parm is probably going to use all my eggplant, I used nearly all my tomatoes in the soup and don't want to make another trip to the store just for canned tomatoes.
Finally, I used my third premade baking mix this morning and made pancakes! They came out a bit flat, but since it was a new recipe, I don't believe the "premade" factor hurt them. My goal is to make another batch of mixes this weekend, including waffle mix and maybe some instant oatmeal packets.
Okay, time for bed. Thanks for stopping by!
Monday, November 7, 2011
Menu Planning (Week 3)
Happy Monday! I'm posting my plan on Monday due to other scheduled posts, but started hopefully started cooking on Sunday with a nice pot of chili. Last week I did pretty well on the menu making a chicken brown rice bake, ribs using this spice rub, black bean and rice burritos, turkey and spinach lasagna, and spaghetti and meatballs. Instead of the pumpkin chocolate bars I had planned, I made pumpkin chocolate chip muffins which were fantastic. I also made seven baking mixes which are stored in the freezer for quick use--well, there are only five left now as I made muffins earlier this week and just took a batch of yummy chocolate-cranberry scones out of the oven. They are a huge timeaver I can keep in the habit of making them. I made dry mixes for banana muffins, scones, pancakes, and biscuits.
This week we'll be eating out on Thursday evening and possibly another night, so I'm planning dishes which can be frozen. Here's the menu, in no particular order:
Main Dishes
1. Eggplant Parmesan


This week we'll be eating out on Thursday evening and possibly another night, so I'm planning dishes which can be frozen. Here's the menu, in no particular order:
Main Dishes
1. Eggplant Parmesan
Source: myrecipes.com via thefishie on Pinterest
2. Garden Minestrone Soup
Source: joyinmykitchen.blogspot.com via thefishie on Pinterest
3. Crock Pot Shredded Beef Chili
Source: lynnskitchenadventures.com via thefishie on Pinterest
4. Flank steak with creamed spinach and roasted parmesan potatoes.
Source: thefishieskitchen.blogspot.com via thefishie on Pinterest
Source: oneperfectbite.blogspot.com via thefishie on Pinterest
Source: lynnskitchenadventures.com via thefishie on Pinterest
5. Eggplant Bolognese
Source: myrecipes.com via thefishie on Pinterest
6. Butternut Squash Stuffed with Cauliflower & Cranberry Couscous
Source: poorgirleatswell.com via thefishie on Pinterest
Other Goodies
Pumpkin Cranberry Oatmeal Cookies
Source: wholefoodsmarket.com via thefishie on Pinterest
This post is linked to I'm an Organizing Junkie's Menu Plan Monday.
Sunday, November 6, 2011
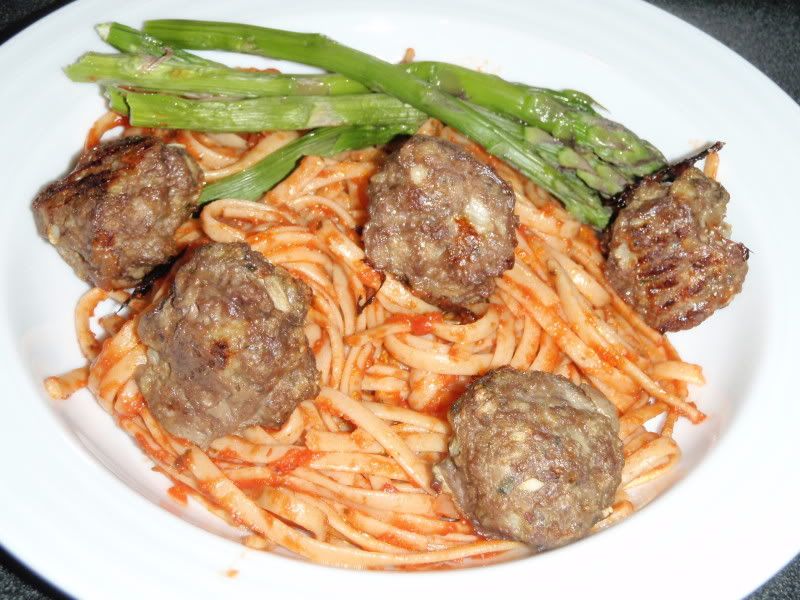
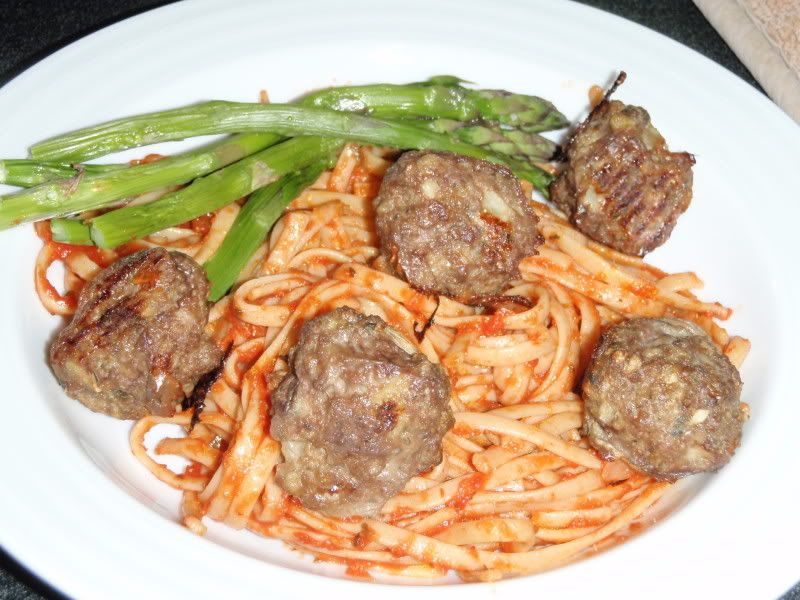
Spaghetti and Meatballs
I absolutely love my turkey meatball recipe--that recipe really turned me on to meatballs despite being a pasta fan. Thus, when I saw this recipe at Finding Joy in My Kitchen, I leaped to try it. Unfortunately, they turned out rather dry. Maybe I over-cooked them? Maybe I didn't use ground beef with enough fat in it? (I used 93/7). Maybe I shouldn't have added a bit of cheese? Maybe I should have sauted the onions as I do in my turkey meatball recipe. With all these things to adjust, I'm posting the recipe.
1 lb. ground beef
1 egg
1/4 c onion, minced
2 cloves garlic, minced
1 tsp. parsley
1 tsp. basil
1 tsp. dried, minced garlic (or 2 fresh cloves)
1/4 C panko bread crumbs
1/4 c parmesan cheese, shredded
salt & pepper
Pasta
3-4 C spaghetti sauce
Preheat oven to 400 degrees.
Combine all ingredients except pasta and sauce. You may wish to first saute that onions and garlic.
Bake on a cookie sheet covered with parchment paper for 20-25 minutes.
Serve over pasta and sauce.
Serves 2-4

Subscribe to:
Posts (Atom)