Monday, December 31, 2012

End of the Year Goals Progress

Photobucket

As 2013 rapidly approaches, I plan on spending much of the day working on the list of goals that I shared a few weeks ago. I will probably not post everything I finish today, but will schedule posts for the new year. To review, here are my three goals and my status thus far:

Goals For the Last Days of 2012
1) Clean out the drafts folder and get posted whatever I can, picture or no picture. I've been working on this for a bit this morning and am almost through the 8-10 posts that have been hanging out in various stages of incompletion. Look for a bunch of those posts in the coming days. DONE!

2) Post all the recipes that I have pictures for. That includes ones for Kalbi (Korean beef short ribs), beef stock, apple cinnamon pancakes, smoked gouda mac and cheese, turkey wild rice soup, cranberry-walnut caramels, and cheddar potato soup.

3) Update the recipe index!

It's about 9:00 a.m. EST. Let's see what I can do before midnight!

Sunday, December 30, 2012

Martha Stewart Cinnamon-Oat Pancakes

I'd been looking for a good oatmeal pancake recipe for quite some time. Earlier attempts such as this one or this one were good, but not quite right. This one from Martha Stewart is both tasty and has the consistency I was looking for--hearty enough that you know you're eating oatmeal. Although this recipe is a bit labor intensive for regular pancakes, in my opinion it's more than worth it. I served these with a super simple apple compote which I made by sauteing a large diced apple in a small amount of butter until softened, then sprinkled with a little bit of brown sugar and cinnamon.

Photobucket

Martha Stewart Cinnamon-Oat Pancakes
2 cups all-purpose flour
1/4 cup packed brown sugar
1 tablespoon baking powder
1 teaspoon salt
1/2 teaspoon ground cinnamon
2 cups old-fashioned rolled oats
2 cups milk
2 eggs
1/4 cup vegetable oil or apple sauce

In a food processor, combine flour, sugar, baking powder, salt, cinnamon, and 1 cup oats and pulse a few times to coarsely grind oats.

In a large bowl, whisk together milk, eggs, and oil or apple sauce. Stir in dry ingredients and 1 cup oats and whisk just until moistened.

Heat skillet or griddle over medium. Lightly oil. Cook 1-2 minutes until a few bubbles have burst. Flip and cook until browned, 1 to 2 minutes more. Repeat with more oil and batter.

Serves 4-6 Photobucket

Friday, December 28, 2012

Smoked Gouda Mac 'N Cheese

Photobucket

At a farmers' market, we stumbled across very tasty smoked gouda. Though it would have been far healthier to have it with fruit or on a salad, I had a craving for a "grown-up" mac 'n cheese. This recipe, modified from an Allrecipes.com recipe, fit the bill perfectly. Definitely a yummy keeper!

Smoked Gouda Mac 'N Cheese
16 ounces dry pasta (e.g. macaroni, penne)
6 tablespoons butter
1/2 cup all-purpose flour
5 1/2 cups milk, divided
2 1/2 cups shredded smoked Gouda
2-3 cups shredded Cheddar cheese
1 cup grated Parmesan cheese
1/2 cup bread crumbs
1 teaspoon cayenne pepper
olive oil, salt, pepper

1. Preheat oven to 350 degrees F (175 degrees C). Spray or butter a 9 x 13" pan.

2. Cook pasta according to the package directions until just shy of al dente (it will cook a little more in the oven).

3. Melt the butter in a large pot over medium heat. Add the flour to the melted butter and whisk continually for 1 to 2 minutes to make a roux. Whisk 2 cups of the milk into the roux until smooth and then add the remaining milk. Raise the heat to medium-high and continue cooking and stirring until thickened, but not boiling.

4. Stir the Gouda, Cheddar, and 1/2 cup Parmesan cheese into the mixture until melted completely. Season with salt and pepper. Fold the pasta into the sauce to coat. Pour the mixture into a 9x13 "baking dish.

5. Stir 1/2 cup Parmesan cheese, the bread crumbs, and cayenne pepper together in a small bowl; sprinkle over the macaroni. Drizzle the olive oil over the bread crumbs.

6. Bake in the preheated oven until golden and bubbly, about 30 minutes. Allow to rest 10 minutes before cutting.

Serves 6

Photobucket

Thursday, December 27, 2012

Beef Kalbi Ribs

Photobucket

Since we're having these for dinner tonight, I figured I should finally post the recipe. One of my favorite Korean takeout dishes is kalbi beef ribs. They're marinated in soy sauce mixture, then fired on the grill. I've made them using an indoor grill pan with great results (albeit with a smokey house). This recipe from Allrecipes.com is super easy and pretty near the flavor I was aiming for. I would have liked a little heat, but my husband thought they were perfect. As you can see from the picture, they're a tad greasy but that just adds flavor to the rice :) In the grocery stores at home in Hawaii, the ribs are labeled "kalbi," but you might have to have them cut by the butcher as described below. Enjoy with brown rice and something green.

Beef Kalbi Ribs
3/4 cup soy sauce
3/4 cup brown sugar
3/4 cup water
1 garlic clove, minced
2 green onions, chopped
1 tablespoon Asian (toasted) sesame oil
2 pounds Korean-style short ribs (beef chuck flanken, cut 1/3 to 1/2 inch thick across bones)

Briskly whisk together all ingredients except ribs until sugar has dissolved.

Marinate ribs in the refrigerator for 3 hours to overnight.

Preheat an outdoor grill for medium-high heat, and lightly oil the grate. Before placing ribs on grill, shake off excess marinade and discard rest. Grill until cooked to your liking, about 3-5 minutes per side, preferably with a nice char.

Serves 4

Photobucket

Friday, December 21, 2012

Egg (Wheat) Sandwich Bread

As you know, I adore my Zojirushi Bread Machine. I have one like this. It's a bit pricey, but I highly recommend it and the brand in general. My rice cooker of the same brand has been with me since sometime in college, approximately 13-14 years. As you know, several weeks ago, I decided to check out a handful of bread machine cookbooks from the library. We enjoyed several recipes from the Better Homes and Gardens Bread Machine Cookbook such as cornmeal pizza dough and french bread baguettes but it was finally time to try another book. This recipe comes from Bread Machine Magic which has some yummy-sounding recipes, though no pictures. Each recipe offers variations for small, medium, and large loaves. This recipe is for a medium loaf, which I think is 2 lbs. Despite the fairly large amount of sugar, the bread isn't noticeably sweet and makes a soft and moist sandwich bread. Plus, it's awesome for grilled cheese.

Egg Sandwich Bread
Photobucket

3/4 c milk
2 eggs
1.5 tsp salt
3 TBS butter
1/4 c sugar
3 c bread flour (I use 1.5 c bread flour and 1/5 c white whole wheat)
2 tsp yeast

Combine ingredients in the order recommended by your bread machine. Set to regular or white bread setting, light crust.

After dough enters kneading cycle, check on it after 5-10 minutes. If it's dry, add more liquid, 1 TBS at a time.

Cool on a wire rack before slicing.

Photobucket

Thursday, December 20, 2012

Sourdough Dinner Rolls

I made these when I was on my sourdough kick earlier this year. I mistakenly thought that they would be like mini loaves of sourdough, but I did not brush them with water or anything that would allow them to crisp up so they had the texture of hamburger buns. Thus, when I'm in the mood for something different with my classic cookout food, I make these instead of my usual hamburger and hot dog buns. I've seen this recipe on a number of blogs, but likely found it at the Sourdough Diva.

(sorry, no pictures!)

1 cup sourdough starter
1 1/2 cups warm water
1 tablespoon yeast
1 tablespoon salt 2 tablespoons sugar
2 tablespoons olive oil
3-4 cups flour
2 TBS butter, melted

In the bowl of your stand mixer, combine all ingredients except flour and butter. Turn on the mixer and add flour 1/2 cup at a time, kneading until dough is smooth but not sticky.

In a greased bowl, cover and let rise in a warm place until doubled.

Punch down dough and form rolls. Let rise until doubled.

Bake in a 375 degree oven for 20 minutes. In the last 5 minutes, brush with melted butter and return to oven.

Last 5 minutes of baking, brush with melted butter and return to oven.

Wednesday, December 19, 2012

Chicken Enchiladas with Black Beans

Argh, another post that was drafted nearly a year ago but hung out in my draft folder due to a lack of pictures....

I love Mexican food, but we haven't found a good restaurant nearby just yet. Plus, we eat out quite enough as it is. This recipe is adapted from one I found on a blog I recently stumbled upon called The Happy Housewife. The only step I skipped was the frying of the corn tortillas prior to baking. It seemed like unnecessary work and calories, although the tortillas would probably have stood up better to all the sauce and cheese. Oh, and I omitted the cilantro because I find it too much. Still, a yummy recipe, which I will make again.

Chicken Enchiladas
1 medium onion, diced
3 cloves garlic, minced
1/2 cup chicken broth
1 cup Rotel tomatoes
2 1/2 cups chopped chicken (I used raw thighs)--shredded might better
2 cups shredded cheese (I used a mix)
16 oz can enchilada sauce
olive oil, salt, pepper
10 corn tortillas
1/2 cup oil (if desired)

Preheat oven to 350 degrees.

Saute onion in olive oil. If using raw chicken, when onions are beginning to soften, add chicken. Sprinkle with salt and pepper. Cook until chicken is nearly cooked through, adding garlic in last few minutes of cooking.

If using cooked chicken, add once onions have finished cooking. Stir in tomatoes and broth. Simmer on low for 15 minutes.

If desired, fry corn tortillas in 1" of oil. Toni recommends 20 seconds on one side and 15 on the other. Dry on paper towels.

In a baking pan (9 x 13"), spread a thin layer of enchilada sauce on bottom. Fill and roll your tortillas with a bit of meat, sprinkle of cheese, and a drizzle of enchilada sauce. Continue filling until all ingredients are spent.

Cover with remaining enchilada sauce and cheese. Bake, covered in foil, for 20 minutes. Remove foil and brown cheese (another 5-6 minutes).

Black Beans
2 cups black beans
1 medium onion, thinly diced
2 cloves garlic, minced
1/4 c chicken broth
1 tsp cumin
salt, pepper, olive oil

cheese for serving

Saute onion in olive oil until tender. In last minute, add garlic. Sprinkle with salt, pepper, and cumin. Add beans and chicken broth. Bring to a near boil, then simmer on low for 15 minutes.

Sprinkle with cheese for serving. (I used mozzarella.)

Serves 3-4.

Monday, December 17, 2012

Walnut Cherry Brownies

Ugh, another completely drafted post of a yummy treat just missing pictures...

For the 4th of July, I wanted to make a fun but simple dessert for a bbq. On a whim, I searched for a brownie recipe that included dried cherries. This one from Epicurious.com (originally published in Gourmet, June 2008) fit the bill perfectly. Other than lightening the recipe slightly by swapping egg whites for some of the eggs, I left the recipe in tact. They were a hit at the party, however I think I prefer to keep my dried fruit and chocolate separate as I felt the dried cherries were a bit out of place. One plus is that this recipe makes a full 9 x 12" pan as opposed to the typical 9 x 9" that most recipes tend to make.

Walnut Cherry Brownies
3/ c butter
6 ounces unsweetened chocolate
1 1/2 cups packed light brown sugar
1 teaspoon vanilla extract
4 large eggs
1 cup all-purpose flour
1/2 teaspoon salt
1 1/2 cups dried cherries
1 1/2 cups walnuts, chopped and toasted

Preheat oven to 350 degrees. Prepare 9 x 13" pan by spraying and flouring it.

Melt butter and chocolate together over low heat until smooth. Cool to lukewarm and whisk in sugar and vanilla. Add eggs one at a time.

In a separate bowl, whisk together dry ingredients (except for cherries and walnuts). Mix into chocolate mixture until combined.

Stir in dried fruit and walnuts.

Pour into prepared pan and bake for 25 - 30 minutes or until tooth pick in center comes out with crumbs.

Cool completely before slicing.

Makes approx 32 (2") squares.

Sunday, December 16, 2012

Roasted Red Pepper Hummus

Still cleaning out the drafts folder...

This hummus recipe was made to go with the homemade pita bread I posted a few days ago, which is also missing pictures. Unfortunately, I no longer remember where I found it. I do remember that I made this at least a couple of times, varying the amount of lemon juice, salt and pepper each time. My husband generally liked it but the sesame paste flavor was way too overwhelming for me so I gave for awhile. I think when I do try it again, I'll either try a different brand of sesame paste or omit it entirely.

Roasted Red Pepper Hummus
2 large garlic cloves, chopped
1 15-ounce can garbanzo beans (chick-peas), drained
1/3 cup tahini (sesame seed paste)
1/3 cup fresh lemon juice
1/2 cup chopped drained roasted red peppers from jar
salt and pepper to taste

With processor running, drop garlic through feed tube and mince. Scrape down sides of work bowl. Add chick-peas, tahini and lemon juice; process until mixture is smooth. Add roasted peppers; process until peppers are finely chopped. Season with salt and pepper. Transfer hummus to small bowl. (Can be made 1 day ahead. Cover and chill. Bring to room temperature before serving.)

Saturday, December 15, 2012

Chocolate Truffle Ice Cream

Still going through my drafts folder...How could I not share a chocolate ice cream recipe?!!!. This recipe comes from The Ultimate Ice Cream Book by Bruce Weinstein. If I remember correctly this one was a bit grainy due to improperly melted cheap chocolate but otherwise tasty. The finer the chocolate, usually the smoother your final product. I'll definitely have to try this again in the summer (or whenever my annual ice-cream making kick begins.)

Chocolate Truffle Ice Cream
1/2 c sugar
2 egg yolks
1 c milk
1/4 c cocoa powder
1.5 c heavy cream
6 oz bittersweet chocolate, chopped
1 tsp vanilla

In a mixing bowl, beat egg yolks and sugar until a pale yellow color is reached (this will take a few minutes).

Bring the milk (only) to a simmer in a medium saucepan. Whisk in cocoa and simmer 3 minutes.

Slowly beat hot milk/chocolate into egg/sugar mixture. Return the entire mixture to the stove over low heat. Cook stirring constantly until custard thickens slightly.

Remove from heat and pour into a clean bowl. (Strain, if desired (i.e. if you scrambled some eggs).

Bring the cream to a simmer and melt chopped chocolate. (I did this right on the stove, although the recipe assumed the hot milk would be hot enough to melt the chocolate.)

Combine the chocolate mixtures, then stir in the vanilla.

Cover and chill completely (overnight is safest bet) before making the ice cream according to your ice cream machine's directions.

Makes 1 quart

Friday, December 14, 2012

Homemade Beef Stock

I've been making my own chicken stock for some time now. But I've never made beef stock.

Why, you ask? Well, unlike chicken (or turkey) stock, which I use several times a week, I use beef stock so infrequently that a store-bought box lasts me ages. Plus, I knew that making it wasn't as simple as chucking everything in a pot. Then one day I had the urge for french onion soup. A pot of french onion soup requires anywhere from 4-8 cups of beef broth/stock at a minimum so I decided it was the excuse I needed to give beef stock a try.

Photobucket

It was nearly as simple as chicken stock--just an extra step of roasting the bones to bring out their flavor. Plus, I found beef marrow bones, which I'd never heard of, for just a couple of dollars at the commissary. I also threw in a package of stew meat which was another few dollars. Thus, for a total cost of $5-6 I got 16 cups of gorgeous beef stock without out any fillers or excess sodium. After browsing the web for a how-to, I generally followed this recipe from Tasty Kitchen.

Homemade Beef Stock
2-4 pounds beef marrow bones (they're huge--ask the butcher if you can't find them)
1-2 lbs beef stew meat, or any cheap cut cut into cubes.
2 large carrots, cut into big pieces
1 large onion, cut into big pieces
olive oil
salt and pepper

3 stalks of celery, cut into big pieces
1 bay leaf
2 TBS parsley or 1/2 c fresh
1 TBS black peppercorns
4 cloves garlic, smashed
water

Heat oven to 400°F. In a dutch oven or roasting pan toss the bones, meat, carrots, and onion with olive oil. Sprinkle with salt and pepper. Roast for an hour, making sure that nothing burns by flipping halfway through the roasting process.

If using a dutch oven, after roasting the meat and veggies add the remaining ingredients and fill with water. Turn to medium high and gently scrape the bottom to deglaze. (Alternatively, you could remove the meat and veggies and deglaze the pot or pan using 1/2 white wine and 1 c water.).

Bring to a boil, then cover and reduce heat and simmer for as long as possible. Skim off any fat that may foam on the top. (You can also put everything in a crock pot for 8-10 hours).

Strain broth and skim fat before storing. I usually let the broth come to room temperature, then refrigerate overnight. The fat will solidify on top and be easily removed before use or freezing.

Photobucket

Thursday, December 13, 2012

Our Best Bites: Black Bean Soup

Still going through recipes in my draft folder which went unposted due to lack of pictures or time. Grrr...I was looking for this not too long ago when I made black bean soup for my husband. I wound up making this slower cooker version which my husband likes but I find rather bland. This recipe from the first Our Best Bites cookbook if I remember correctly was very tasty and had just enough heat for me.

Black Bean Soup (Our Best Bites cookbook)

3/4 c carrots, diced
3/4 c celery, diced
1 c onion, diced
4 cloves garlic
2-15 oz can black beans, rinsed and drained
1-3.5 oz c diced green chilies
2-15 oz c beef broth
1 tsp kosher salt
1/8 tsp pepper
1/2 tsp chili powder
1/4 tsp cumin
1/2 tsp oregano
1 bay leaf
1 lime, juiced

Saute carrots, celery, onion and garlic and saute for 4-5 minutes.

Add black beans, chilies, and broth. Stir to combine. Add spices. Simmer uncovered 20-25 min until carrots are tender

Puree soup. If the soup is too thick, thin with a little water or broth. Squeeze in lime juice.

Wednesday, December 12, 2012

Bread Machine Pita Bread

Wow, three posts in one day. Unimaginable!

As I related in my previous post, I'm determined to clean out my drafts folder. I tried this recipe for homemade pita bread back in February after being inspired by The Happy Housewife who regularly posted roasted red pepper hummus and pita bread on her lunch menus. This recipe comes from Good Cheap Eats. To my recollection it whipped up easily enough but the rounds did not poof as I expected them to so they were a bit hard to stuff. That being said, there weren't any left to take pictures of and we enjoyed them both with hummus and tuna fish salad. I might try making them on the grill.

Bread Machine Pita Bread
1 1/4 cups water
1 teaspoon honey
3 cups unbleached flour
1 cup whole wheat flour
1/2 teaspoon salt
2 1/4 teaspoons yeast

In the bread machine pan, place ingredients in the order recommended by the manufacturer. In my case, that means liquids first, then dry ingredients, and yeast in a little volcano in the middle. Select dough cycle. When dough cycle ends, remove dough to lightly floured surface.

Preheat oven to 450 °. Divide into 12 equal-sized pieces. Roll into balls. Roll each ball into a 5-inch circle and rest on floured kitchen towel. I left them about 1/4 inch thick. Continue process. until all 12 pieces are rolled.

Place rounds on lightly floured cookie sheet and bake for 2 minutes. Flip and bake another 1 1/2 to 2 minutes. Do not brown. Dough should puff during baking, but it didn't much for me.

Cleaning House For the New Year

As the new year approaches, one of my goals will be to get back in the swing of blogging on all my blogs. I've been fairly good about Project Little Blueberry but have neglected this blog quite a bit and all bit abandoned my crafts blog since the baby was born. In most cases, particularly in my kitchen, I have material but haven't made the time to write up the recipes or have gotten lazy about picture-taking. However, I'm coming to terms with the fact that not every recipe needs a picture. Heck, I bet a number of recipes on the blog would seem more appetizing if not accompanied by a poorly lit and staged picture given my photography talents. Thus, my goals between now and the end of the year are as follows:

Goals For the Last Days of 2012
1) Clean out the drafts folder and get posted whatever I can, picture or no picture. I've been working on this for a bit this morning and am almost through the 8-10 posts that have been hanging out in various stages of incompletion. Look for a bunch of those posts in the coming days.

2) Post all the recipes that I have pictures for that I made during the last three weeks. That includes a yummy one for Kalbi (Korean beef short ribs), beef stock, apple cinnamon pancakes, smoked gouda mac and cheese, turkey wild rice soup, cranberry-walnut caramels, and cheddar potato soup. I'm pretty sure I have pictures for nearly all of those.

3) Update the recipe index! This is a continuous struggle of mine, but I hope to get it done. I've also realized that some of my oldies but goodies recipes which were imported from the old Geocities blog never made it onto the index so I'll work to rectify that.

Wow, that's a lot more than I thought to do but here's hoping...

French Bread Baguettes

Sorry for the major lack of posts lately. Thanksgiving came and went and in a flash. I did a fair amount of cooking but mostly tried and true familiar recipes. We did try a couple new things which will definitely be going in the recipe box to make again. First, there's this french bread. It's from the Better Homes and Garden Bread Machine Cookbook, which I checked out from the library and sadly may be out of print. This is the third or fourth really nice recipe I've tried from this book, so I recommend picking it up if you see it at your local library or in a used book store. With only four ingredients and only a minimal amount of shaping, this bread recipe whips up fairly quickly. It's flaky and is great for sandwiches or snacking. We even used it in our stuffing in place of the usual store-bought loaf with great success. On to the recipe.

Photobucket

French Bread Baguettes

1 c water
3 c bread flour
3/4 tsp salt
1 tsp active dry yeast

Egg wash: 1 slightly beaten egg white + 1 TBS water cornmeal for dusting

Add first 4 ingredients to bread maker according to manufacture's directions. Select dough cycle.

When cycle is complete, punch dough down. Cover and let rest for 10 minutes.

Divide dough in half and roll into a 10 x 8" rectangle. Starting from long side, roll into a spiral. Pinch ends to taper.

Place loaves, seams down on a greased baking pan dusted with cornmeal (we made this 3-4 times and forgot this step every time). Brush with egg wash. Cover and let rise in a warm place for 35 to 45 minutes or until nearly double. Using a sharp knife make 3-4 diagonal slits about 1/4" deep across the top of each loaf.

Bake in a 375 degree oven for 22 minutes. Brush with remaining egg white mixture and bake for 12-15 minutes until loaves sound hollow when lightly tapped.

Cool on a wire rack.

Makes 2 three-fourth pound loaves.

Photobucket

Saturday, November 24, 2012

Chicken Pot Pies

Photobucket

I haven't made a pot pie since I made my very first meal from scratch the summer after my freshman year in college. That pot pie used Bisquick for the pie crust, limp vegetables that had been hanging around in the veggie drawer for too long, and a cream of something soup. I think it was this recipe, which despite the ingredients I used was rather tasty.

I've come a long way since then but have never made another chicken pot pie. Last Thanksgiving, I had collected a number of recipes hoping to make pot pies with turkey leftovers. Then I ran out of leftovers without ever making the pies. Fast forward nearly a year and finally I made pot pies with chicken. Tonight, I plan on making another using turkey leftovers.

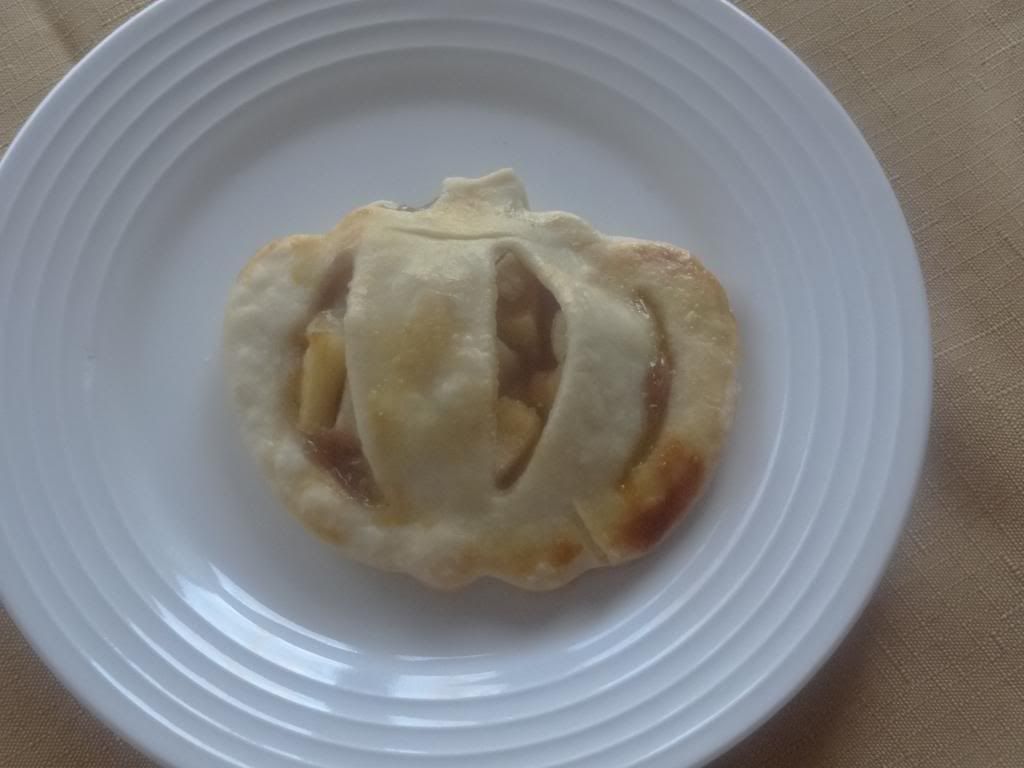
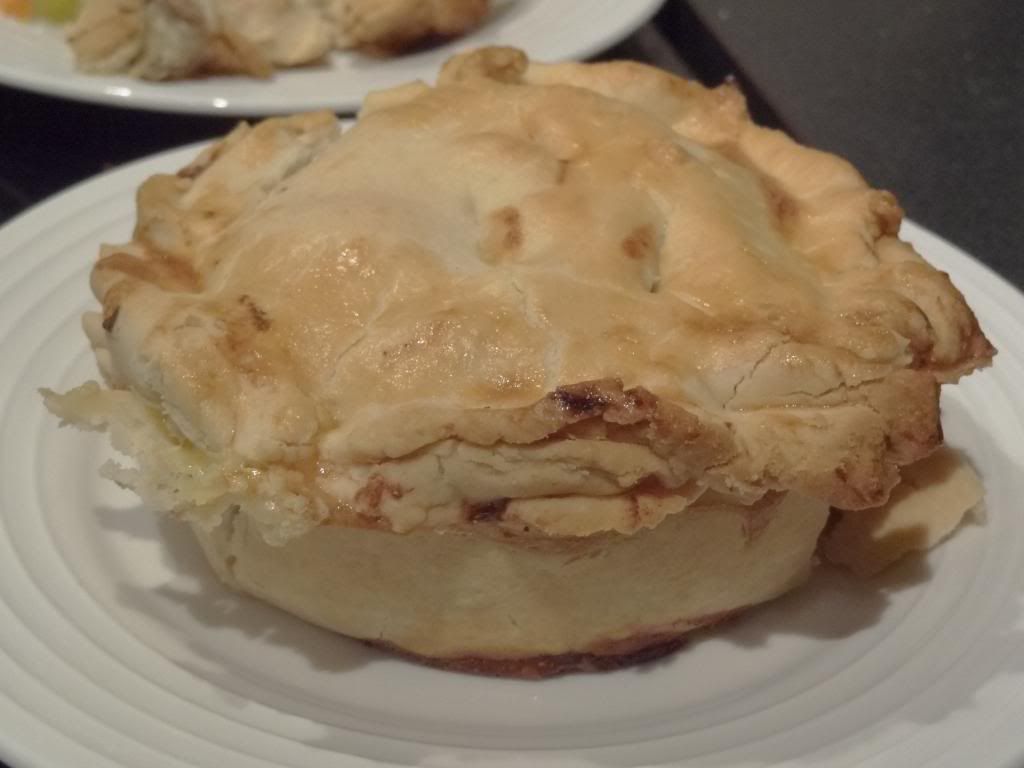
I worked off of this recipe from the Baker Chick, although I had to fill in the spice gaps myself and switched up some of the veggies. What I like especially about this recipe is that it contemplates using uncooked chicken rather than leftover meat so you can make it anytime assuming you're like me and always keep boneless skinless chicken breasts in the freezer. You can also use cooked meat and add it at the end. Other than being incredibly sloppy because I had a screaming baby being thrust in my face every 2 seconds by my darling husband as I was trying to roll and shape the crusts, these turned out wonderfully. I used a deep large muffin pan to make cute individual pies, although you could certain make one large pie.

Chicken Pot Pies
Photobucket

Crust
2 1/2 cups all-purpose flour
1 teaspoon salt
1 cup butter, cold and cut into small
1/4 cup ice water

Filling
1 pound skinless, boneless chicken breast halves, diced
3-4 med carrots, diced
1 large or two small potatoes, diced (I used red)
1 med onion, diced
2 ribs celery, diced
1/2 c corn
1/2 c peas, if desired
1/3 cup butter
1/3 cup all-purpose flour
1/2 teaspoon salt
1/4 teaspoon black pepper
1/2 tsp garlic powder
1/2 tsp thyme
2 cups of chicken broth
1 cup milk (I used equal parts 1/2 & 1/2 and milk)

To Make Crust
Using a pastry cutter or in the bowl of a food processor, combine flour and salt.

Cut in or pulse butter until mixture resembles coarse crumbs. Add in ice water a tablespoon at a time until the dough holds together without being wet or sticky.

Turn out dough onto a floured work surface. Divide in thirds and flatten into disks.

Wrap in plastic, and refrigerate at least 1 hour or overnight.

To Make Filling
Preheat oven to 425 degrees F.

In a saucepan, combine chicken, carrots, and potatoes. Add enough chicken broth cover and boil for 15 minutes. Remove from heat, drain (while saving the chicken broth,) and set aside.

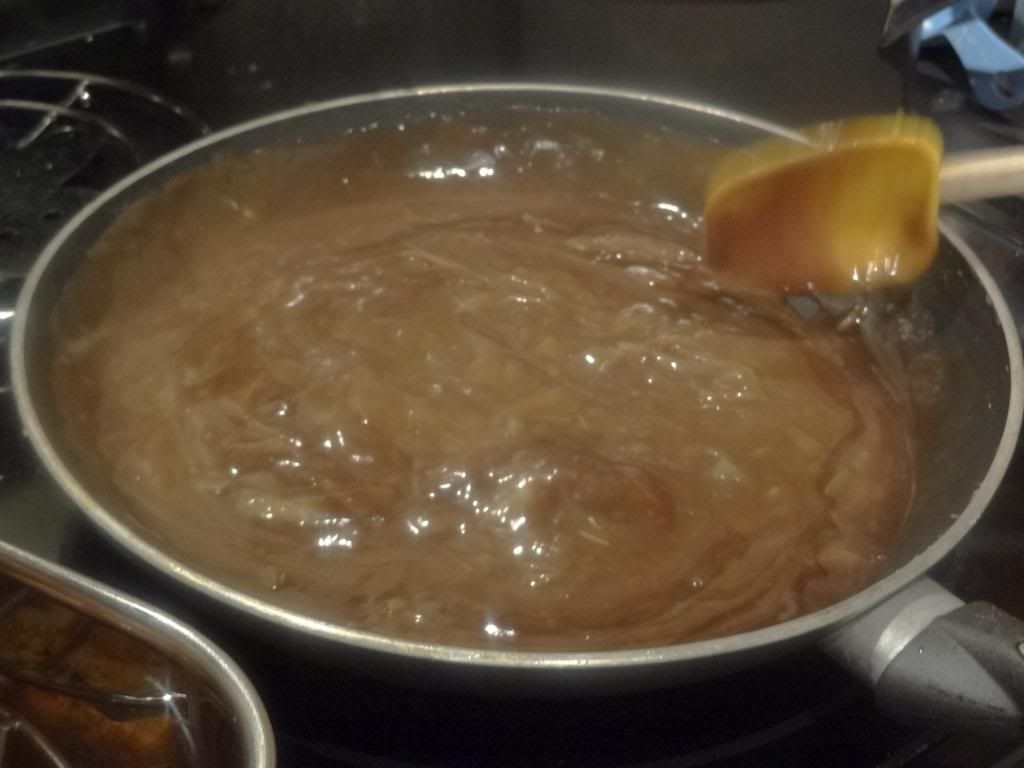
In the saucepan over medium heat, cook onions in butter until soft and translucent.

Stir in flour, salt, pepper, and spices. Slowly stir in 1 3/4 cup chicken broth and milk. Simmer over medium-low heat until thickened. Gently stir in chicken, potatoes, and corn (and peas, if using).

To Assemble:
Each 3rd of dough yields 4 dough rounds. Roll each dough circle out until it is big enough to be pressed into the muffin tin with a half inch over hang. Ready 6.

Generously spoon filling into each bottom layer of dough--you want it to dome.

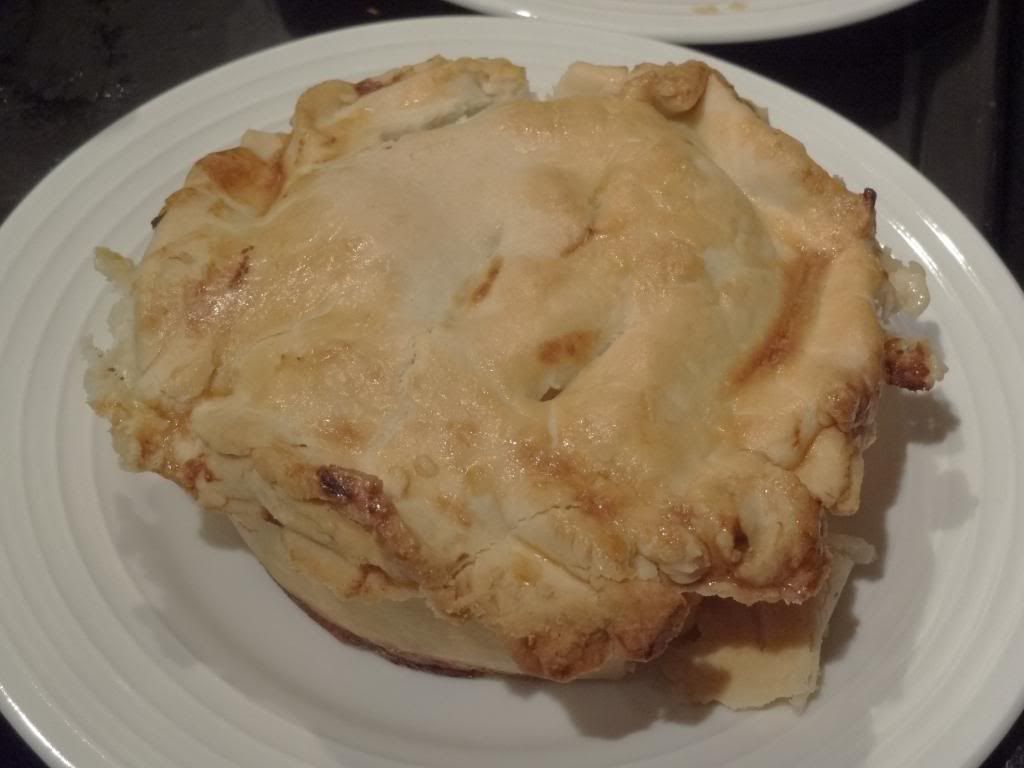
Top layer with other layer of dough. Trim excess and press to seal with tines of a fork. Brush with an egg wash and cut a few slits in the top of the pie to allow steam to escape.

Bake at 425 for 30 minutes, or until pies are crisp on top and golden brown.

DSC01278

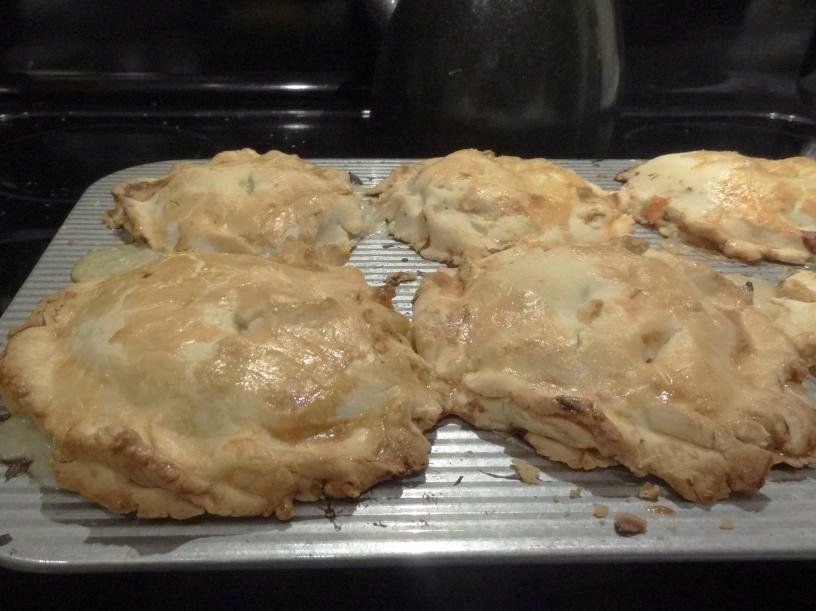
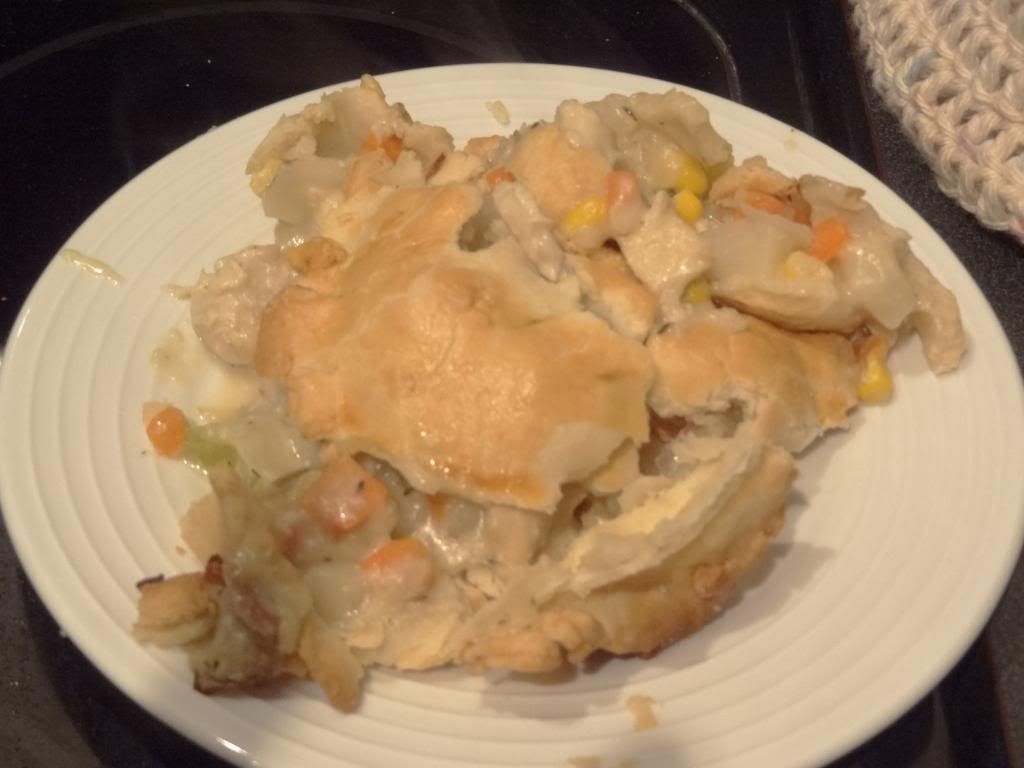
Though they weren't the prettiest, they were definitely yummy. Even the one that fell apart.
Photobucket

Yields 6 mini pies

Friday, November 23, 2012

Thanksgiving 2012

I hope everyone had a marvelous Thanksgiving! This year I was fortunate enough to spend the day with my loved ones, especially the latest little addition to our family.
Photobucket

He wanted to help make the turkey, but given that it was nearly as big as he is, all he could do was watch.
Photobucket

With the new baby, I kept the table very simple using tried and true recipes. We had Roast Turkey with Herbed Butter.

Photobucket

Cranberry Walnut Stuffing, Mashed Potatoes
Photobucket

Roasted Green Beans and Fresh Cranberry Sauce
Photobucket

Last, but not least, my Caramelized Onion Balsamic Gravy.
Photobucket

Honestly, this gravy is in part why my husband married me.
Photobucket

Thanks so much to my wonderful auntie for braving the chilly weather to spoil visit us in Virginia.
Maryann thanksgiving

Opps, I almost forgot about dessert, which didn't photograph well. We had Libby's Pumpkin Pie
Photobucket

and Apple Pie Pockets
Photobucket

Time for leftovers!

Thursday, November 8, 2012

Apple Cinnamon Pecan Rolls

Photobucket

I'm in love. Absolutely in love with these cinnamon rolls. Even the chocolate cinnamon rolls that I made at the beginning of the year cannot hold a candle to this recipe. If ever there was a must-make cinnamon roll recipe, this is it. Let me be perfectly clear--you want to make these cinnamon rolls and you want to make them NOW!!!

Just a little background...Early last month we went apple picking in Northern Virginia. I came home with at least 20 pounds of apples. Though I had a ton of plans on what I wanted to bake/do with them all (pies, preserves, bagels, etc.), for whatever reason we've mainly snacked on them. Oh, I also made pancakes one morning, but that's about it. Don't get me wrong--I will eventually get around to baking at least a few things, particularly for Thanksgiving, but for now I seem to be drawn to quick and easy recipes. Sunday proved the exception. Although this recipe is incredibly easy, it takes some time and patience as the dough must rise. My recommendation is to throw the dough in the breadmaker first thing in the morning and they'll be ready for brunch. Either that or you could make them in advance and warm them in the oven before serving. These were so good that by evening I had to toss the remaining rolls in the freezer as both my husband and I had eaten two each.

This recipe is a combination of a whole wheat sweet dough recipe found in Bread Machine Magic and the filling and topping are from this Taste of Home recipe. The only change I would make next time would be to use less sugar in the filling. The rolls are amazingly yummy, but if they weren't quite as sweet, I could probably eat more that one in a sitting. Kidding! (sort of.) Consider what type of apple you are using and sweeten accordingly. Remember that if you prefer them glazed, you will have that sugary goodness and may want to go easy on the sweetness in the filling. However, if you're all about sweet, by all means make the recipe as written.

Apple Cinnamon Pecan Rolls
Photobucket

Dough
3/8 c milk (6 TBS) - I used skim
3/8 c water
1 egg
4 TBS butter, diced
1/4 c dark brown sugar
1.5 c all purpose flour
1.5 c whole wheat flour
1.5 tsp active dry yeast

Filling
3/4 cup packed brown sugar (1/2 c worked for me)
1/4 cup all-purpose flour
1 tablespoon ground cinnamon
pinch of salt
1/2 cup cold butter
1 cup finely chopped peeled apple
1/2 cup chopped pecans

Glaze
1 cup confectioners' sugar
2 tablespoons milk

For dough, combine all dough ingredients in the pan of your bread machine per the manufacturer's instructions. Set to "dough" cycle.

In last few minutes of the dough cycle prepare the filling by combining sugar, flour, salt and cinnamon. Cut in butter until crumbs formed using a pastry knife or two knives.

Spray or grease baking pan(s)--I used two 8" rounds.

When dough is ready turn it our onto a floured surface and roll into a 9 x 18" rectangle. Sprinkle with crumb mixture being sure to leave a 1/2" edge all around. Top with apples and pecans. Roll into a log and cut into 8-10 rolls about 1.5" thick. (Unwaxed floss is recommended.) Load rolls into baking pans--I prefer them touching but it's up to you. Cover and let rise in a warm place until doubled in size--about 30-45 minutes.

Bake in a 350 degree oven for 20-25 minutes or until golden brown. Meanwhile,whisk together sugar and milk for glaze.

Serve rolls warm drizzled with glaze, if desired.

Makes 8-10 rolls.

Tuesday, November 6, 2012

Another Naan Recipe

One of the best things about Indian food, particularly curries, is the sauce. I love dipping naan in leftover sauce and often make another meal out of that. Naan is also great for eating with hummus. Recently I tried two Indian recipes from Mel's Kitchen Cafe. With Indian Butter Chicken, I used this recipe from my favorite bread machine cookbook. It was definitely tasty but the recipe requires yogurt which I don't always have on hand. This recipe uses milk instead, which means I can whip it up at any time--truly a dangerous proposition as these are fantastic! This recipe was served with Chicken Tikka Masala and made a marvelous meal. I must warn you that this recipe makes a lot of naan, so next time my goal is to freeze some rather than eating way too many.

NaturallyI used my bread machine, but if you prefer to make the dough by hand, check out the original recipe here for detailed instructions.

Naan (from Mel's Kitchen Cafe)
photo15

3-4 cups all-purpose flour (I used 3.5 cups)
1 teaspoon salt
1/2 teaspoon active dry or instant yeast
1 1/2 cups milk
1 teaspoon sugar
Melted butter for serving

Combine all ingredients in the pan of your bread machine according to your machine's instructions. Set to "dough" cycle. During the kneading cycle, check on your dough and see that it isn't too wet or too dry. If it's too wet and not coming together nicely, add more flour. If it's too dry, add more milk in 1 TBS amounts.

Turn the dough out onto a floured surface and divide into 12 equal balls. Cover and let rest for 30 minutes.

Preheat oven to 500 degrees F. If you prefer to use a pizza stone or upside down cookie sheet, preheat it with your oven. (I use a pizza crisper which does not need to be preheated.) You can also grill these.

Roll each ball of dough to your desired thickness for naan. I prefer 1/4" to 3/8". An oval shape is characteristic of restaurant naan, but circles are fine.

Bake 2-4 minutes until lightly puffed and golden brown with a bit of charring, if desired. Brush with melted butter before serving.

Makes 12 6-8" pieces

Monday, November 5, 2012

Chicken Tikka Masala

Since last week's Indian Butter Chicken dish was a success, I decided to try my favorite dish, Chicken Tikka Masala using another recipe from Mel's Kitchen Cafe. Other than making a mess of a nonstick pan (which eventually came clean with a lot of soaking), this recipe was easy and tasted great. Though this dish and last week's look fairly similar, the chicken in this dish is sauteed separately rather than cooked in the sauce. This allows the dish to come together more quickly yet still have a lot of flavor in each bite of chicken. Other than using 1/2 and 1/2 instead of cream and omitting the cilantro, I followed Mel's recipe as written.

Photobucket

For the Marinade:
1 cup plain yogurt
1 tablespoons lemon juice
2 teaspoons ground cumin
1 teaspoon ground cinnamon
1/2 teaspoon cayenne pepper
1 1/2 teaspoons paprika
2 teaspoons black pepper
1 tablespoons minced fresh ginger
1 teaspoon salt
3 boneless, skinless chicken breasts, cut into thin strips

For the masala:
1 tablespoon butter
1 clove garlic, minced
1 jalapeno pepper, finely chopped
2 teaspoons ground cumin
2 teaspoons paprika
1/2 teaspoon salt
8 ounces tomato sauce
1 cup half & half or cream

For the marinade, combine all ingredients except chicken. Pour sauce over chicken and refrigerate for one hour or up to 8 hours. Grill or cook chicken in frying pan. Discard marinade.

For the masala, melt butter in large skillet over medium heat. Saute garlic and jalapeno for one minute. Season with cumin, paprika and salt. Stir in tomato sauce and cream. Simmer on low heat until sauce thickens, about 20 minutes. Add grilled chicken and simmer for 10 minutes. Serve over rice.

Chicken Tikka Masala
Photobucket

Serves 4

Thursday, November 1, 2012

Wheat Buttermilk Bread

I've been wanting to make a buttermilk bread ever since Sandra posted her regular sandwich bread recipe on her blog, Full Bellies, Happy Kids, this past summer. I often buy buttermilk but only use a cup or so at a time so it goes bad. Being able to use it up in bread would be great. Though her bread looks gorgeous, I haven't tried her recipe as it is made by hand. I could convert her recipe for the bread machine, but I just haven't gotten around to it. Thus, when I stumbled across this recipe from SnoWhite @ Finding Joy in My Kitchen, I had to try it.

I love this bread! It's positively marvelous. Whether its the buttermilk or the milk powder or a combination of the two, this bread is soft and fluffy just like the store-bought white sandwich bread I remember eating as a kid.

I followed SnoWhite's recipe except that I reduced the yeast to 2 tsp so I could bake the bread all the way through in my bread machine, rather than in the oven. I'm not certain this step was necessary, but the bread did not over-rise and came out beautifully! I have a little buttermilk left so I just might have to make a second loaf this week.

Photobucket

Wheat Buttermilk Bread
1 1/4 C buttermilk (or 1 1/4 c water if subbing buttermilk powder)
1 1/2 tsp. salt
1/4 C honey
1 T butter
1/4 C dry milk (increase to 1/2 c if using King Arthur's buttermilk powder)
1 1/2 C bread flour
1 1/2 C whole wheat flour (I use white whole wheat)
2 1/4 tsp. yeast

Add ingredients to your bread machine in the order recommended for your machine. Set to "white" and "medium crust."

Photobucket

DSC01184

Wednesday, October 31, 2012

Pumpkin Chocolate Chip Scones

Happy Halloween! At one point earlier this month I entertained the notion of making some sort of ghoulish cupcakes or muffins, but that just didn't happen. However, I did buy a pumpkin this year, not to decorate but to use for baking. These scones took exactly half of a small pie pumpkin.

Photobucket

Typically, I despise all pumpkin dishes from baked goods to savory pastas. I do, however, enjoy baking and cooking with pumpkin because I know I won't go nuts with the tasting. My various pumpkin creations over the years have included pumpkin chocolate muffins, pumpkin muffins with raisins, and a classic pumpkin pie. Originally, I had the notion of making some sort of ghoulish cupcakes or muffins. However, when I came across this recipe from Mommy Hates Cooking for chocolate chip pumpkin scones, I had to try it. I love scones, especially these, so even though there's pumpkin in the recipe, I was open-minded.

They're not bad. I know that's not the most roaring of endorsements, but I do mean to be positive. There's a little too much pumpkin in them for me as I can still taste it. There may not be enough of the flavor if you love pumpkins, but if you're somewhere in between they're just right. These scones are also more of a flatish muffin or cake than what I think of as a scone (which should be heartier than a muffin). I also think they're missing a texture piece and wish I would have added oatmeal or some nuts before baking. But that being said, they ooze with chocolate and are extremely moist. Conveniently, this recipe took exactly half of a small pumpkin so I have another half (a cup or so) to try another recipe if I'm so inclined. I followed the original recipe precisely except I swapped in 1 cup of whole wheat flour instead of using only all-purpose.

Pumpkin Chocolate Chip Scones
3 Cups Flour (you may use part whole wheat, part all-purpose flour, if desired)
1/2 Cup Sugar
5 Tsp Baking Powder
1/2 Tsp Salt
3/4 Cup Butter
1 Egg, Beaten
1 Cup Milk
1 Cup Pumpkin Puree
1/2 Tbsp Pumpkin Spice
1/2 Cup Chocolate Chips

Preheat oven to 400*.

In a large bowl combine flour, sugar, baking powder, and salt. Cream in butter and add egg, milk, pumpkin, and pumpkin pie spice.

Fold in chocolate chips.

The original recipe suggests turning the down out on a floured surface, kneading a bit, then cutting rolling into a circle and cutting into wedges 1/2" thick. I simply used my large muffin scoop.

Bake on parchment paper or a greased cookie sheet for 15 minutes or until browned.

Makes 12-16 scones.

DSC01188

Tuesday, October 30, 2012

Cornmeal Parmesan Pizza Dough

While visiting Chicago recently, my husband and I were astounded to learn that my mother-in-law had never tasted Giordano's pizza despite living in Chicago for over 30 years. She'd had deep-dish, of course, but never Giordano's which in my opinion is the best big-chain deep dish place in town. Naturally, we had to expose her to its delicious goodness.

Perhaps we had built her expectations too high but she didn't care for it. Crazy, I know! Her criticisms included that the Giordano's pizza had doughy crust, rather than the cornmeal one featured by a competitor who shall remain nameless. Even though I had tasted the competitor's pizza before and noted that the crust was different, it never registered in my mind what the difference was (other than that I preferred Girodano's deep dish). I also had never heard of a cornmeal crust, only that cornmeal was a popular dusting ingredient. Then I stumbled upon this recipe in the Better Homes and Gardens Bread Machine Cookbook, which I had checked out from the library, and had to try it. It was fantastic! The texture is crisper than my regular dough recipe and the Parmesan is subtle but definitely there. Though I am not sure that it will replace my regular recipe, I will definitely make it again in the future and likely start some sort of dough rotation on Pizza Fridays. :)

Photobucket

Cornmeal Parmesan Pizza Dough
1 c water
2 TBS olive oil
2.5 c bread flour
1/2 c cornmeal
1/2 c grated Parmesan
3/4 tsp salt
1 tsp active dry yeast

Add ingredients in the order recommended for your bread machine. Set to dough cycle.

For thin-crust pizza, divide dough into desired portions and roll or pull to 1/4-1/2" thickness, depending upon your preference. Grease pan. Pre-bake in 425 degree oven for 10 - 12 minutes or until lightly browned. Add toppings and bake for another 10 -15 minutes until crust is golden brown and cheese is bubbly.

For thick-crust pizza, shape into a 13-14" pizza. Cover and rise for 30-45 minutes or until nearly double. Pre-bake in 375 degree oven for 20-25 minutes or until lightly browned. Add toppings and bake for another 15-20 minutes or until topping is bubbly.

Makes two 11-12" thin-crust pizza or one 13-14" thick-crust pizza.

Photobucket

Photobucket

Monday, October 29, 2012

Creamed Chicken and Rice with Broccoli

Some 20+ years later, I still remember my very favorite dish from my elementary school's cafeteria. It was called "creamed chicken and rice" and was basically just that-chicken over white rice, sans vegetables and probably as laden in fat as you can get for the cream sauce. But it was sooo good and I looked forward to it whenever it appeared on the menu. My version here has zero cream in it or cheese, but it was pretty darn good. If you'd like, throw in a handful of grated Parmesan and use any sort of milk/cream product you prefer.

Photobucket

Creamed Chicken and Rice with Broccoli

2 c cooked brown rice (or 1 c uncooked rice and 2 and a splash c broth)
2 c broccoli florets
2 c milk
3 tbs butter
3 tbs all purpose flour
1 medium onion, diced
3-4 cloves garlic, minced
1.5 lb chicken breasts, cut into small cubes
salt, pepper,olive oil

Cook rice however method you prefer (I used my ricecooker.

In a small sauce pan, make a roux by melting butter then whisking in flour. Cook for a minute or two. Whisk in half cup of cold milk and whisk briskly until all the lumps are gone. Stir in remaining milk. Cook on medium low until thickened, stirring frequently, about 10-15 minutes. Salt and pepper to taste. If desired, add half cup of Parmesan or Parmesan-Reggiano cheese in the last few minutes.

While the sauce is thickening, in a high rimmed skillet or another pot, saute onion in olive oil until beginning to soften. Add chicken, garlic, and sprinkle with salt and pepper. Saute until chicken is cooked through. At this point, I noticed that there was a fair amount of liquid so I tossed the broccoli on top and covered the pan loosely. Cook until the broccoli is tender and the liquid has mostly evaporated.

Add rice to veggie mixture. Pour in sauce and stir until well-combined. Cook for a minute or two, then adjust seasoning to taste.

Serves 4.

Thursday, October 25, 2012

Roasted Sweet Potato and Black Bean Burritos

Photobucket

I adore roasted sweet potatoes and black beans, as well as burritos, so when I came across this recipe from The Tasty Kitchen for a dish that put all three together, plus more yummy veggies such as red bell peppers and red onions, I had to try it. It most decidedly did not disappoint. Healthy and fantastically flavorful! The roasting process brings out the sweetness in the veggies and the ones in this dish really complement each other.

A few notes on what I did differently from the inspiring recipe. First, it called for 2 jalapenos but being the timid sort, I only used one unseeded. The heat was minimal, so I might try using more in the future. I also omitted the finishing ingredients of a squirt of lime juice and cilantro because I didn't have either on hand. I didn't miss their flavors, but you could certainly add them if you'd like. Definitely a tasty meatless dish that's probably reasonably healthy for you since sweet potatoes and red peppers are loaded with vitamins and the beans provide protein and healthy fiber.

This recipe makes a lot depending upon how much filling you include in each burrito. I think I make pretty generous portions but still had enough filling for five big burritos, two salads, and a whole lot of a tasting.

2 whole Sweet Potatoes, peeled and cubed small
2 whole Jalapenos Diced
1 whole Red Pepper, Diced Small
1 whole Red Onion, Diced Small
2 teaspoons Olive Oil
1 teaspoon Cumin
1 teaspoon Chili Powder
1 pinch Salt And Pepper
1 15-oz can Black Beans, Rinsed And Drained
2 cups Shredded Cheddar
6-8 Burrito-Sized Wheat Tortillas
Handful of cilantro and juice of 1/2 a lime, if desired.

Preheat oven to 425 degrees. Toss veggies in olive oil and spices. Roast for 20 minutes, tossing halfway through.

In a large bowl, combine roasted veggies, black beans, cilantro and lime juice if using. Once cooled, this mixtures may be stored for later use.

Preheat oven to 375 degrees. Spray a baking dish large enough to hold all your burritos.

Warm tortillas before filling. Fill with 2 heaping tablespoons of the veggie-black bean mixture. Sprinkle with cheese. To fold the burrito, fold the sides in first, then close the roll. Place fold-side down in the baking dish. I sprinkled mine with leftover cheese. Bake for 10-15 minutes or until golden brown.

Photobucket

Makes about 6 burritos.

Wednesday, October 24, 2012

Naan (Breadmaker)

Since I plan on trying another recipe this evening, I figured I'd better get this one up. Taken from my favorite bread machine cookbook, The Bread Machine Bible, this recipe was quite tasty (there were no leftovers to photograph) but a tad blander than what I've enjoyed at happy Indian or Middle Eastern restaurants. It also didn't brown much before I worried about burning the bottom so it could have been less chewy. Finally, the yogurt component makes whipping this recipe up on a whim possibly challenging as I don't always have plain yogurt on hand. All in all, this is a nice and easy recipe that I would try again. (The recipe I plan to try this evening requires just milk, so I'll report back with the comparison hopefully in the near future.)

Naan (bread machine recipe)

1/2 c milk, room temperature
4 TBS plain yogurt, room temperature
1 TBS oil (I used canola)
2 c + 2 TBS bread flour
1 tsp salt
1 1/2 tsp sugar
1 tsp instant dry yeast
3 TBS melted butter for brushing

Add all ingredients except melted butter in the order called for by your bread machine. (mine is in the ordered listed). Set to "dough" cycle.

When dough is ready, divide into 4 portions. On a floured surface, roll into oval shape at 1/4" thick and 9" long. Cover and let rise for 15 minutes.

Preheat oven to 450 degrees with two large cookie sheets or a pizza stone in the oven.

Place dough on preheated pans and brush with butter. Bake for 10-12 minutes until golden brown. Serve warm.

Makes 4 large breads.

Tuesday, October 23, 2012

Indian Butter Chicken

I enjoy Indian food, but for whatever reason do not have very many recipes in my repertoire. Thus, when I came across this recipe at Mel's Kitchen Cafe I had to try it. In general, the dish was very yummy but I thought it a bit heavy on the ginger. The original recipe called for jalapeno which I didn't have so I omitted--perhaps that would have offset the ginger but since I'm not much of a ginger person in general, I'll likely half the amount the recipe calls for when I make this again.

Uploaded from the Photobucket iPhone App

1 medium yellow onion, diced
1 tablespoon fresh ginger, finely chopped
2 cloves garlic, finely minced
1 jalapeño, seeded, and finely chopped
1 tablespoon canola oil
2 teaspoons garam masala
1 teaspoon chili powder
1 teaspoon cardamom
1/2 teaspoon coriander
6 oz tomato paste
2 cups chicken broth
1/2 cup fat free half-and-half
1 1/2 pounds boneless, skinless chicken breasts, cut into 3/4-inch chunks
1/2 teaspoon black pepper
1 teaspoon salt
3 tablespoons butter

In a large 12-inch skillet, heat the oil over medium heat until hot. Add the onion, ginger and jalapeno. Cook until the onion is translucent, about 4-5 minutes. Stir in garlic, garam masala, chili powder, cardamom, and coriander. Cook while stirring for another minute.

Using a stick blender, puree the mixture until smooth. Mix in tomato past and broth. Pour the sauce back into the skillet and add the half and half. Bring the mixture to a simmer over medium heat and add the chicken pieces and the salt and pepper.

Keep the sauce at a simmer, stirring occasionally, and cook for 10-15 minutes, until the chicken is cooked through and the sauce has slightly thickened.

Stir the butter into the sauce until melted. Serve the chicken and sauce over hot rice, preferably jasmine.

Leftover sauce goes great with naan. (Recipe to come!)

Uploaded from the Photobucket iPhone App

Monday, October 22, 2012

Summer Vegetable Minestrone

As the crisp, cool weather of fall rolls in, I'm starting to think soup. However, since the markets are not entirely devoid of summer veggies (e.g. zucchini, yellow squash, colored peppers, etc.) and since I had quite a few veggies that were aging, last week I decided to whip up a quick vegetable minestrone. (Note: Most minestrone soups have beans, but I wasn't in the mood. However, this would be great with some northern or navy beans.) Though I looked at quite a few recipes, I really just threw everything in a pot and kept seasoning until it tasted good.

Photobucket

Here's more or less the ingredients used:

1 medium onion, diced
3 carrots, diced
2 cloves garlic, minced
1 medium zucchini, diced
1 medium colored bell pepper (red, yellow or orange preferred)
1 c mushrooms, diced
14.5 oz diced tomatoes or 4-5 roma tomatoes
1/2 c shells
4 c chicken broth
1-2 c water
1/2 tsp dried oregano*
1/4 tsp dried basil*
1/2 tsp dried parsley*
1-2 tsp salt
fresh ground pepper
olive oil
*I eyeballed the measurements. Alternatively, use 1 tsp Italian Seasoning.

Saute onions and carrots in olive oil until tender. Add mushrooms and cook until liquid has evaporated.

Add remaining ingredients and bring to a boil.

Cover and simmer on low for 20 minutes or until pasta is tender.

Photobucket

Monday, October 15, 2012

Menu Plan for Week of October 15th

During the last week of August, I made a 30-day menu plan. It was more of a list of 30-some odd meals which relied on tried and true recipes and utilized what I had in my freezer. The intent was that each week I'd go through the list and select a week's worth of meals. Though I only posted the weekly menu three times, I more or less relied on this master list for about 6 weeks, which included leftovers and a few spontaneous dishes that weren't in the plan. All and all it was a decent success as I made at least 75% of the dishes listed. It was so handy to always have an idea as to what to make for dinner and a quick resource to make my shopping list. Plus, I cleaned out the vast majority of my freezer stash paving the way to restock with goodies for fall and winter.

It is my intent to make another 30-day list, however I don't really have the time at the moment. Thus, I'm going to share what I have so far for this week. Since last month relied heavily on familiar recipes, I will incorporate some of them, particularly with stuff that will likely stock the freezer for lunches, but also some new recipes that have been lurking on my Pinterest board waiting to be tried. You'll note that the list includes tons of chicken and a few meatless dishes. That's because we just returned from visiting my husband's parents where it's red meat, red meat, and red meat.

Here's what I'm thinking about for this week:

Monday - Slower Cooker Shoyu Chicken, broccoli, and brown rice

Tuesday - Indian Butter Chicken with naan (breadmaker) and zucchini

Wednesday - Roasted Veggie and Black Bean Burritos

Thursday - Baked Plum Chicken

Friday - Taco Salad, Nachos or Pizza

Saturday - Roast Chicken with Paprika and Shallots, mashed potatoes, and tossed salad

Sunday - Unstuffed Bell Peppers

I also want to make some Potato Cheddar Soup, French bread, and vanilla yogurt for lunches this week.

Sunday, October 7, 2012

Lamb Lettuce Wraps

Though it seems that fall has finally arrived, I thought I'd share a dish we enjoyed in August--lamb lettuce wraps. Though I often enjoy lettuce wraps when dining out, especially for Thai food, I never think to make them at home. This recipe appeared in the August 2012 Cooking Light caught my eye, so I decided to try it. Other than omitting mint and using butter lettuce instead of Boston lettuce, I followed the recipe precisely. The result was very tasty, though I recommend that you accompany it with a hearty side dish or treat it as an appetizer when serving a meal. I paired it with toasted tortillas, but we were still a bit peckish later.

DSC00771
Apologies for the terrible pictures. I was too hungry to make sure they were actually in focus.

Ingredients
2 teaspoons canola oil
1 cup finely chopped onion
2 teaspoons minced fresh garlic
1 teaspoon ground cinnamon
3/4 teaspoon kosher salt
1/4 teaspoon freshly ground black pepper
6-8 ounces lean ground lamb
1/2 cup chopped fresh parsley
1/2 cup chopped tomato
1/2 cup chopped cucumber
1/4 cup plain fat-free Greek yogurt
1/4 cup hummus, red pepper recommended
8 lettuce leaves, Boston lettuce recommended
2 tablespoons torn mint leaves (I omitted)
1 tablespoon pine nuts, toasted

Directions
Heat a large skillet over high heat. Add oil to pan; swirl to coat. Add onion and next 5 ingredients (through lamb) to pan; sauté 5 minutes or until lamb is done.

Combine parsley, tomato, and cucumber in a medium bowl. Stir in lamb mixture.

Stir together yogurt and hummus in a small bowl.

Place about 1/4 cup lamb mixture in each lettuce leaf. Top each wrap with 1 tablespoon hummus mixture. Divide mint and pine nuts evenly among wraps.

4 servings, 2 wraps each

Photobucket

Monday, September 24, 2012

Risotto Primavera

I finally made risotto by myself!!! It's one of my auntie's specialties and I've seen her make several varieties many times, but I've always been intimidated of making the dish on my own. It was about time that ended. While browsing my food blogs, I stumbled across this recipe from Ree at the Pioneer Woman. With a veggie drawer full of goodies, I decided to try it. For the most part, it was a roaring success and my husband and I both had several portions. It took exactly 5 cups of broth, although I will reduce the wine in the future as the flavor was too strong. (Ree's recipe calls for 1.5 cups of wine; I reduced that to 3/4 cup but that was still too much.) Also, I used all Parmesan cheese instead of half goat cheese.

Here's the recipe as I plan to make it next time. Yes, there will be a next time.

Photobucket

Ingredients
5 cups Low Sodium Chicken Broth
1/2 whole Large Yellow Onion Finely Diced
3 whole Carrots, Peeled And Finely Diced
1 Zucchini or Yellow Squash, Finely Diced
1 cup Mushrooms, Finely Diced
1-1/2 cup Arborio Rice
1/2 cup Dry White Wine
Butter, Olive Oil, Kosher salt
1 cup Grated Parmesan Cheese
Optional Vegetables To Substitute For Any Of The Above: Broccoli, Cauliflower, Red Bell Pepper, Zucchini, Asparagus Pieces

Directions
Pour chicken broth into a small saucepan. Heat to a simmer.

In a large Dutch oven, heat 2 tablespoons olive oil and 2 tablespoons butter. Add diced onions and diced carrots. Stir and cook for a minute or two. Add rest of veggies in order of decreasing tenderness. Sprinkle in salt and stir. Remove from pan and set aside.

Add 1 tablespoons olive oil and 1 tablespoon butter to the same pan. Heat over medium-low heat. Add rice and stir, cooking for 1 minute. Add half the wine and 1 1/2 teaspoons kosher salt. Stir and cook until liquid is absorbed. Over the next 30 to 45 minutes, add 1 cup of simmering broth at a time, stirring and cooking until each addition of broth has absorbed. Add other half of wine and cook until absorbed.

Taste to make sure rice is the right texture. It should not be mushy. Add another helping of broth if rice has too much bite to it. Check seasoning.

Once rice is cooked, remove from heat. Stir in cheese and vegetables until all cheese is combined.

Photobucket

Serves 4-6