Thursday, September 30, 2010

Xmas Mini Album Cover

Last night, I showed a pictured of things I was thinking about putting on my cover. Well, that didn't happen, as you can see. To be fair, I did buy all of these trimmings at the same time, but when laying out the cover, I decided that the penguin looked more appropriate than the snowman ornament and that the green spring looked better than the silver. What this means is that I still have the snowman ornament, silver sprig, and many more stars to use on another mini album. I can't wait to get more holiday paper. The Imaginisce paper I ordered from Custom Crops is still backordered! I'm hoping to get the Very Merry collection from October Afternoon and the Echo Park Everybody Loves Christmas as soon as I have time to work on a new project.

Photobucket

Since the gingerbread tags are so tall, the little heads will stick out, which I think is super cute.
Photobucket

Photobucket

Photobucket

I found all the trimmings in the Christmas section at my local Michaels, except for the buttons, which were in the dollar bin.

Wednesday, September 29, 2010

Xmas Mini Album In Progress

Here are some of the tags for my mini album. The gingerbread men are found on From My Kitchen and the peppermints are on Simply Charmed.

Photobucket

Photobucket

The snowflakes are from Don Juan and were welded to a 4 x 1.25" strip using my Gypsy.
Photobucket

Here are a few things that I am thinking about for the cover.
Photobucket

Check back for more tomorrow!

Tuesday, September 28, 2010

Butternut Squash Soup with Caramelized Onions

This recipe is slightly similar to my Butternut Squash and Leek Soup that I made last November, but I mixed it up by using a red onion and tarragon and sage. Those herbs were chosen by smell frankly because I discovered I was out of thyme and wanted something woodsy, but not as harsh as rosemary. I really liked the combination. You could omit the milk, if desired, or up the creaminess by using a higher fat milk product.

Photobucket

Photobucket

Printable version

Ingredients
1.5-2 lbs butternut squash
2 large onions (I used one red and one sweet), sliced (about 3 cups)
48 oz chicken broth
4 cloves garlic, minced
3/4 c milk of choice (I used 2%)
1 tsp dried sage
1/2 tsp dried tarragon

Directions
1. Preheat oven to 375 degrees. Cut in half and de-seed butternut squash. Salt and pepper insides. Roast face-down on a cookie sheet sprayed with cooking spray until tender, about 45 minutes.

2. Meanwhile, saute onions, tarragon, and sage in olive oil slowly over medium-low heat until nearly caramelized. This step is up to you as the more-caramelized, the sweeter the result. I took my onions about 80% of the way towards caramelization so they were not completely mushy.

3. Add garlic and butternut squash. Cook for 1-2 minutes.

4. Add chicken broth and bring to a simmer. Simmer for 20 minutes.

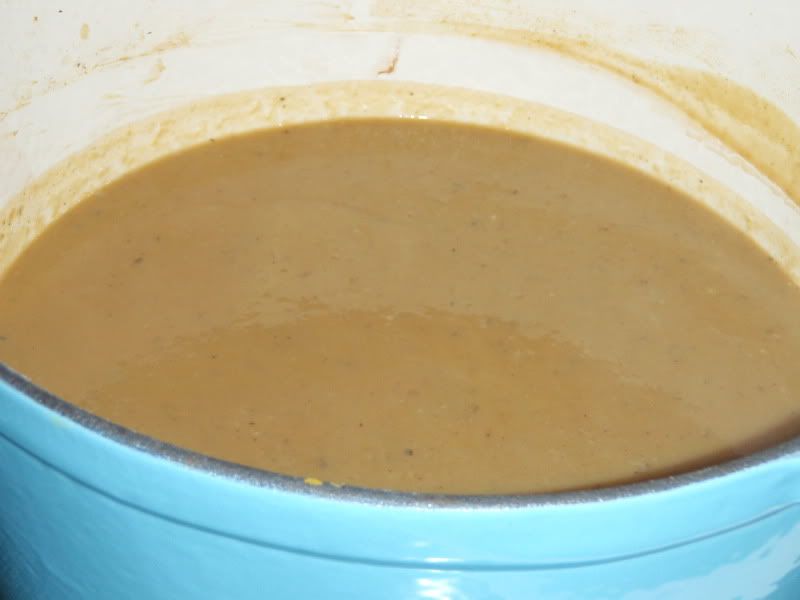
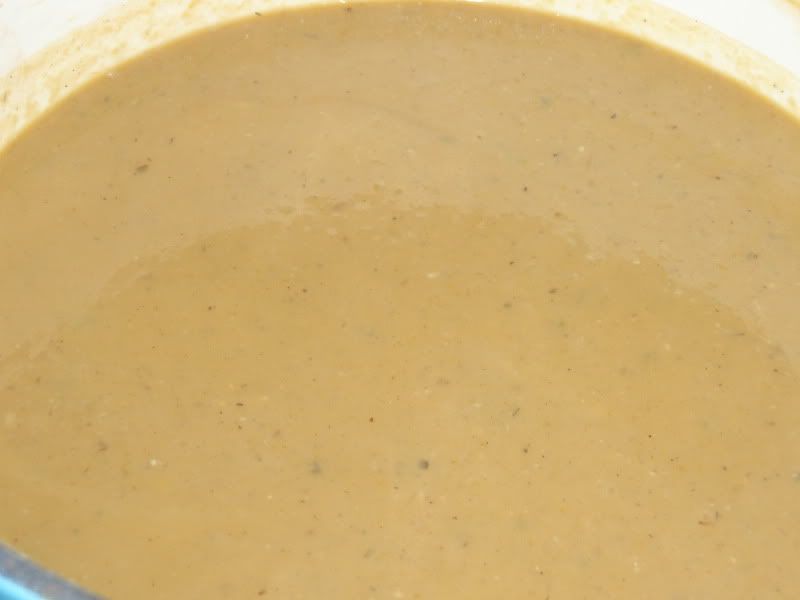
5. With an immersion blender, puree the mixture until it reaches the desired consistency.

6. Stir in milk and adjust seasonings to taste.

Serves 6 (roughly 1.5 cup portions)

Monday, September 27, 2010

Roasted Tomato-Turkey Meat Sauce

It's shocking, but I actually cooked two new recipes in a row! Since I've been on a huge papercrafting kick, I haven't been experimenting with new recipes or cooking more than a couple times a week (and eating leftovers or salads for the balance of the week). While neither the recipe below, nor the one scheduled for tomorrow is terribly novel or exciting, both are comfy foods for crisp fall weather. The secret to this hearty pasta sauce is the roasted tomatoes, which I purchased at Whole Foods.

Photobucket

Printable Version

Ingredients

12 oz ground turkey
2 medium onions, diced
3 cloves garlic, minced
28 oz can whole fire roasted tomatoes
6 oz can tomato paste
1/2 tsp dried oregano
1 tsp dried basil
1/4 tsp crushed red pepper, or to taste
salt, pepper, olive oil

Directions

1. Saute onions in a medium sauce pan until tender.

2. Add ground turkey, sprinkled with salt, pepper, and minced garlic. Use a spatula to break up meat. Cook until browned and liquid is mostly evaporated, about 10 minutes.

3. Chop whole tomatoes, reserving juices. Add tomatoes, juices, tomato paste, and crushed red pepper to meat.

4. Simmer for 15-20 minutes to all tomatoes to break down.

5. Adjust seasonings to taste. Serve over your choice of pasta with a sprinkle of parmesan or parsley.

Serves 4-6

Halloween Day 11: Candy Pumpkin

Here's another simple Halloween card. I picked up an awesome ribbon packet by Recollections at Michaels yesterday and this sequin trim is one of 4 or five different ones ranging to crushed velour to a popcorn type, three yards each. Look for more ribbons later this week. I got this little die cut last year, so it was fun to bring it out.

Photobucket

Photobucket

Materials:
- Paper: A2 card base - Papertrey Ink cardstock, K&C "Halloween Tim Coffey" cut at 4 x 5.25" and 4x4"
- Cartridge(s): Gypsy Wandering (pumpkin cut at 4")
- Embellishments: Recollections trim, K&Co sticker
- Adhesives: Pink ATG gun, glue dots, Xyron
- Special Tools: Scor-Buddy, mini-pumpkin punch, Cuttlebug 2 x 2" die, white Sakura gel pen

Sunday, September 26, 2010

Another project in the works

Here's what I worked on last night. It's a Christmas mini-album using paper I had leftover from last year. I hope to finish it this evening or later this week. I'm still not sure what I will put on the cover, but have plans to decorate the pockets with Cricut cuts (snowflakes, reindeer, ornaments, trees, etc). I used Laura's technique for an accordion binding in the middle; you can find the tutorial on her blog, Following the Paper Trail. I changed it slightly in that I adhered my pages to the binding, rather than using what she calls "pressure-fit" or something which allows the pages to be removable. I'll describe my changes in detail later, especially after I see whether it's sturdy. Hopefully you can't tell that I messed up and did a patch job or two. This book will likely be just for me, so I can experiment as I choose. Last night I got all the pages and pockets assembled. Now I need to work on tags and decorations.

Photobucket

Two pictures of the binding and lining.
Photobucket

Photobucket

There are seven pages made of No. 10 envelopes.
Photobucket

You can see a pocket on the left.
Photobucket

There's plenty of room to fill it up with tags and embellishments.
Photobucket

Saturday, September 25, 2010

More Bats Cards

I am working on a new project, but I did whip up two more of the bat cards like I posted on Friday. They are each slightly different and I used a different stamp from My Pink Stamper "Spooky Puns" set. Also, I did not have any more of the moon and stars paper, so had to adjust. Thanks for visiting and have a great weekend!

Photobucket

Photobucket

Photobucket

Friday, September 24, 2010

Halloween Day 10: Batty for You

Happy Friday! It's a wet and rainy morning in Chicago, which is actually weather I enjoy. Next to snow, rain where the temperature is higher than the 60s is my favorite weather. Anyway, here's another shape card made using my Gypsy that will fit in an A2 envelope. It took me awhile to work out the measurements, but now that they're all done, I will likely make a few more of this one because he's so cute! I colored his eyes using a red Copic marker, but may try using stickles next time. Originally I was going to put the tag near the bottom of the card on the ribbon, but its current location will help keep the card closed...I just hope its recipient realizes that it opens.

Photobucket

Photobucket

Photobucket

Materials:
- Paper: Papertrey Ink and Recollections cardstock, K&C "Halloween Tim Coffey" mat cut at 5 3/8 x 3"
- Cartridge(s): Simply Charmed (bat cut at about 3.75" and welded to a 5.5 x 4.25" rectangle), Don Juan (tag cut at 1.5")
- Stamp: My Pink Stamper "Spooky Puns" stamped using Memento ink
- Embellishments: square brad, PaperTrey Ink ribbon
- Adhesives: Pink ATG gun, Zig two-way glue pen, glue dots
- Special Tools: Scor-Buddy, 1" circle punch

Wednesday, September 22, 2010

You're Fabulous Dress

I sent this card to my sister-in-law who had a death in her family. It's more of a "thinking of you" or "cheer up" card than a sympathy card and will hopefully brighten her day. The title of this post refers to the suggested sentiment on the cartridge. She likes to sew and make clothes, so this image spoke to me. She isn't a girly-girl, but I wanted something bright. Hope she likes it.

Photobucket

Materials:
- Paper: A2 card base, mat cut a 4 x 5.25", K & Co (Citronella) and a DCWV paper collection from my stash
- Cartridge(s): Gypsy Wanderings (dress cut at 4")
- Embellishments: gems, pearl accents
- Adhesives: Pink ATG gun, Zig two-way glue pen
- Special Tools: Scor-Buddy, MS Lace punch

Tuesday, September 21, 2010

Sixth Recipe Box

Yay! All the recipe boxes are assembled. I apologize for the delay in posting this. As I may have mentioned, I ran out of Scor Tap and had to wait until my order from Custom Crops arrived. Now all I have to do is decorate and select recipes, recipe cards, and pictures. While that will be time consuming, once we have the 8 recipes and pictures selected, it will be relatively quick to assemble that part. As for decorating, I can do as much or as little as I want and the boxes will still be cute because of the apron and the papers.

Photobucket

Photobucket

Photobucket

Photobucket

Darn, I forgot to take a picture of the back. Oh well, I'll make sure to add that later once the boxes are more complete.

Thanks for visiting my blog!

Chocolate-Peanut Butter Cookies

Here's a recipe that I found on the back of a Hershey's Special Dark bag of chips. I modified it slightly to make it more interesting and slightly healthier. I was initially worried about so much butter and so little rising agent, but they came out just fine. They're definitely firmer cookies, which I like. Be careful not to overcook, as I imagine they would get hard.

Photobucket
Printable Version

1 c butter, softened
3/4 c brown sugar
3/4 c granulated sugar
1 egg and 2 egg whites
1 tsp vanilla
1 c whole wheat flour
1.25 c all-purpose flour
3/4 tsp salt
1 tsp baking soda
1/2 c peanut butter chips
1/2 c chocolate chips
1/2 c nuts, if desired

1. Preheat oven to 375.

2. In a separate bowl, sift together flours, salt, baking soda. (This step probably is not necessary, but I was in a sifting mode).

3. In the bowl of your stand mixer or other mixing bowl, cream together butter and sugars. Add eggs and vanilla. Beat until fluffy.

4. Slowly incorporate wet and dry mixtures.

5. Add in chips and nuts, if using.

6. Using a cookie scoop about 1 - 1.5 TBS in capacity, drop dough onto cookie sheet covered in parchment paper about 2 inches apart.

7. Bake 8-10 minutes, until nicely golden brown.

8. Allow to cook on cookie sheet for 2-3 minute before transferring to a wire rack to cool completely.

Makes 4 dozen 2 inch cookies.
Photobucket

Monday, September 20, 2010

Welcome Baby

I'm a couple of weeks overdue, but here's a baby card for a friend of my husband's family. She had her first baby, a boy about a few weeks ago. This is my fourth easel card and making it with PaperTrey Ink cardstock makes a huge difference in its sturdiness. Out of caution, I added an extra stamp because it seemed extra heavy. This dies cuts are from Simply Charmed, which is my favorite new cartridge (at least for the month of September).

Photobucket

Photobucket
Before mailing, I remembered to add the dot in the "i"


Materials
:
- Paper: Papertrey Ink cardstock, American Crafts "Everyday Salut", Recollections cardstock and pattern paper, DCWV glitter cardstock
- Cartridge: Simply Sweet (baby buggy cut at 3.5", sentiment cut at 1.5")
- Stamps: Peachy Keen Stamps "Basic Paper Doll Faces"
- Embellishments: buttons, ribbon
- Adhesives: Pink ATG gun, Zig two-way glue pen, glue dots, Xyron
- Special Tools: Scor-Buddy

Sunday, September 19, 2010

Halloween Day 9: The Greeting Farm Shedevil

Sorry for the late post. I spent the night at my in-laws last night and neglected to bring my digital camera. Today's card features the other new Halloween digi that I bought last week from The Greeting Farm. I used this Saturday Sketch from Club Anya. I'm a fourth to a third there of the cards I want to make for Halloween. Fortunately, I still have a few weeks to go.


Photobucket

Photobucket

Photobucket

Materials:
- Paper: A2 card base (PaperTrey Ink), Recollections paper and cardstock cut at 4 x 5.25", 3.5 x 1.5", and 4 x 3"
- Stamp: The Greeting Farm "Shedevil"
- Embellishments: buttons, ribbon from PaperTrey Ink
- Adhesives: Pink ATG gun, Zig two-way glue pen, glue dots
- Special Tools: Scor-Buddy, Fiskars "Apron Lace" punch

Saturday, September 18, 2010

Chocolate-Chocolate Muffins

Sorry for the lousy pictures. Once again, I forgot to take pictures before I bundled up the goodies and took them to work. Thus, these were shot in the office with my Iphone. I wanted to make something decadent for a Friday treat. It was also my co-worker's last day, so something a little more special was required. This recipe is adapted from one I clipped from a British Mag called Fresh. I have no idea when I clipped this recipe.

Photobucket
Printable Version

Ingredients
250 g all-purpose flour
25 g cocoa powder
4 tsp baking powder
150 g granulated sugar
6 oz skim milk
1 egg and two egg whites, slightly beaten
100 ml (3.5 oz) canola oil
1/2 c chocolate chips (plus an extra handful, if desired)

Directions
1. Preheat oven to 375 degrees.
2. Sift dry ingredients together.
3. Using a hand mixer or stand mixer, mix together wet and dry until you have a fluffy cake batter mixture. I use a spatula to wet all the dry ingredients, then turned the mixer on a higher speed for about 15 seconds.
4. Pour into a prepared muffin pan--6 big muffins or 12 regular.
5. Bake for 25 minutes, then check for springiness or with a toothpick.
6. Cool for 5 minutes in tins, then completely on a wire rack. Before removing from tin, I decorated the muffins with a few chips. After the chips had melted, I used a knife to smear the chocolate for a glaze.

Makes 6 large muffins or 12 regular muffins.

Photobucket

Halloween Day 8: Ghost Shape card

Happy Saturday! Here in Chicago, it's dark and gloomy with intermittent showers. Perfect sleeping or crafting weather. Unfortunately, I have to go out very soon. Oh well, before I go, here's an easy little shape card for Halloween. I'm hoping to finish a good chunk of my Halloween cards this weekend, so I can send them out in early October. I used the Simply Charmed cartridge and my Gypsy to make an A2 sized card.

Photobucket

Photobucket

Materials:
- Paper: Recollections cardstock (glossy and plain)
- Cartridge(s): Simply Charmed (ghost cut at 5, flipped and welded), Alphalicious (or any basic shape) (rectangle cut at 2 x 4.25 and welded to the ghost)
- Stamp: My Pink Stamper "Spooky Puns" stamped using Studio G white pigment ink
- Embellishments: buttons, hemp
- Adhesives: Pink ATG gun, Zig two-way glue pen, glue dots
- Special Tools: Scor-Buddy

Friday, September 17, 2010

New Job Card

I definitely need to work on masculine cards that are not cute animals. This was my most recent attempt and I'm not overly taken with it. I used Simply Charmed and attempted to make the shirt and tie look like a suit and tie, but didn't want to go too overboard with the jacket. I'm thinking of making a whole mini album that consists of nothing but boy garb (a suit, sweater, polo, dress shit) so perhaps once I start working on that I'll learn how to convert it to a card. I left the inner shirt plain and wrote on the top in white gel pen. This card will fit in an A2 envelope.

Photobucket

Photobucket
Inside

Materials:
- Paper: Paper Trey Ink, Recollections (glossy and plain cardstock, pattern paper)
- Cartridge(s): Simply Charmed (shirt and tie cut at 5" and welded to 5.5 x 4.25" card based)
- Embellishments: buttons
- Adhesives: Pink ATG gun, Zip Quick Dry glue, glue dots
- Special Tools: Scor-Buddy, Corner Chomper


Photobucket

Thursday, September 16, 2010

Halloween Day 7: The Greeting Farm "Hallo Witch"

As you may know, the Greeting Farm released their new line of Halloween stamps Wednesday morning. I couldn't wait and ordered a couple first thing, even before having my coffee. What is great about them is that they're digitals ("digis"), which means that you print them directly from your computer. While I prefer physical stamps to digis most of the time, these were so cute that I really appreciated the instant gratification. (They're also cheaper, too). I assume that these images will only be digis since it is rather late in the Halloween card-making season and most rubber stamps shipped soon after CHA, but who knows?

Here's my first Halloween card since last month. Of the the set of new stamps, she's my favorite. Don't worry, I'm still working on the last recipe box and will hopefully have it up on Friday or Saturday.

Photobucket

Photobucket

Materials:
- Paper: A2 card base in kraft card stock, 4 x 5.25" pattern paper - Recollections "Time Frame," leftover strips of paper from the K & Co "Halloween Tim Coffey".
- Stamp(s): The Greeting Farm "Hallo Witch", colored with Copics; My Pink Stamper "Spooky Puns" stamped with Colorbox chalk ink.
- Embellishments: hemp, buttons
- Adhesives: Pink ATG gun, glue dots
- Special Tools: Scor-Buddy

Wednesday, September 15, 2010

Fifth Recipe Box

Sorry for the late post. I had finished this yesterday morning, but neglected to schedule the post. One more box to go, then all will be left is the decorating.

Photobucket
Front

Photobucket
Inside

Photobucket
Profile

Photobucket
Back