Sunday, December 14, 2014

MS Simple Waffles - doubled and updated!

I've had this recipe for simple waffles from Martha Stewart on my blog now for nearly two years. It was one of several waffle recipes that we enjoyed, but I never really had a go-to recipe. Recently, I had a craving for breakfast for lunch and decided to give these waffles another try. I loved them! Perhaps it's because the original recipe makes such a small batch (10 thin toaster-sized waffles) or maybe because the flavor is hearty and not too sweet, but I promptly mixed up several bags of mixes using this recipe for my pantry. Though it was handy not to have to whip up a ton of waffles for a quick lunch for my older son and I, for breakfast for a family of (even though one little is just starting solids), the quantity just isn't enough to feed us. Plus, that's a lot of butter in the original recipe. Thus, here's a tasty and somewhat healthier version perfect for family weekend breakfasts.

MS Simple Waffles (doubled)
2 cups white whole wheat flour
1/4 cup sugar
2 teaspoons baking powder
1/2 teaspoon salt
2 cups milk
4 large eggs
4 tablespoons butter, melted
1/4 cup apple sauce

Preheat waffle iron.

In a large bowl, whisk together dry ingredients and set aside.

In a small bowl, whisk wet ingredients. Pour wet over dry ingredients and gently combine but do not overmix.

Pour into greased waffle maker and cook until golden brown.

Makes about 20 single waffles

Sunday, November 16, 2014

Fresh Tomato Sauce

As summer is well over and fall is rushing towards winter, I figured I would post my favorite recipe for tomato sauce using fresh tomatoes today. Makes sense, huh? Actually, I was thinking of making pizza for dinner and remembered that we have some of this wonderful sauce leftover in the freezer. It also reminded me that I neglected to post this recipe despite making it several times over the course of the summer thanks to the abundance of tomatoes in my CSA share. Oh well.

This recipe is adapted from one I found at Oh She Glows. It calls for oil-packed sun-dried tomatoes as the secret ingredient, but I never have those on hand. Instead, I substituted tomato paste and added some balsamic vinegar and brown sugar. Yummy! I'm not sure whether it's due to the chunky freshness of the tomatoes, but it's definitely amore vibrant sauce than my go-to marinara sauce made from canned tomatoes in the slow cooker. I've used big tomatoes, cherry tomatoes, grape tomatoes and a combination thereof all with great success.

Sorry for the lack of pictures. One of these days I'll get back in the groove of food blogging but this will have to do for now....

Fresh Tomato Sauce
1 tbs extra-virgin olive oil
1 medium yellow onion, diced (about 1 cup)
2 large garlic cloves, minced
3 large tomatoes, seeded and diced (about 3 cups diced)
1 tsp dried basil
1/2 tsp dried oregano
1/4-1/2 tsp fine grain sea salt, to taste
Freshly ground black pepper, to taste
Pinch of crushed red pepper flakes
1 TBS balsamic vinegar
2 tsp brown sugar
6 oz regular tomato paste (or 1-2 tbs of high quality tomato paste)

Saute onion in olive oil in a medium pot over medium heat for about 5 minutes, until the onion is translucent. Add garlic and cook for a minute. Season with salt and pepper.

Stir in the diced tomatoes and increase heat to high-medium to bring to a low boil. When the mixture boils, reduce the heat to medium and simmer for about 15 minutes, uncovered, until most of the water cooks off.

Stir in tomato paste, basil, oregano, crushed red pepper flakes, balsamic vinegar, brown sugar, and a bit more salt and pepper. Cook on medium-low for another 10-15 minutes, stirring occasionally. If desired, using a hand blender puree until the texture is to your liking.

Enjoy with your favorite pasta or homemade pizza.

Saturday, October 11, 2014

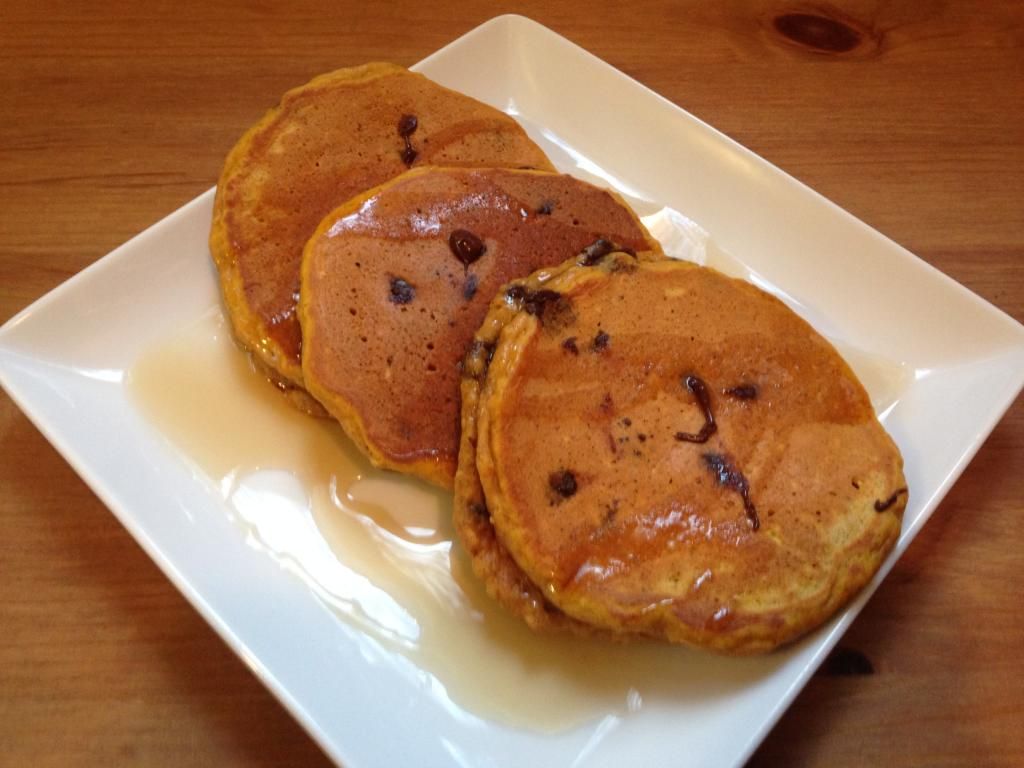
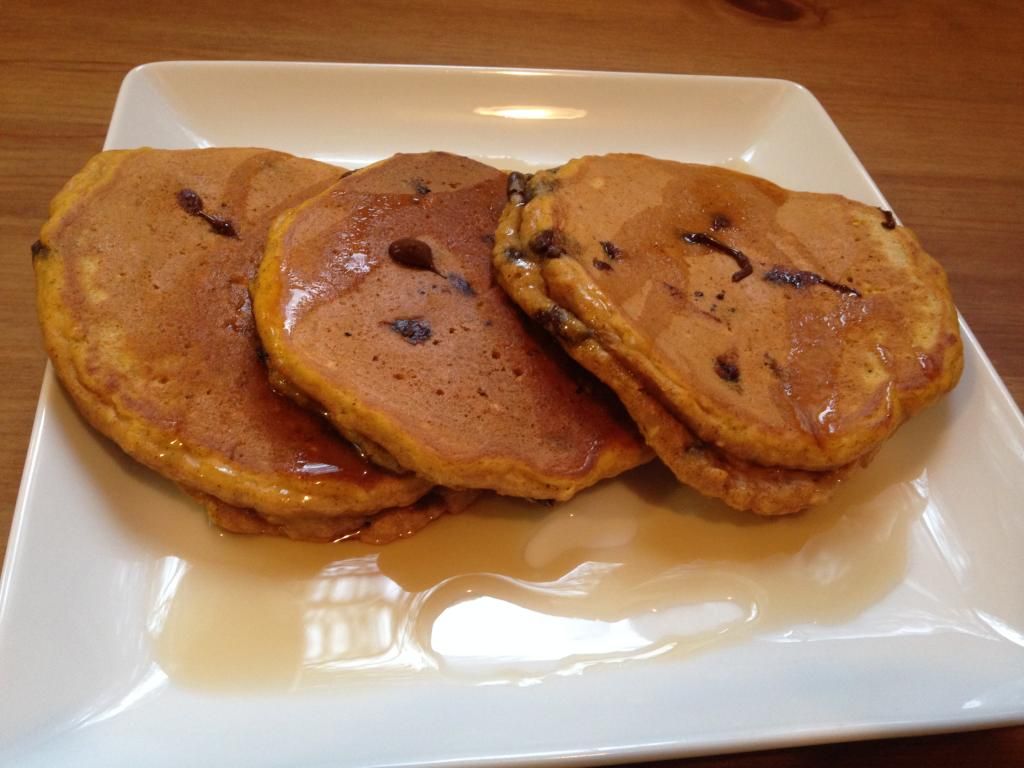
Pumpkin Oatmeal Pancakes with Chocolate Chips!

It's fall and I'm in a pumpkin mood. That's not a super extraordinary thing to say this time of year, I know, but it is rather for me since I'm not a big pumpkin lover. I typically enjoy baking or cooking with pumpkin when it's something I know I'll be able to give away or feed to someone else. However, I've honestly been enjoying my endeavors this fall. Thus far, I've made pumpkin raviolis using my butternut squash ravioli recipe and this tasty pumpkin oat bread. The raviolis were a happy accident as I though I had pulled a bag of frozen butternut squash from the freezer only to find out it was pumpkin after it was defrosted. I think there are pictures of the bread somewhere, but they may have been misplaced in my mad dash to clear memory space for our trip to Hawaii.

Anyway, today's breakfast was a hit. I slightly adapted a recipe from Cooking Classy to make it a bit healthier by using white whole wheat flour. I also made a third of the recipe without chocolate chips (and fed those to my two year old who gets quite enough sugar as it is :). Finally, I used King Arthur's dried buttermilk powder as I didn't have any fresh buttermilk on hand. I love that stuff as it makes cooking with buttermilk something I can do on a whim.

 photo photo1-1.jpg

Pumpkin Oatmeal Pancakes with Chocolate Chips
1 cup white whole wheat flour
1/2 cup all-purpose flour
1 cup quick oats
1/3 cup granulated sugar
2 tsp baking powder
1/2 tsp baking soda
3/4 tsp salt
2 tsp ground cinnamon
1/4 tsp ground nutmeg
1/4 tsp ground ginger
1 1/2 cups buttermilk (or 3/8 c buttermilk powder + 1 1/2 c water)
3/4 cup pumpkin puree
2 large eggs
3 Tbsp canola oil
1 tsp vanilla extract
About 1 cup chocolate chips (I used 1/2 c semi-sweet chips with 2/3rds of the batter)

Preheat griddle to 350 degrees. In a large bowl, whisk together flours, oats, sugar, baking powder, baking soda, salt, spices and dried buttermilk powder (if using).

In a separate bowl, combine eggs, pumpkin puree, vanilla, canola oil, buttermilk or water. Slowly add wet to dry until well combined. (Do not overmix.) Stir in chips.

Spray or butter griddle. Pour batter in 1/3 cupfuls and cook a few minutes on each side until golden brown and cooked through.

Makes 18 pancakes

 photo photo2-1.jpg

Tuesday, September 2, 2014

Homemade Play Dough

 photo 43368E94-8483-4F64-AF42-4F5D3B6EF1D1.jpg

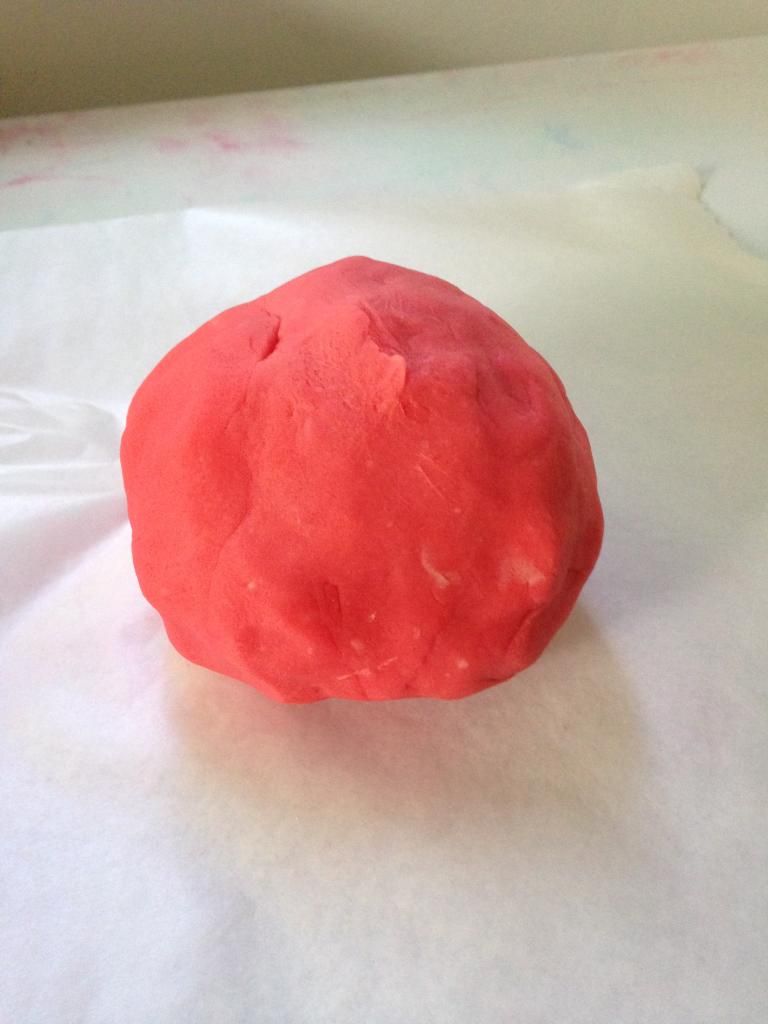
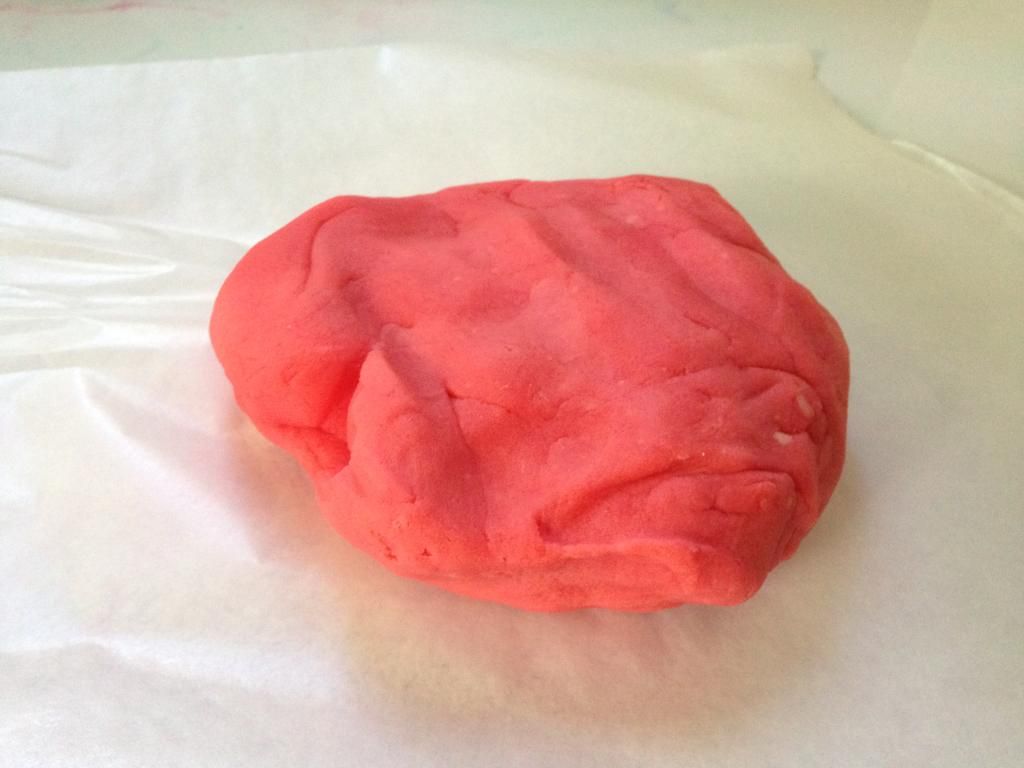
I finally decided to try making homemade play dough! I don't remember how old I was when I loved the stuff, but I figured my two year old was ready to give it a whirl. There's a million and one recipes for a homemade version, but I chose one that required only ingredients from my pantry and could be whipped up during naptime. This one from Musings of a Stay at Home Mom fit the bill. Her version is quite simple and includes helpful pictures of what each stage of the cooking process entails. From start to finish, the process took maybe 10 minutes. The texture is spot-on for the manufactured stuff and thus far show no signs of drying out. The only downside to this recipe, however, is that it only makes one color at a time. I suppose you could divide the mixture among several saucepans, but my smallest saucepan is only so small. It might be possible to mix the color in after the dough has finished cooling, but it might be more challenging to get a uniform coloring.

I can't tell you what this play dough tastes like but my son apparently liked it given the number of times I chanted "Not food, not food" during the course of a brief play session this morning. Oh well.

 photo 7D598A5C-A35B-4E97-A7A3-5263A471BB52.jpg

Homemade Play Dough
1 cup flour
1 cup water
2 teaspoon cream of tartar
1/3 cup salt
1 tablespoon oil (I used canola)
food coloring, gel works best

Whisk together dry ingredients in a 2 quart saucepan, then add water and oil and mix well to combine. Cook over low/medium heat, stirring continuously. Once it begins to thicken (it should only take a few minutes), add the food coloring. Continue stirring until the mixture begins to gather around the spoon and looks like the commercial stuff.

Remove the dough onto wax paper to cool.

Store in an air-tight container or plastic bag.

Makes the equivalent of 3-4 small cans of the commercial stuff.

Wednesday, August 27, 2014

Scrappy Quilted Potholders

Ever since I got my new sewing machine for Christmas (and even a few months before that), I've been sewing up a storm. Mostly home decor stuff and sadly I've been remiss about taking pictures, but I've been having a grand time. Did you know that a popular term for people who sew seems to be "sewist?" Not tailor, not seamstress, not sewer or even dressmaker. I found this interesting commentary in Threads Magazine and though there seems to be some controversy over the term among people who sew, it's definitely a ubiquitous word in the sewing community. I don't care much for it, however since I crochet, sew, and do papercrafts about the same based upon my crafting mood, it wouldn't much be fair to pick one. I do call myself a "scrappy hooker" in my profile blurb, but that just sounds cute. Anyway, back to the post at hand.

Since I've been sewing a fair bit and shopping for fabric even more (fabric is just as addictive as scrapbook paper!), I've accumulated a ton of scraps. This project put a few to good use. I got the idea and basic tutorial here, though I used both cotton batting and Insulbright to make them more protective where as she only uses batting. They're about 9" square.

 photo photo2.jpg

 photo photo4.jpg

 photo photo3.jpg

Tuesday, August 26, 2014

Thank Goodness for Cookies

This day from hell is nearly at a close. Nearly, but not quite. The Toddler is screaming again, having awoken from a 30 minute power nap) but I'm off duty for at least the next 15 minutes due to yogurt-making, which is a temperature-sensitive process. Not exactly a break since I also have to take the trash can out, but I'll take what I can get.

Today started out wonderfully. Though the night was a little rough due to The Toddler coming into our bed (he's teething his last set of molars) and an infant middle-of-the-night feeding, I awoke around 8:00 a.m. feeling relatively energized. I cleaned the kitchen, which I had neglected the night before, and managed to fit every since dirty dish in the dishwasher! I know it sounds like a trivial thing to be excited about, but when I don't run the dishwasher daily often not all the dishes will fit the next morning. This morning I was lucky, likely since I'd made pizza and fajitas for our meals yesterday, both of which used leftovers. Not only did I have time to clean the kitchen, but I also whipped up a batch of these amazing cookies.
Then the day started to go to hell. First, I had an appointment that I'd called at 8:30 a.m to confirm but received no response show up at 10:17 a.m. We made the appointment three weeks ago and settled on a date but not a time. When she didn't contact me prior to today, I'd assumed she flaked entirely but just in case call this morning to make sure. Upon getting no response then, I relaxed and set about a lazy morning only to wind up answering the door in my pajamas and having to yank a very groggy husband out of bed. She also failed to apologize for being nearly 20 minutes late which further irked me. This basically unannounced appointment also thwarted our plans to take The Toddler to a farm/petting zoo which looked like it would have been a lot of fun.

This is the last week my husband will be on daytime shift work and have non-holiday weekdays off so I'm trying to make the most of his remaining time. Though our farm trip was spoiled, we decided to go out to lunch at our favorite bistro. It's in the Columbia Town Center right off of Lake Kittamaqundi. Lunch was great--best cream of crab I've had in Maryland. The Toddler had some of my husband's salmon--I love it that salmon is among the things on his picky foods list. My husband and I also shared a wonderful crab cake sandwich with loads of fresh fruit.

Though it was already past 2:00 p.m. and the Toddler's nap time was imminent, since it was a beautiful day and we were by the lake, my husband decided to roam about lakefront with The Toddler (there's a pathway that runs around the late) while the Baby I and checked out the brand new WholeFoods. Which experience was worse is a close call. Though The Toddler loves running about and was given free reign albeit on his kid leash, due to the time of day, the heat or maybe his teeth pain, he ran in spurts and stops and eventually melted. My husband had to carry him a fair ways back to the car. Meanwhile, The Baby and I had mediocre experience in the new WholeFoods which only worsened the longer I spent in the store. First, there seemed to be a shortage of employees on the floor to ask for assistance in locating things. Then I spent 10+ minutes in the checkout line with only two people ahead of me, each with less than 10 items in their carts! When it was finally my turn, I discovered the likely reason for the delay as the cashier didn't know (and couldn't figure out from her picture book) the code for sweet potatoes! Perhaps if I'd had an uncommon pepper or herb, but sweet potatoes?!!! After finally completing my purchase, my experience was further soured by coffee splattering over my cloth shopping bags when I drove the cart over this weird bump on the door's threshold. Then as I was standing just outside the store attempting to wipe up the spilled coffee, a parking lot attendant very aggressively offered to carry my bags to my car. I'm wiping coffee and he's grabbing my bags out of my cart telling me that he'll take my two bags (I had three, btw!) and I can carry my coffee. I had to emphatically decline his offer several times before he'd release my bags and go away. Perhaps he worked for tips and it was a slow day or perhaps it's the WholeFoods policy. Either way, his manner was quite offensive. Little did I realize that the likely reason for the parking lot guys is that there are NO cart returns! Suffice to say that while I was thrilled to find whole wheat couscous in the bulk bins and another source of cheap organic milk, I won't be returning to that store any time soon. My conclusion: just as one shouldn't buy a new product that's only been on the market for a week, one shouldn't go to a new store that's only been open for a week.

Though the happy buzz from a lovely lunch was muted now for all of us, my husband and I figured we'd get some quality free time once we returned home during The Toddler's nap. Haha, we were wrong. He.Wouldn't.Nap. The Toddler hasn't skipped his afternoon nap more than once or twice this year, but, sure enough, he did so today. Even on those few isolated occasions in the past where he didn't nap, though he was tired, he wasn't overly cranky. Not today. If he was by himself for too long, he melted. Either by screaming, tossing all of his books out of his room or destroying something, he demanded attention from one of us all afternoon and evening. Attempting him to tear himself away from watching Daddy play MarioKart for dinner resulted in a screaming fit. No, I didn't simply bring The Toddler to the table--the game was paused and both he and Daddy came upstairs. But since the game wasn't over, The Toddler had a fit. Finally, he calmed down and ate a few bites of dinner but that was it. He's now fallen asleep several times since we went upstairs at 8:00 p.m. but it's now after 11:00 p.m. and I just heard him up screaming again.
As I savor the final crumbs of my fifth cookie of the evening, I guess it's my turn to go check on him. It's got to be teething-related as the last set of molars just broke through his gums. I feel really bad for the little guy, but this craziness has to end. Thank goodness for cookies.

Dark Chocolate Cookies

I've been looking for a dark chocolate cookie for some time now and these are pretty darn great. This recipe comes from Dessert Now, Dinner Later and is actually styled "Dark Chocolate Cookies and Cream Cookies" but since I was mainly looking for a dark chocolate base, I decided to omit the chocolate chips and candy bar pieces and tossed in some peanut butter chips. Mid-toss of the peanut butter chips, I wondered how just a plain chocolate dough cookie would taste. Thus, I halved the amount of chips and did a less than thorough job stirring so some cookies have lots of chips and others had practically none. The results were lovely even the bites with no chips at all. In the future, I intend to try this recipe with other flavors of chips (e.g. dark chocolate or coffee) and maybe some walnuts. Don't worry, the amount of chips listed below is double what I used and should be adequate to have multiple chips per cookie. If you're a fan of chewy cookies, these are for you. Though they rose fairly high, due to a good amount of butter, they collapse into near-flat cookies after cooking. Though purists and the original recipe recommend using unsalted butter, I very much enjoyed the taste of the extra salt in contrast to the sweet cookie.

 photo photo2.jpg

Dark Chocolate Cookies
1/2 cup butter, room temperature
1/2 cup sugar
1/2 cup brown sugar
1 egg
1 tsp vanilla
1 cup white whole wheat flour (or all purpose)
1/2 cup cocoa powder (I used King Arthur's double chocolate cocoa powder)
1 tsp baking soda
1/2 tsp salt
1 cup any flavor chips and/or nuts (e.g. peanut butter, dark chocolate, cappuccino, walnuts,etc)

Preheat oven to 350 degrees. Spray and flour cookie sheets or cover with parchment paper.

With mixer or hand beater cream together butter and sugars. Add in egg and vanilla.

In a separate bowl, whisk together flour, cocoa powder, baking soda, and salt.

With the mixer on low, gradually add dry mixture to wet and beat until well-combined.

Gently stir in chips, nuts, etc.

Drop rounded balls of dough with 1" scoop onto prepared pan, leaving at least two inches space in between.

Bake 10 minutes. Allow cookies to rest on sheet for 3 to 5 minutes before transferring onto wire rack to cool completely. (Note: cookies will be poufy when they are removed from the oven but will quickly fall. This is normal and does not affect the tenderness of the cookie.)

Makes about 3 dozen 2" cookies.
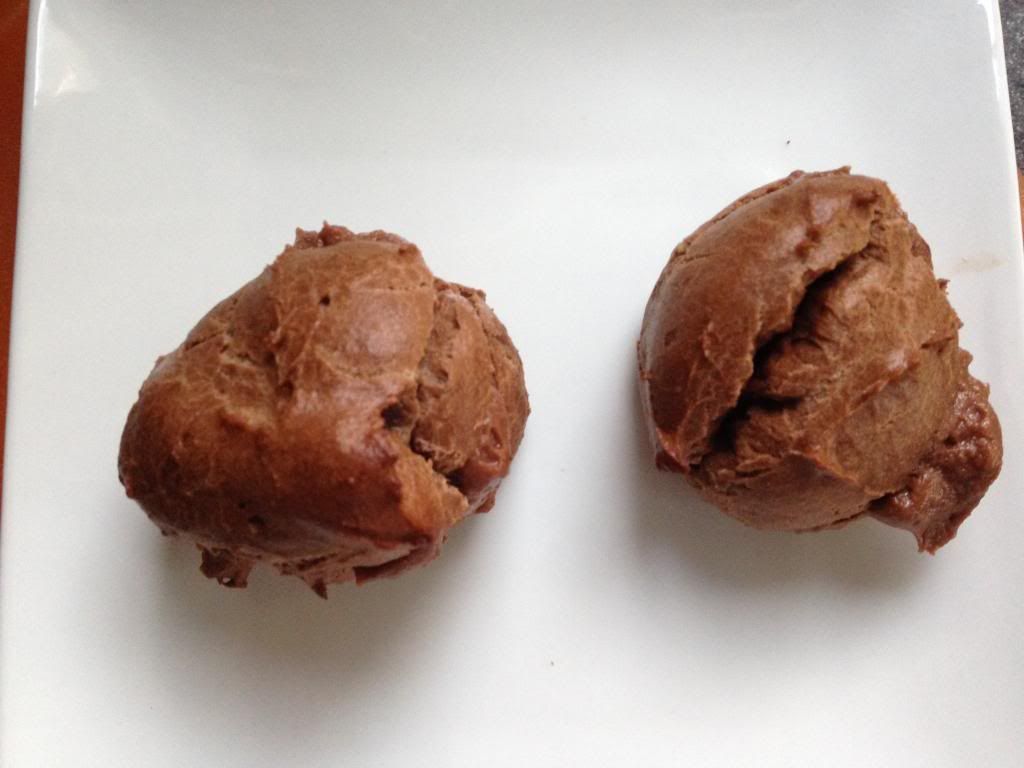
 photo photo1.jpg

 photo photo3.jpg

Thursday, August 21, 2014

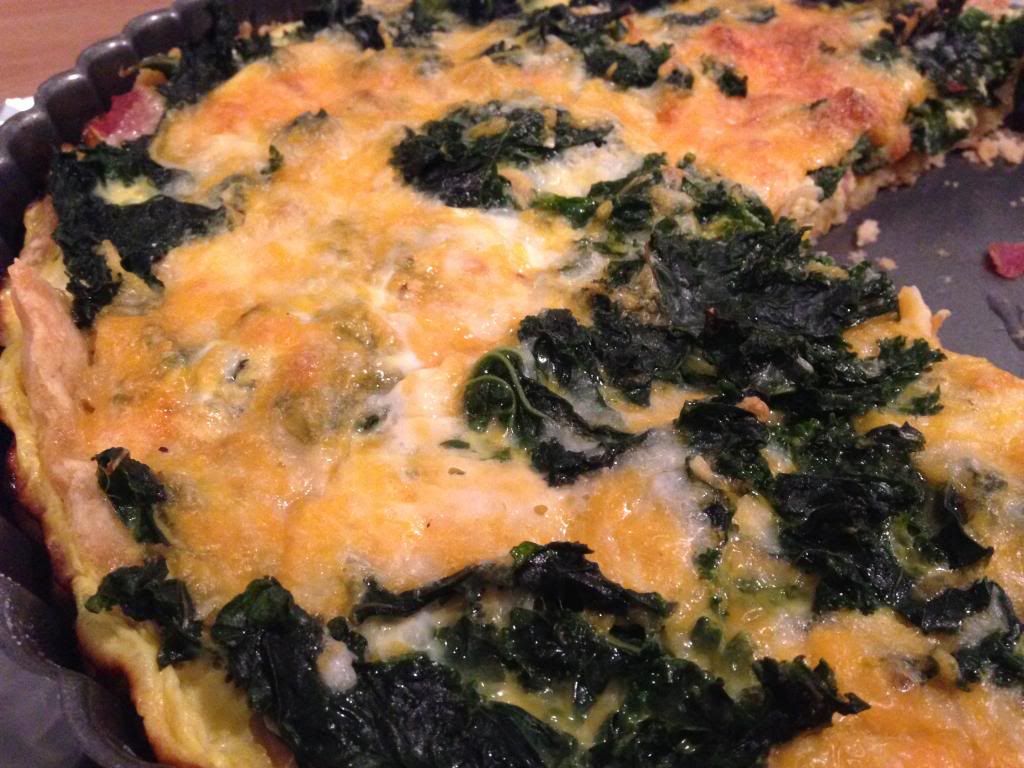
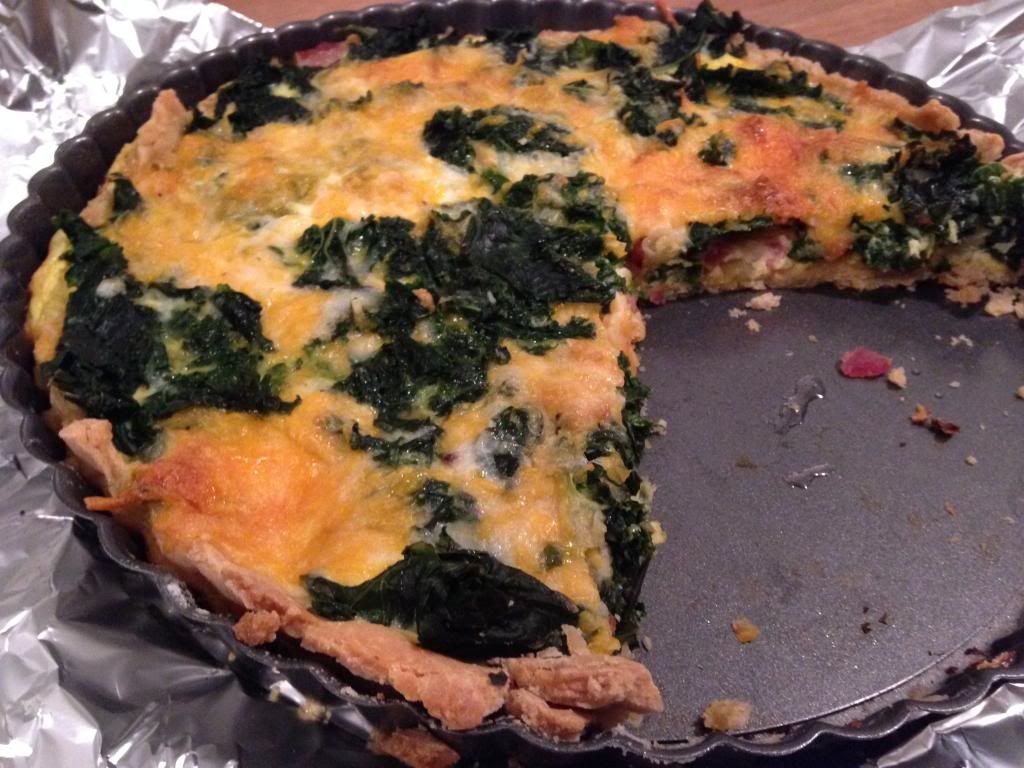
Kale Bacon Shallot Quiche (Dough Recipe Included)

I really need to make quiche more often. It's so yummy and can be loaded with good-for-you things such as dark leafy greens. Since the produce box comes with a dozen eggs, I've been looking for interesting ways to use them up each week and naturally quiche came to mind. This recipe actually doesn't use as many eggs as other recipes which would make it lighter but for the buttery crust from Martha Stewart that I use. I started with this recipe from Tracey's Culinary Adventures, which I made for the first time in the fall, and then modified it with my own ingredients.

 photo kalemushroomquiche4.jpg

 photo kalemushroomquiche1.jpg Kale Bacon Shallot Quiche

Quich dough (1 recipe makes enough for two 9" pies)
2 1/2 cups all purpose flour
1 teaspoon salt
2 cups unsalted butter, cut into small cubes and keep cold
1/4 - 1/2 cup ice water

In the bowl of a food processor, pulse flour and salt. Add the butter, and pulse until mixture resembles coarse crumbs.

With the machine running, add the ice water in a slow, steady stream, just until the dough holds together without being wet or sticky. This should take less than 30 seconds. It should hold its shape and not be too crumbly. If the dough is crumbly, add more water 1 tablespoon at a time. Test by squeezing a small amount of the dough together; if it is still too crumbly, add a bit more water, 1 tablespoon at a time.

Divide dough in half and flatten into a disk. Wrap in plastic and refrigerate at least 1 hour or overnight. The dough can be frozen for up to 1 month; thaw overnight in the refrigerator before using.

Preheat oven to 350 degrees. Roll dough the desired thickness and place in well-greased tart pan. Cover completely with foil or parchment paper and fill center with pie beads or uncooked beans. Par-bake the crust for 20 minutes. Remove foil or parchment paper carefully as beads will be very hot.

Filling
2 shallots, chopped
4 slices bacon, if desired
3/4 cup milk
4 eggs
1 cup shredded cheddar cheese
1 cup cooked kale
olive oil, salt and pepper

Preheat oven to 375 degrees.

Cook bacon until crisp. Crumble and set aside. Saute shallots in a little olive oil until golden brown. In a medium bowl, mix together shallots, bacon, and kale. Spread in an even layer into prepared crust and sprinkle with majority of cheese.

In a small bowl, whisk together eggs and milk until well-blended. Pour over kale bacon shallot mixture. Top with remaining cheese.

Bake for 30-40 minutes until set.

Serve warm or at room temperature.

Roasted Veggie and Black Bean Burritos

I don't have any pictures of these because they disappear far too quickly. I came across this recipe back in early May when I was prepping for baby #2's arrival. I whipped up a dozen for the freezer and have since made the recipe two or three more times. They are delicious and nutritious! I omitted jalepenos and cilantro from the original recipe because I didn't have any on hand and just kept doing so because they were so tasty. I imagine you could substitute a variety of root veggies for the sweet potatoes or any veggies that go well with the spice palate. I started out following the recipe's heating instructions but then got lazy and just went with the microwave. Occasionally, I'll pop them under the broiler for a couple minutes to crisp up, but most of the time I devour them as soon as they're cool enough to eat.

Roasted Veggie and Black Bean Burritos

Ingredients
2 sweet potatoes, peeled and diced into 1/2" cubes
1 red bell pepper, diced
1 red onion, diced
Olive oil, about 2 tsp
1 teaspoon cumin
1 teaspoon chili powder
salt and pepper, to taste
1 can (15 oz) black beans drained and rinsed
2 teaspoons lime juice (also omit if I don't have on hand)
2 cups shredded cheddar cheese
6-10 burrito-sized tortillas, whole wheat preferred

Directions
Preheat oven to 425 degrees. Toss veggies in olive oil and season with spices. Place in a large baking dish or sheet pan and roast for 20 minutes, tossing around halfway through. Let cool.

In a medium bowl toss roasted veggies with black beans and lime juice. (This is also where you'd add a handful of chopped cilantro, if using.) Set up an assembly line of burrito, black bean/veggie filling, and cheese.

If desired, warm tortillas first. Add 2-3 heaping tablespoons to the center of each wrap and top with shredded cheese. Fold over bottom of tortilla, tuck in sides, and roll closed.

[At this point, I wrap each burrito in foil and freeze them about 6 per gallon-size bag.]

To heat, you have a couple options:

1. Bake, seam-side down in a baking dish or on a sheet pan in 375 degree oven for about 15-20 minutes or until golden brown.

2. Microwave for 3-5 minutes until center is heated through. To crisp them up, stick under the broiler for 2-3 minutes or in a hot skillet.

Makes 6-10 burritos.

Saturday, August 16, 2014

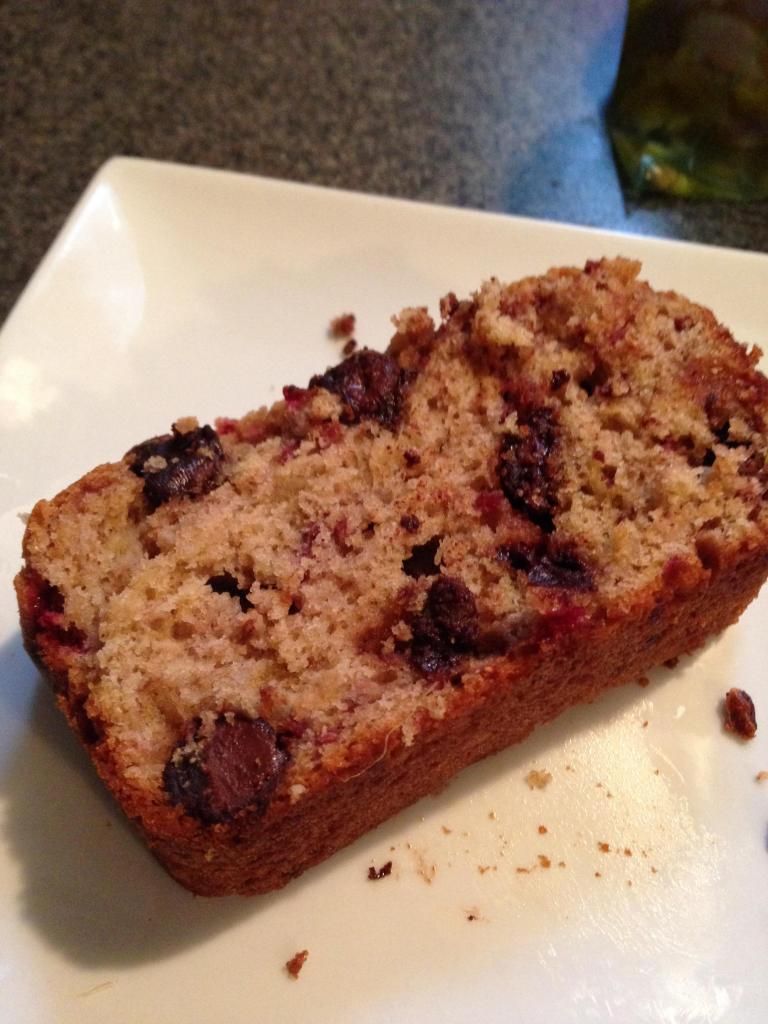
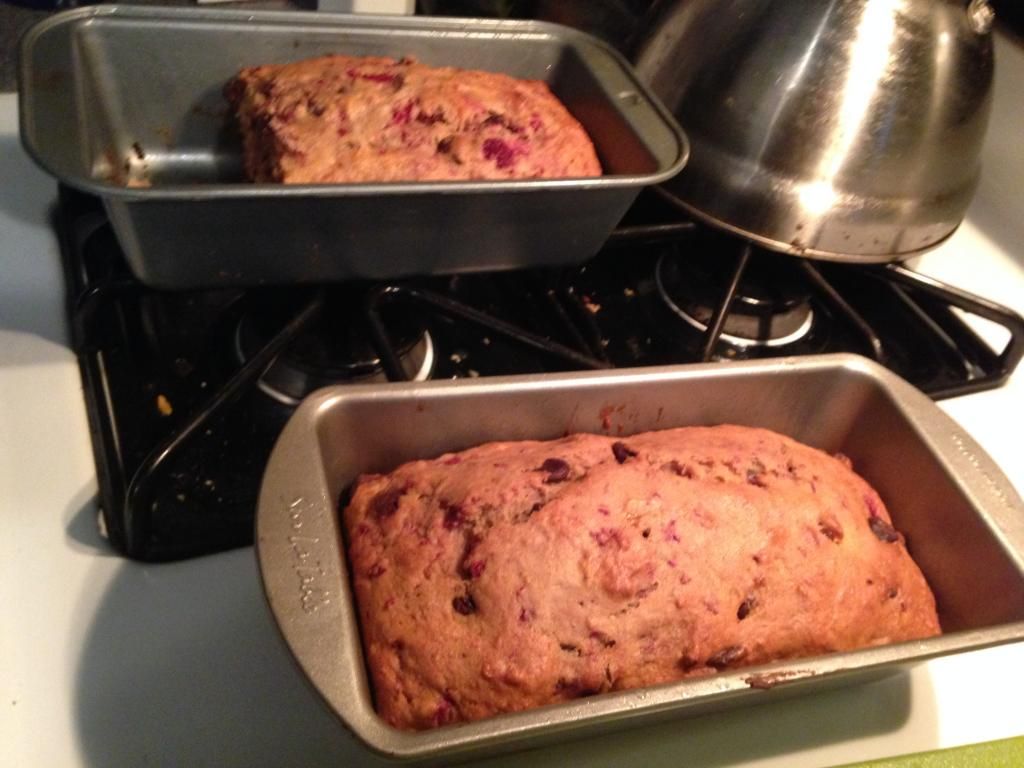
Chocolate Raspberry Banana Bread

Another perk about the CSA I'm participating in is that in addition to the fruits and veggies, each week I get a dozen fresh eggs and bread item made with locally milled flours. When I signed up for the CSA, I was initially ho-hum about the bread item as I bake my own with my trusty breadmaker. Boy, was I wrong! The breads have been super--even the ordinary breads. The more interesting ones such as the blueberry cornbread I replicated last month have been outstanding! This month, I'm on the hunt for a chocolate raspberry bread that I picked up with my CSA share a couple of weeks ago. We gobbled it down in less than 2 days. This recipe from Sally's Baking Addiction comes close in that it's delicious and disappeared in no time flat, but it's definitely a banana bread variation and the original was not. In the future, I might try to adapt this recipe to remove the banana but I'll mostly likely just keep looking. In the meantime, enjoy!

 photo Chocolateraspberry2.jpg

Chocolate Raspberry Banana Bread
2 cups white whole wheat flour
3/4 teaspoon baking soda
1/2 teaspoon salt
3/4 cup sugar
4 tablespoons butter, softened
2 large eggs
1.5 cups mashed ripe banana (about 3 bananas)
1/3 cup plain yogurt
1 teaspoon vanilla extract
3/4 cup dark chocolate chips
1 cup halved raspberries (fresh or frozen)

Preheat oven to 350 degrees. Prepare 1-2 loaf pans. (I used two. Original recipe calls for only one pan and a longer baking time.)

In a medium bowl, whisk together the flour, baking soda and salt. Set aside. In a separate large bowl, beat the sugar and butter until well blended. Add the eggs one at a time, beating well after each addition. Add the mashed banana, yogurt, and vanilla.

Slowly add dry ingredients until just combined. Gently fold in the chocolate chips and raspberries.
Pour into prepared pan(s). Bake 30-40 minutes if using two pans, 50 to 60 minutes if using one or until a toothpick inserted in center comes out clean. Cool 15 minutes in the pan on a wire rack, then remove from pan to the wire rack and cool completely.

 photo Chocolateraspberry1.jpg

Thursday, August 14, 2014

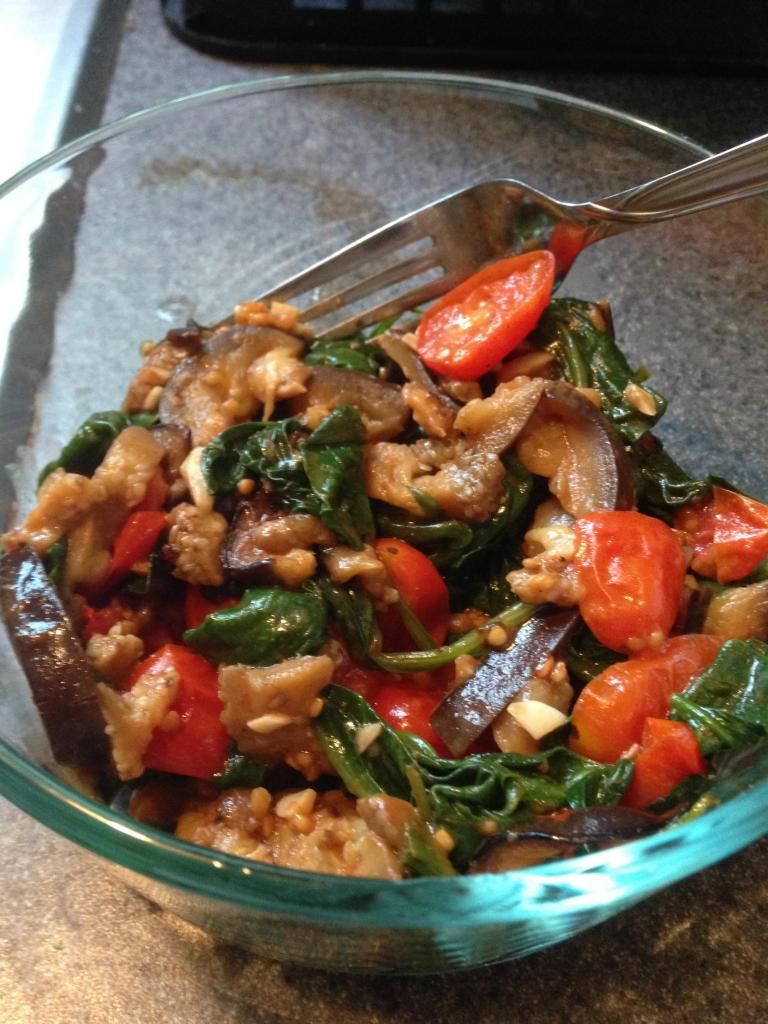
Eggplant, Tomato, Garlic, Spinach Saute

As I mentioned last month, this summer I'm participating in a CSA and get a weekly produce selection. What I'm loving about it is eating what's in season and locally grown. If I'm left to my own devices, veggie-wise we'd pretty much eat the same things year-round: zucchini, broccoli, spinach, lettuces, sweet potatoes, peppers, mushrooms, carrots, and potatoes. Not a whole lot variation would happen unless I wanted to make a particular recipe or had a random craving. To some that may be a pretty broad selection, but trust me it gets pretty boring if you're eating your 2-3 veggies per day as we try to do. It's also can be quite expensive to eat produce that's not in season, especially if you're also trying to eat organic. To make a long story short, I love that each week's selection is different (yes, there's some overlap, but it's never the same week to week). It forces me to try new combinations and sometimes eat a lot of things I wouldn't normally purchase in efforts to use all the produce before it spoils or the next week rolls around.

This recipe came from an abundance of tomatoes and eggplant. Ironically, the recipe uses cherry tomatoes which I purchased at Trader Joe's, but I likely had tomatoes on the brain since I've been overwhelmed with an abundance of regular tomatoes in my weekly selection. You could no doubt use regular tomatoes in this recipe, though cherry tomatoes hold their shape well during the cooking process. Inspired by this recipe at Real Simple I had intended to serve it over pasta. Then I started nibbling from the pan and before I knew it, I'd eaten the entire dish sans pasta! Granted, I used a smallish eggplant, but together with the tomatoes and spinach it filled a nine inch sauce pan! I had no idea browning the eggplant in a saucepan would produce a buttery flavor that I just could not get enough of! I meant to add the mozzarella, but forgot and didn't miss it as this dish is too tasty on its own. I recommend serving this with a nice hunk of crusty bread or over pasta (so as stretch it to feed more than a single person :). Without further ago, here's the recipe:

 photo eggplantsaute.jpg

Eggplant, Tomato, Garlic, Spinach Saute
1 medium eggplant, sliced into 1 x 1/2" pieces
2 garlic cloves, minced
1/2 lb cherry tomatoes, halved
2 c baby spinach
1/4 tsp crushed red pepper, if desired
salt and pepper
olive oil

Saute the eggplant in olive oil until golden brown, 8-10 minutes. Add tomatoes, garlic, crushed red pepper (if using, I omitted) and season with salt and pepper. Cook until the tomatoes are tender, 2-3 minutes. Stir in spinach and cook until wilted. Adjust seasonings.

I enjoyed this both piping hot and at room temperature.

Monday, July 21, 2014

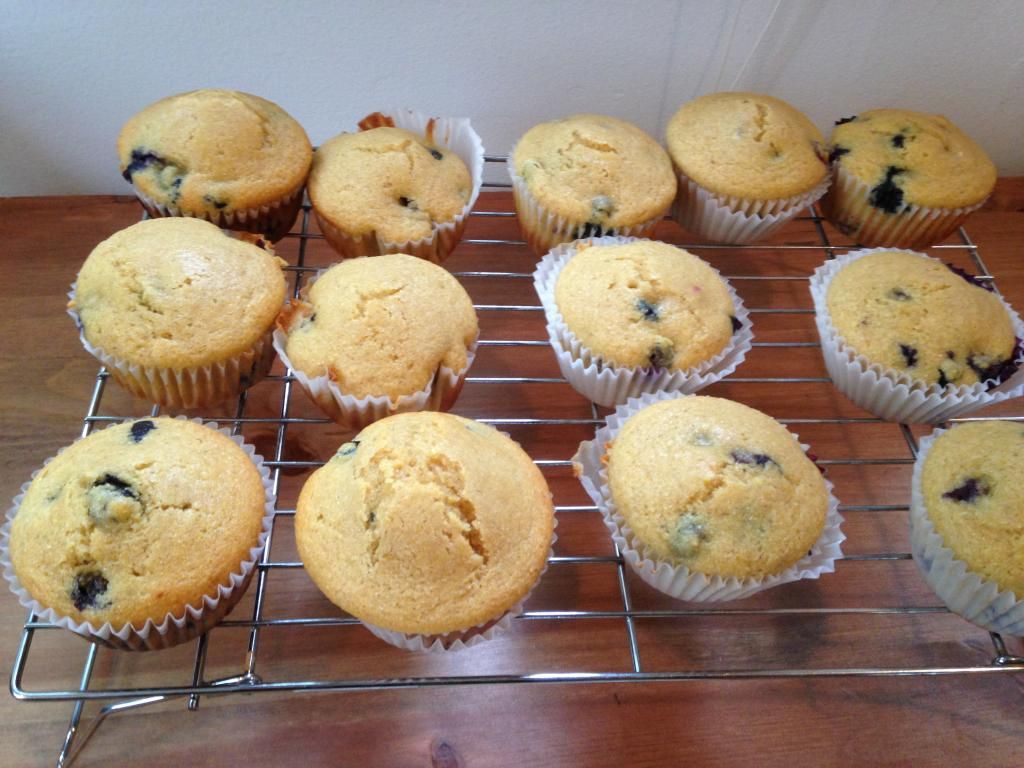
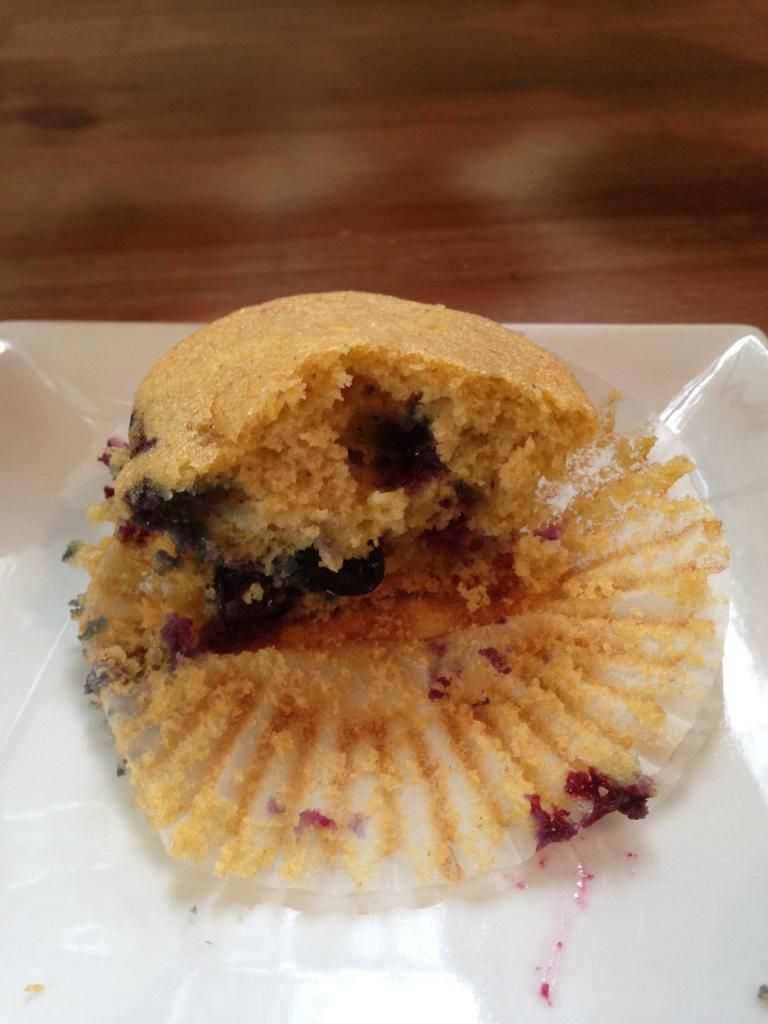
Blueberry Corn Muffins

This summer I'm participating in a CSA (Community Supported Agriculture) program. The way this one works is that you purchase a "share" for the season which translates to a weekly produce box from June till November. My box includes 8-10 freshly picked fruits or veggies, a dozen fresh farm eggs, and a bread item from a local bakery that uses freshly milled wheat. It's been an awesome experience thus far and actually not too expensive seeing as the produce is organic and locally sourced. Obviously the produce is supposed to be the star of the show and the eggs and bread simply extras, but I've had a blast trying different bread products. Since I make my own sandwich bread, I've been free most weeks to try a "fun" bread item. I've tried pretzel rolls, challah bread, and the inspiration for this recipe--blueberry corn bread! I'd never had such a thing and found it tasty as well as intriguing. So I turned to Pinterest for a version to bake at home. This recipe from Two Peas and Their Pod might be even tastier than the cornbread I had from the bakery as I think I've eaten 6 muffins since baking them this morning. I used fresh blueberries from the week's box, but you could easily use frozen. I've made this recipe with regular buttermilk as well as King Arthur's buttermilk powder with great results each time. Light and airy, these muffins make for the perfect morning breakfast accompaniment or afternoon snack.

 photo 623D9A08-5BB7-4664-8AEC-79CC31F81DA1.jpg

Blueberry Corn Muffins
1 cup white whole wheat flour (or all purpose)
1 cup course ground yellow cornmeal
1/2 cup granulated sugar
2 1/2 teaspoons baking powder
1/4 teaspoon baking soda
1/2 teaspoon salt
1 cup buttermilk
3 tablespoons butter, melted and cooled
3 tablespoons canola oil
1 teaspoon vanilla extract
2 large eggs
1 cup blueberries

Preheat the oven to 400 degrees. Prepare a standard sized muffin pan with paper cups or spray with cooking spray.

In a large bowl, whisk together the flour, cornmeal, sugar, baking powder, baking soda, and salt. Set aside.

In a medium bowl, whisk the buttermilk, melted butter, canola oil, vanilla, and eggs until well blended. Pour the liquid ingredients over the dry ingredients and mix until combined. The batter will be lumpy. Gently fold in the blueberries. Divide the batter evenly among the muffin cups.

Bake for 15 minutes, or until the tops are golden and a toothpick inserted into the center of the muffins comes out clean. Transfer the pan to a rack and cool for 5 minutes. Remove muffins from pan and serve or cool completely for storage (1-3 days) or freezing.

Makes 15 muffins

 photo 7701D7DC-AAD3-4796-AC42-CC1E735C459F.jpg

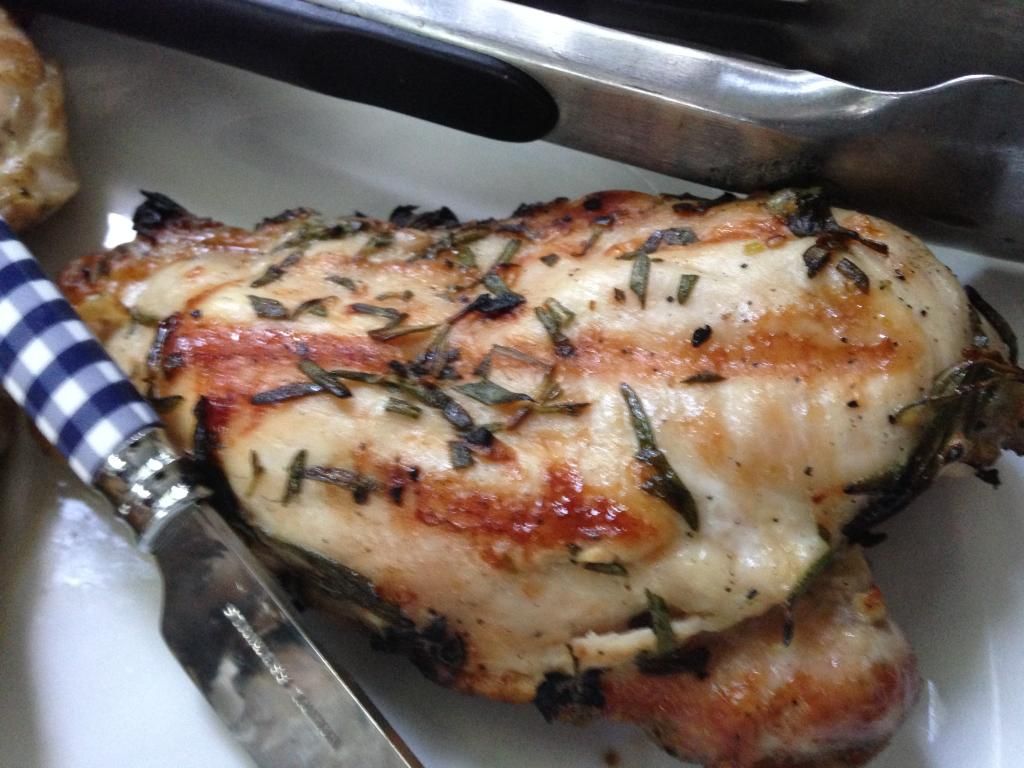
Garlic, Lemon & Rosemary Marinade for Chicken

Good morning! It's been grilling season for awhile here now, so I figured it's about time I shared my new favorite marinade for grilled chicken. I've never been too big a marinade fan, but this recipe from The Naptime Chef sounded so fresh and easy that I had to try it. It's quickly become my go-to recipe when I want to grill chicken. (Move over bbq sauce!) I've basically halved the ingredients from the original recipe . With lemons sometimes being quite pricey most of the year, not to mention the cost of good olive oil, I'm pleased to report that the result is still very flavorful. I've only made this recipe with chicken breasts, but you could use any cut of chicken (thigh meat on kabobs would be great), pork or fish. As you can see from the picture, I don't mind the texture of rosemary, but leave the needles on the sprig so you can remove it at the end or chop them up finely if you do.

 photo 75381F92-B954-4D9E-8765-1B8EB8EBA03F.jpg

Garlic, Lemon & Rosemary Marinade

1-2 lemons, halved and juiced (save rind)
3-5 cloves garlic, smashed with flat side of knife or roughly chopped
3 large sprigs of rosemary
1/2 c olive oil
1 tsp salt
½ tsp red pepper (optional, I sometimes sub black pepper)
½ tsp cinnamon
4 boneless, skinless chicken breasts (or any meat that might pair well)

Whisk together lemon juice, olive oil, salt, pepper, and cinnamon. In a gallon sized bag, pour marinade over chicken and add garlic cloves, rosemary (on or off the sprig), and lemon halves. Turn to coat well. Place in refrigerator for at least 30 minutes but ideally an hour. The acidity in the lemon juice will eventually "cook" the chicken so you don't want to leave it too long, but the original poster states that she's let it rest for 5 hours with great results.

Preheat grill to medium heat. Discard rosemary sprigs and lemon rinds. Grill chicken 5-7 minutes per side, until cooked through (165 degrees F).

Serves 4

Monday, June 9, 2014

Chocolate Truffle Ice Cream

What's the start of a week without ice cream? I first made this recipe over a year ago, but somehow neglected to take pictures. Since it was such a tasty recipe, I posted it anyway but who wants to follow a recipe without pictures? (Maybe Julia Child or her loyal fans, but certainly not me!) This recipe comes from The Ultimate Ice Cream Book by Bruce Weinstein. I used cheap Nestle dark chocolate with high-quality cocoa powder and vanilla. The result was pretty tasty but I can only imagine how yummy it would be if I used nicer ingredients for the entire recipe. I especially like that there's not a half-dozen egg yolks in this recipe, yet the result is pretty close to a commercial quality ice cream. Enjoy!

 photo chocolatetruffleicecream2.jpg

Chocolate Truffle Ice Cream
1/2 c sugar
2 egg yolks
1 c milk (I used 2%)
1/4 c cocoa powder
1.5 c heavy cream
6 oz bittersweet chocolate, chopped
1 tsp vanilla

In a mixing bowl, beat egg yolks and sugar until a pale yellow color is reached (this will take a few minutes).

Bring the milk (only) to a simmer in a medium saucepan. Whisk in cocoa and simmer 3 minutes.

Slowly beat hot milk mixture into egg/sugar mixture. Return the entire mixture to the stove over low heat. Cook stirring constantly until custard thickens slightly. This took about 10 minutes with low-fat milk.

Remove from heat and pour into a clean bowl. (Strain, if desired (i.e. if you scrambled some eggs).

Bring the cream to a simmer and melt chopped chocolate. (I pre-melted the chocolate in the microwave, but this likely is unnecessary if you're using high quality chocolate.)

Combine the chocolate mixtures and stir in the vanilla.

Cover with plastic wrap (touching surface of custard to avoid a skin forming). Chill completely (overnight is ideal). Make ice cream according to your ice cream machine's directions.

Makes 1 quart

Saturday, April 19, 2014

Chocolate Frozen Goodies

Never mind that I plan on making my favorite carrot cake for Easter dessert tomorrow. I'm in a chocolate frozen goody mood. I'm planning to try one or both of these recipes that I pinned on Pinterest many moons ago.

Fudge Popsicles from Comfy Belly

Chocolate Frozen Yogurt from Serious Eats
There's no picture on the website, but it sounds easy and yummy.

Monday, March 10, 2014

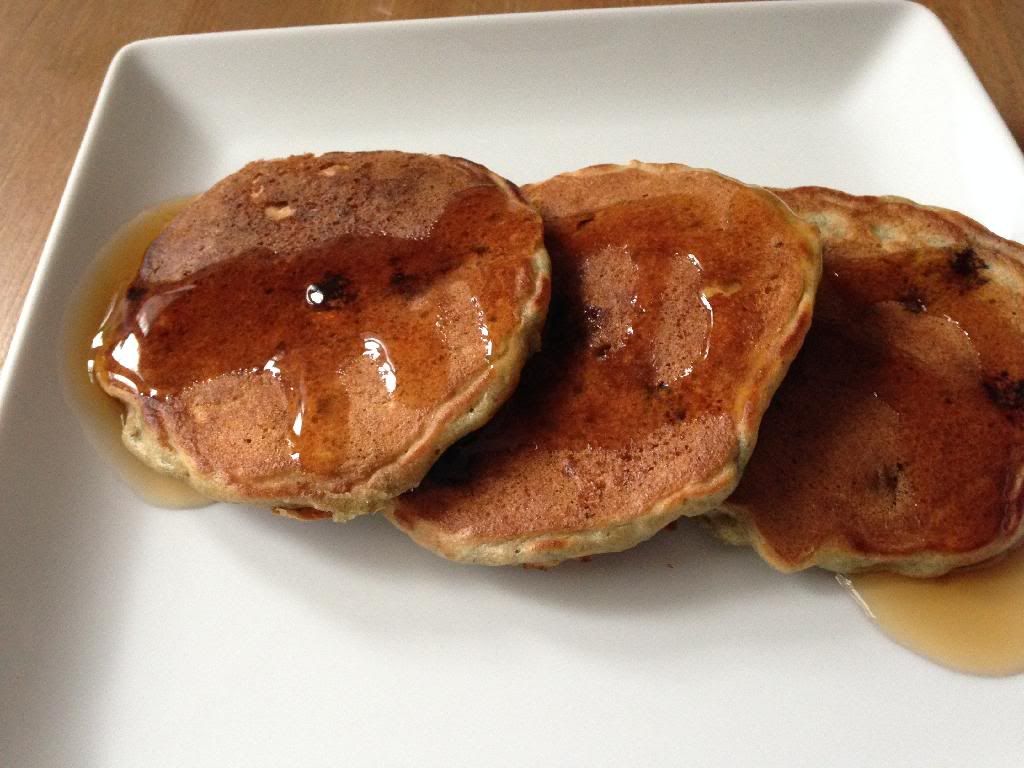
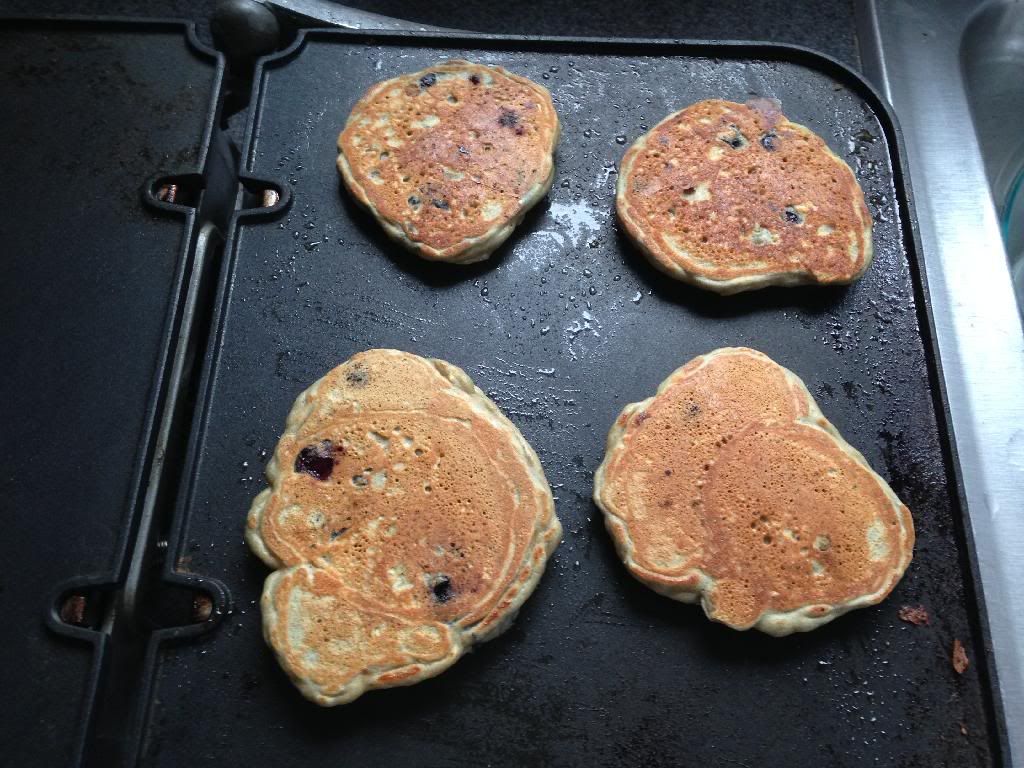
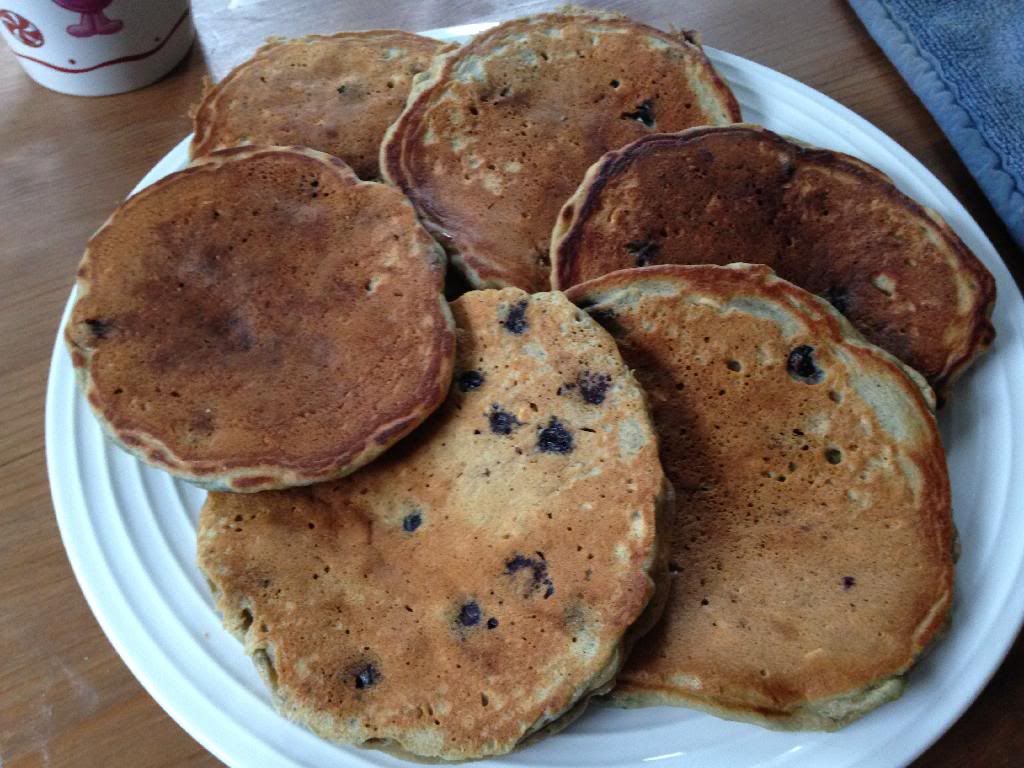
Blueberry Oatmeal Pancakes

I absolutely love Pinterest. Essentially, I use it as my "to try" bookmark folder for food, craft projects, and numerous other ideas. I love that you save/post not only a direct link to the website, but also a picture to remind you what you're pinning. Beyond my own virtual clippings, it's a treasure trove of ideas. You can search or simply sit back and watch what your friends are pinning. This morning I came across this recipe from a new-to-me food blog called Damn Delicious. I've tried oatmeal pancake recipes in the past, with mixed success. My favorite oatmeal pancake recipe thus far has been this one from Martha Stewart. However, like the others, it's a bit labor intensive because you have to haul out the food processor. Today's recipe trumps all the rest. It's a simple dump and mix procedure, one which could easily be made into a freezer or shelf mix. Yogurt keeps the oats from sapping up all the moisture of the pancake without requiring a presoak of the oats, yet still leave the crunch and texture I think of when I think of oatmeal in pancakes.

The only catch I can think of that might make this recipe something reserved for special brunches is that not everyone may have Greek yogurt (or any yogurt) in their fridge. But the same could be said of buttermilk. Some people always have a quart handy, others only buy it for special occasions. Fortunately, I've been on a Greek yogurt kick and have even started making it in my yogurt maker. My home version is not as tangy as commercial, but that didn't hurt the recipe a bit, so I feel safe in recommending whatever plain yogurt you might have on hand. I adhered to the original recipe, except to swap white whole wheat flour for the all purpose.

On to pictures and the recipe!

Blueberry Oatmeal Pancakes
 photo 68FC8ED2-DADD-4430-BB61-55AE8713E561.jpg

1 2/3 cups white whole wheat (or all purpose) flour
2/3 cup rolled oats
2 tablespoons sugar
1 1/4 teaspoons baking powder
1/4 teaspoon baking soda
1/4 teaspoon salt
1 cup plain Greek yogurt
1 cup skim milk
4 tablespoons butter, melted
2 large eggs
1 cup blueberries

Preheat griddle to 350 degrees and oven to 200 degrees.

Whisk together dry ingredients.

Make a well in the center of the dry ingredients and mix together all wet ingredients except for blueberries. Gently incorporate wet with dry into thoroughly mixed.

Stir in blueberries. Note: the batter will be quite thick.

For nicer browning, spray hot griddle before pouring batter. Ladle or spoon 1/3 cup for conventional-sized pancakes, 2 tablespoons for dollar-sized. Cook until tiny bubbles appear, about 2-4 minutes. Flip and cook for another 2 minutes.

Serve with your favorite syrup. Keep pancakes warm in oven until ready for serving.

Serves 4-6

 photo D4B271CA-6136-4F04-AB5B-0660DDF4591F.jpg

 photo B10D691B-0D28-44CC-A0CB-22ED6AFDA262.jpg

Wednesday, January 29, 2014

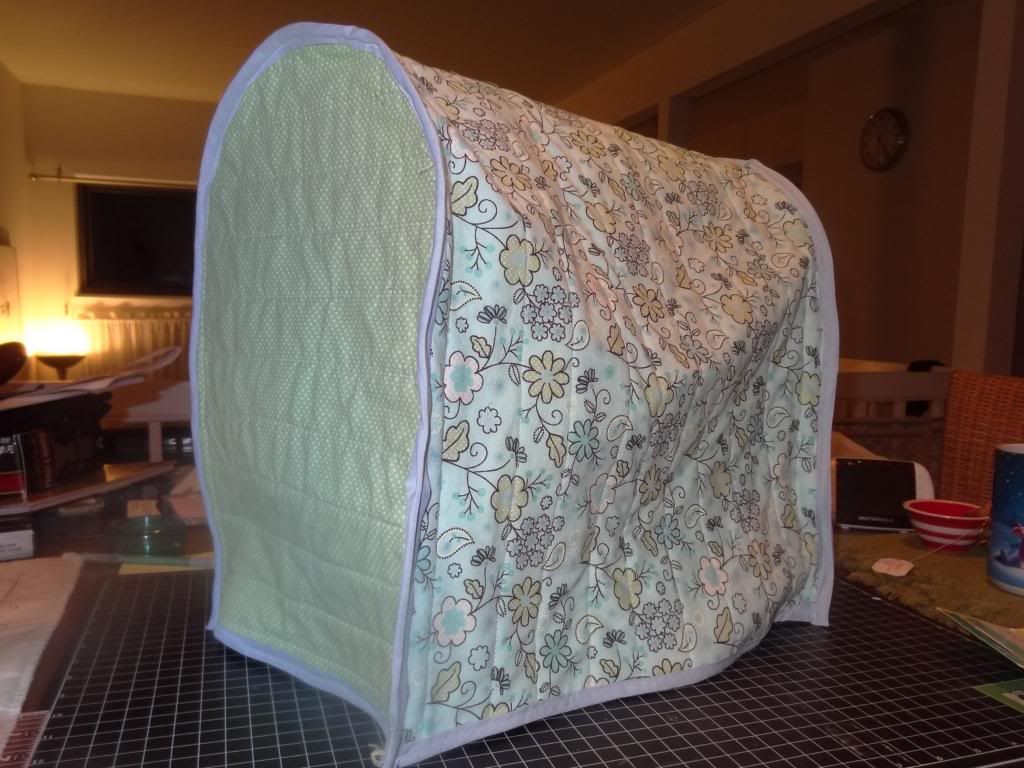
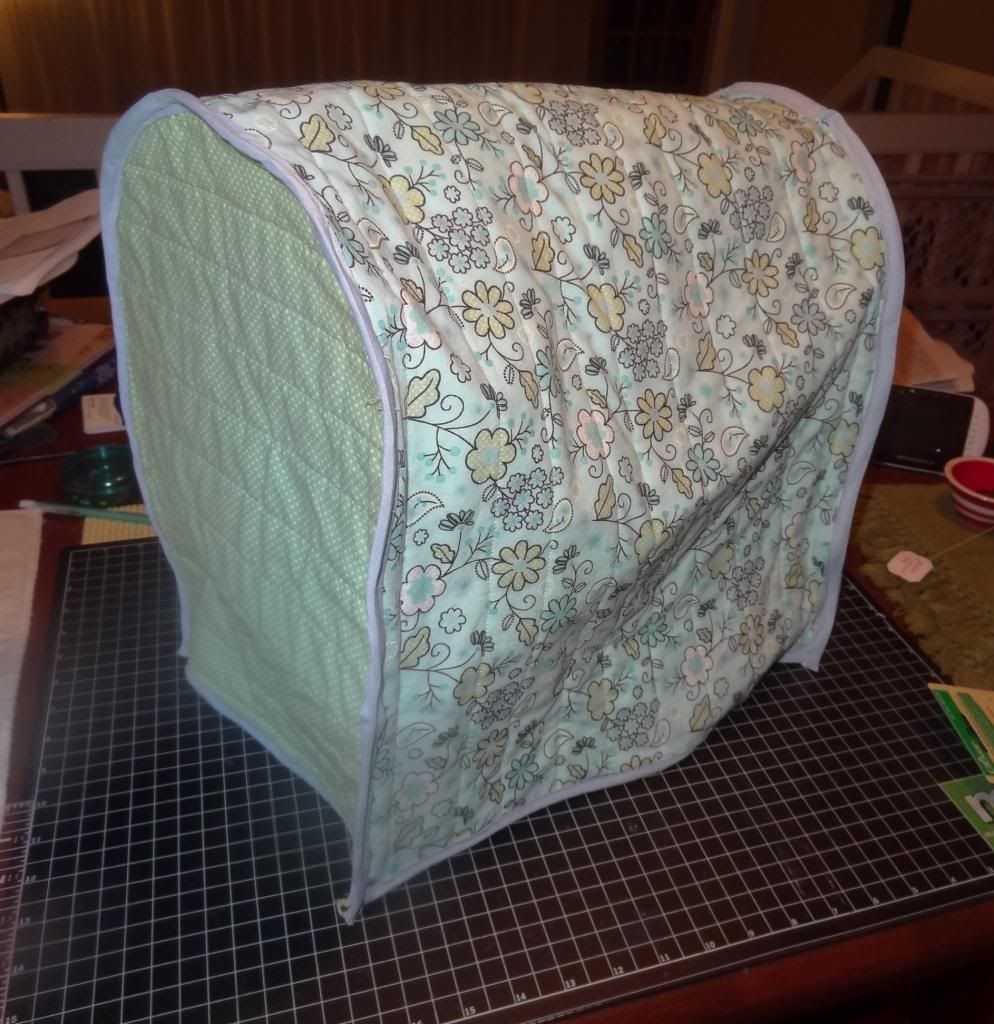
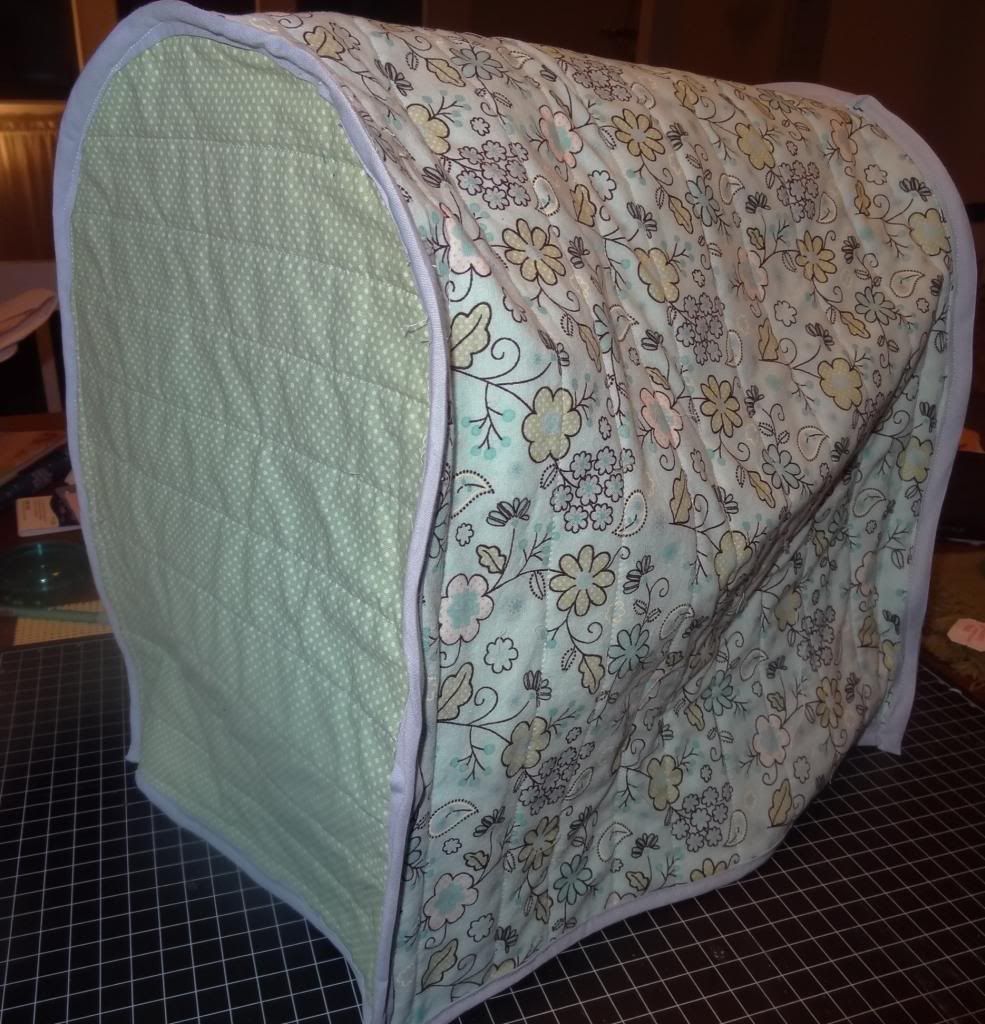
Kitchen Stand Mixer Cozy

 photo DSC02470.jpg

I prefer my appliances to be covered. There's nothing I hate more than discovering a fine, grimey film of dust on one my beautiful kitchen appliances when I want to use it. Most of my appliances currently have crochet covers made with cotton yarn. They're mostly cream with a few blocks of pink and brown. They work, but have zero structure and dull as can be. My current crafty personality is all about color and patterns so I couldn't wait to make a new cover.

Enter my new hobby: sewing! Okay, it's a not a new hobby. I've been fiddling on and off with a sewing machine since I was a kid, but with the birth of my son I've really gotten back into it. It might have something to do with the time investment for the return product--much less time is required than for crocheting and I can make large statement pieces unlike with paper-crafting. Over the past year I've made a set of soft blocks, a tag-style lovey, a sleeping bag, and a nap mat for my son, plus numerous throw pillow covers for around the house. Those projects mostly involved cutting squares or rectangles and didn't involve a pattern or much more than straight lines. With this project, not only did I venture into the world of curves but I also did a bit of quilting!

I followed this mini tutorial from a blog called Heart of Mary. She includes a simple pattern for the curved part, as well as detailed directions. For the most part, I'm very pleased with my result although the bias tape along the top edges was a huge pain as two quilted layers plus the bias tape was a bit much for my novice skills. From a distance it looks great, plus it's also reversible so if I truly hate the imperfections, I can always flip it. Since I plan on covering all my appliances and have a hoard of new fabric from a recent Joann shopping spree, no doubt my skills will improve.

Here are a few more shots of the finished cosy. My apologies for the messy work space in the background and poor lighting but I was anxious to get this posted and the new cover on my machine.

 photo DSC02471.jpg

 photo DSC02472.jpg

Next up will be my spring pillow covers, though I might get around to sharing the winter ones before I take them down. I also have holiday fabric ear-marked for the kitchen since I actually hoped to make this project in December but time got away from me. There's a possibility I'll make a holiday one before I work on covering the rest of the appliances. We'll see.

Have a great rest of the week!

Friday, January 17, 2014

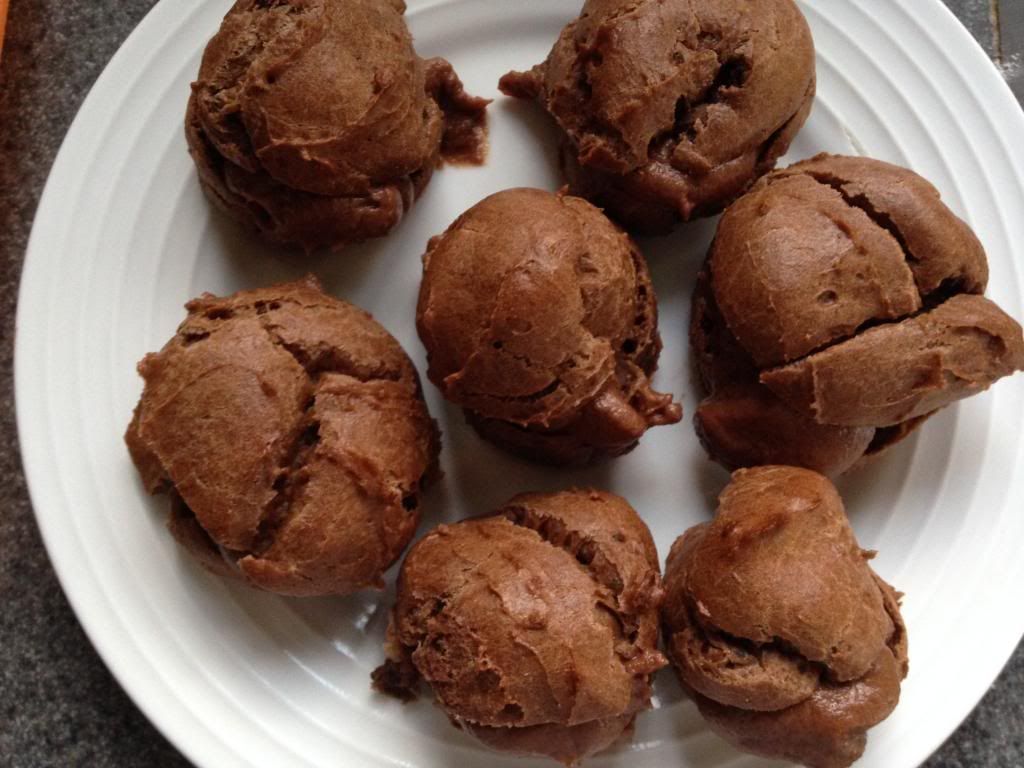
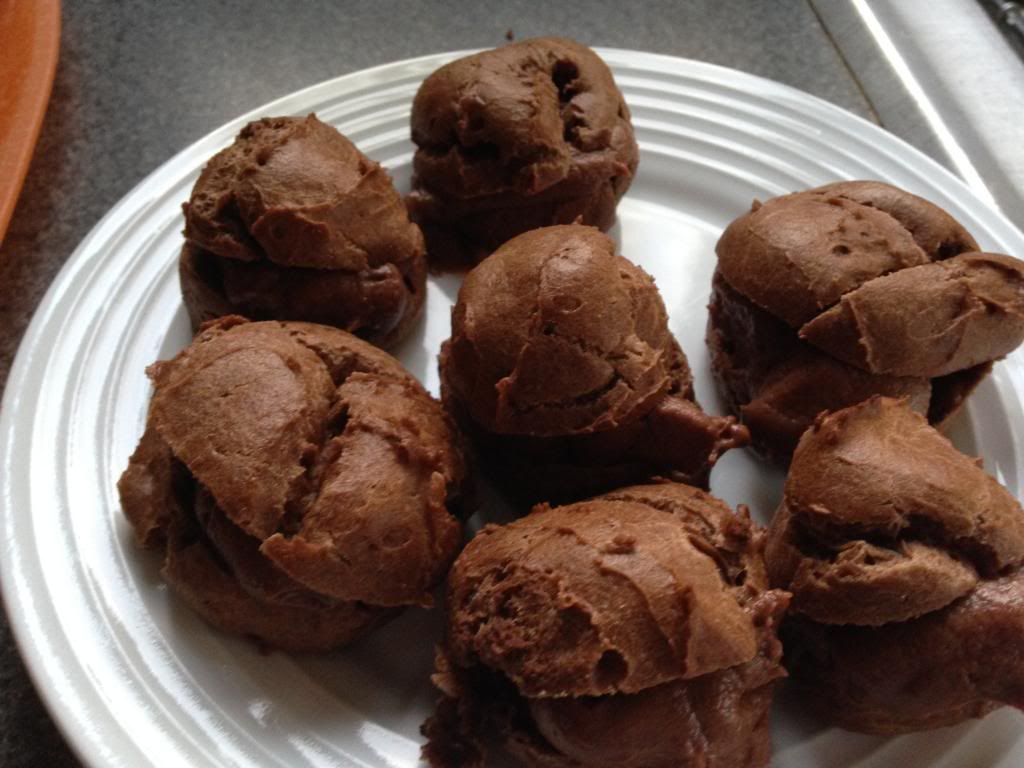
Chocolate Hazelnut Cream Puffs

Happy Friday! How about a super easy dessert? These cream puffs are deceptively easy and so delicious. This recipe comes from the blog One Perfect Bite. I followed the recipe pretty much to the letter, except for the omission of chopped nuts. I made both mini puffs, as the recipe suggests, and 6 bigger ones, but will stick to minis in the future. Much more satisfying to polish off 2-3 at a time then be restricted to just one :) Plus, the big ones took longer to bake and it wasn't as easy to tell when they were done. Though none were left to freeze, I've been freezing bakery ones for some time so I feel pretty confident that these would freeze--either with or without the filling. Enjoy!

 photo chocolatecreampuffs1.jpg

Chocolate Hazelnut Cream Puffs

Filling
6 ounces mascarpone cheese
2 tablespoons sugar
2/3 cup chocolate hazelnut spread (e.g. Nutella--I used Wegman's storebrand)
1/4 cup heavy whipping cream
1/2 cup chopped hazelnuts or pecans, toasted (I omitted)

Pastry
1 cup all-purpose flour
3 tablespoons baking cocoa
2 tablespoons sugar
1 cup water
1/2 cup butter
1/4 teaspoon salt
4 eggs

To Prepare Filling
Beat mascarpone cheese with sugar until smooth. Gradually add heavy cream and hazelnut spread and beat into smooth. Stir in nuts, if using. Cover and refrigerate until puffs have cooled.

To Prepare Puffs
Preheat oven to 400 degrees. Line baking sheets with parchment paper.

Whisk together flour, cocoa and sugar in a small bowl and set aside. In a medium saucepan bring water, butter and salt to a boil. Stir in flour mixture and stir until a smooth ball forms. Remove from heat and let stand for 5 minutes. Add eggs, one at a time, beating well after each addition.

Drop dough by rounded tablespoons 2" apart. Bake for 20-25 minutes or until puffs are set and slightly browned. Remove to wire racks and cool completely.

Slice each puff in half or about 3/4ths of the way. Use a piping bag and to fill with filling. (Alternatively, you can scoop out some of the dough before they cool, but the dough is light and airy so there was plenty of room to fill.)

Refrigerate or freeze any leftovers.

Makes about 2 dozen mini cream puffs

 photo chocolatecreampuffs2.jpg

 photo chocolatecreampuffs3.jpg

Thursday, January 16, 2014

2014 Crochet Progress

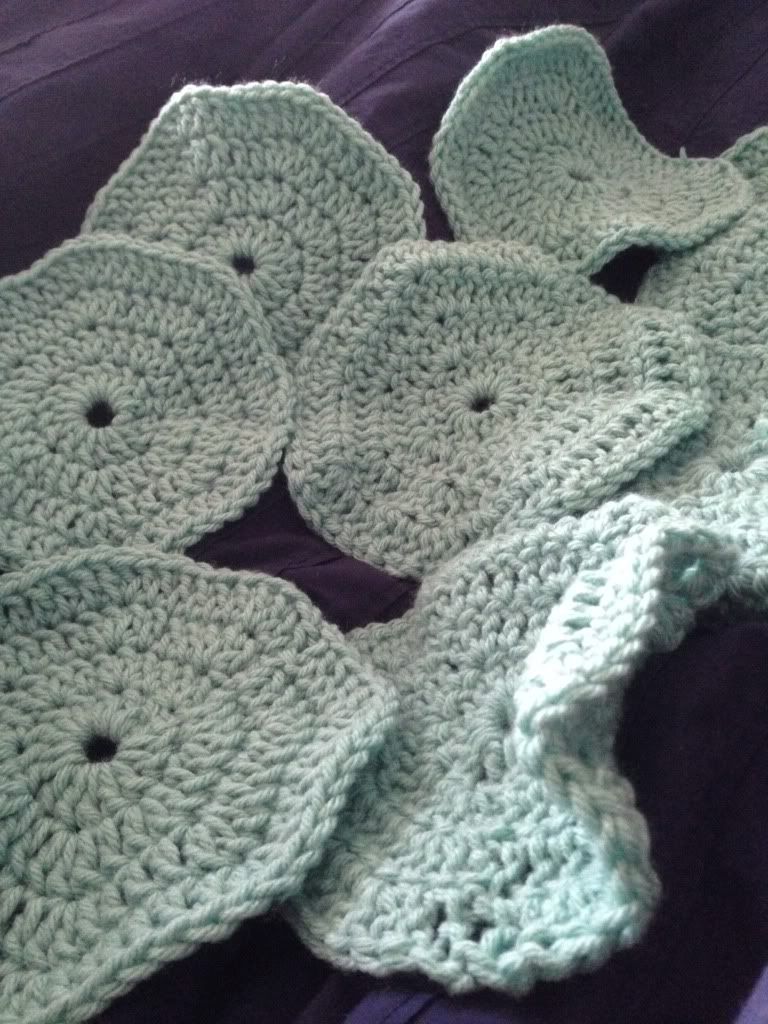
Inspired by the 2014 Crochet Mood Blanket group on Facebook and Instagram, I decided to start working on a blanket that I could make in a piecemeal fashion. Initially, I planned it out so I would finish this in a year, doing about 3 squares per week, but then I realized that I was in a crochet mood. Also, what was the likelihood of me sticking to one craft all year long, despite my best intentions? Not very high. And I'm okay with that, so long as I'm crafting something. Anyway, I selected the Patchwork Motif Afghan which is a free pattern from Lionbrand.

I haven't done too many hexagonal patterns before, so I thought it would be something new. Today's January 16th and I've finished 10 squares. I'm a little behind if my goal is one square a day, but actually I'm doing a couple at a time, whenever the mood strikes me. Hey, I guess in that way it's a "mood" blanket, right? Here's my progress to date:

 photo BF2939D4-1A81-4918-B11E-870C779EE2E6-1278-00000263F0819876_zps1b3c9459.jpg

I'm working with a single color now. I might regret that when it comes time to put the blanket together, but for now it's easier to keep a single skein of yarn out at a time.

Stay tuned...

Saturday, January 11, 2014

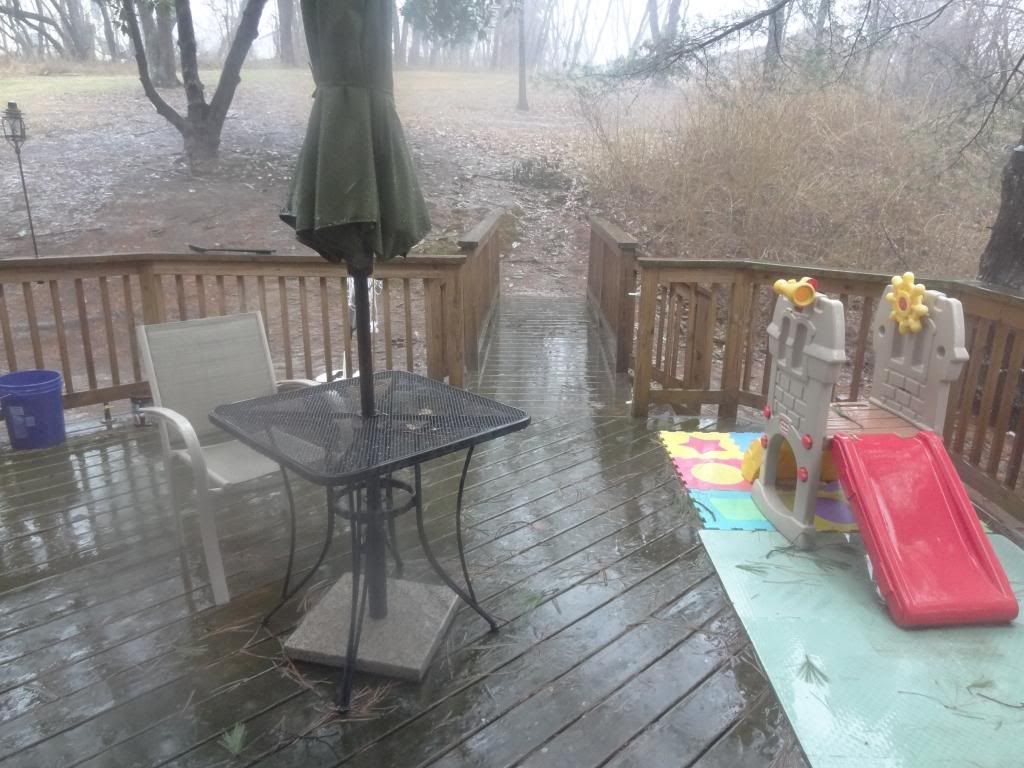
Another wet and dreary day

It's hard to tell in this shot, but it's raining cats and dogs. This day two of rain, rain, rain. I love the rain, but this time of year it's should be snow, darnit! On the bright side, it's deliciously warm...the trouble is I'd probably be a bad mommy if I took my little one outside to play in it for very long.

 photo DSC02443.jpg

I guess my goals for the day will include mostly puttering about the house, hanging with the little one, and maybe a little baking.

Thursday, January 9, 2014

Happy New Year!

It's another year--can you believe it? I know, I know, I'm already a week and a half late, but oh well. As you may have guessed from the new blog URL (thefishieskitchenandhome.com), some changes are afoot. Assuming I can stick with them, that is. Last night, I merged my craft blog with my kitchen blog and purchased a shiny new domain name. If you're in the market for a new domain name, GoDaddy is having a super 99 cents sale so I recommend checking them out.

Since my son came along, my time for hobbies decreased dramatically. I've experienced a fair amount of guilt for neglecting the blogs, but not enough to really make much headway in getting any of them on track. Don't worry, I still try new recipes on a weekly basis and find time every now and then to craft. By merging my blogs, I can also share just about anything I want in one forum that's not kid-related. At the moment I intend to keep my kid-related posts separate on ProjectLittleBlueberry.com simply for organization purposes, but I have a lot of catching up to do there as well.

In the next week or so, hopefully I'll get things here organized and maybe even come up with a blogging schedule. I still take random photos of what I bake, cook or craft so I've definitely got some material to share. I also plan on sharing more random life-musings such as my list of 2014 goals. Fingers crossed that I'll stick with it.

Until then, ta ta for now!

Wednesday, January 8, 2014

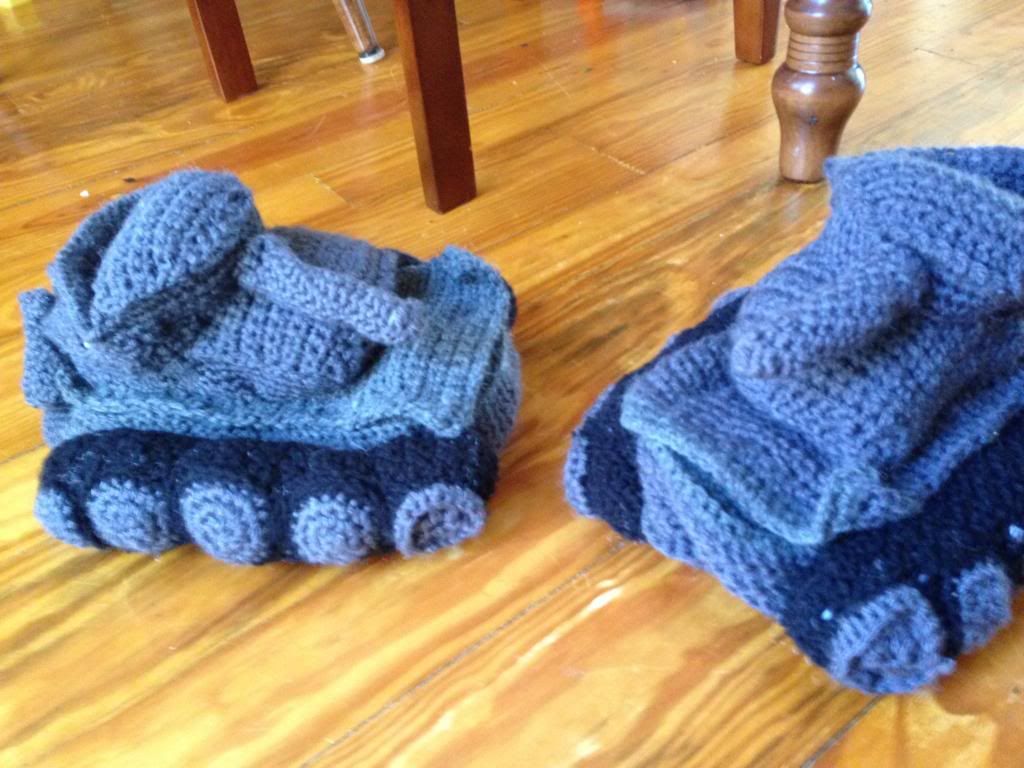
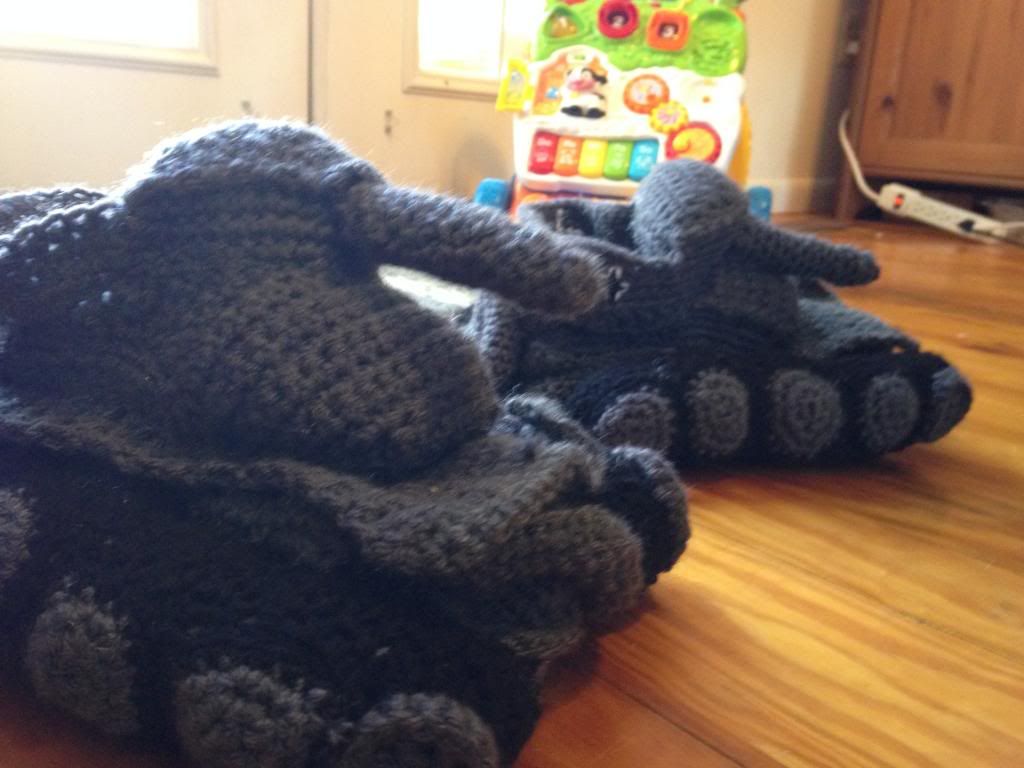
Panzer Tank Slippers

 photo IMG_2511.jpg They're finally finished! I can't believe I thought I could make these in a weekend. They took an entire week to make. Each day I devoted at least an hour or more, some days it felt like I spent the entire day. The probably was not so much that they were complicated to do, I'm just mostly a blanket and scarf kind of hooker. Sure, I've made hats, shawls, and even some fitted clothing over the years, but off the top of my head I can't think of any amigurumis or stuffed animals that I've completed. Making cute, small items requires greater attention to detail than I usually approach crochet projects. Anyway, I managed. And they're cute.

I used a pattern found on Etsy, which my husband found and asked me to make for him. For the most part, the pattern is extremely well-written--lots of pictures, however I think the author became a bit tired of pattern-writing towards the end, especially when it came time for assembly. Either that or it's a common sense thing that I'm just lacking. By the time I started assembling the second slipper, I had figured most things out, but the first one was rather tedious.

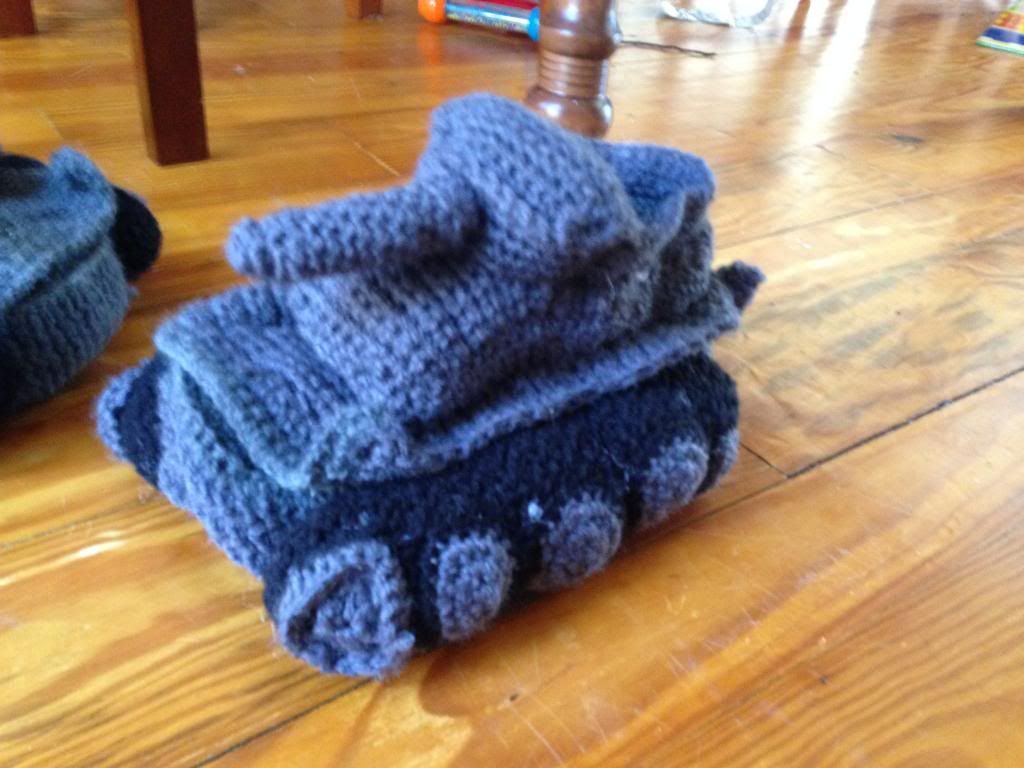
Here are a couple more shots of the slippers.
 photo IMG_2512.jpg

As you can see in this last picture, I "embroidered" an iron cross on the side of each tank. I use quotes because I did a really messy job here. I so wanted to be done with these things and just wasn't thinking that you could easily see the messy side if someone wasn't wearing them. Oh well. Maybe in another 7 years I'll make my husband a neater pair.  photo IMG_2516.jpg