Thursday, November 18, 2010

New Cricut Lite Cartridges!

I really hope Walmarts in Hawaii have the new releases on Black Friday. There are seven new Cricut Lite Cartridges. See them all here.

These are the three that make my wish list.

Jolly Holidays
Photobucket


Four Legged Friends
Photobucket

Cupcake (font cartridge)
Photobucket

Tuesday, November 16, 2010

Early Thanksgiving Dinner

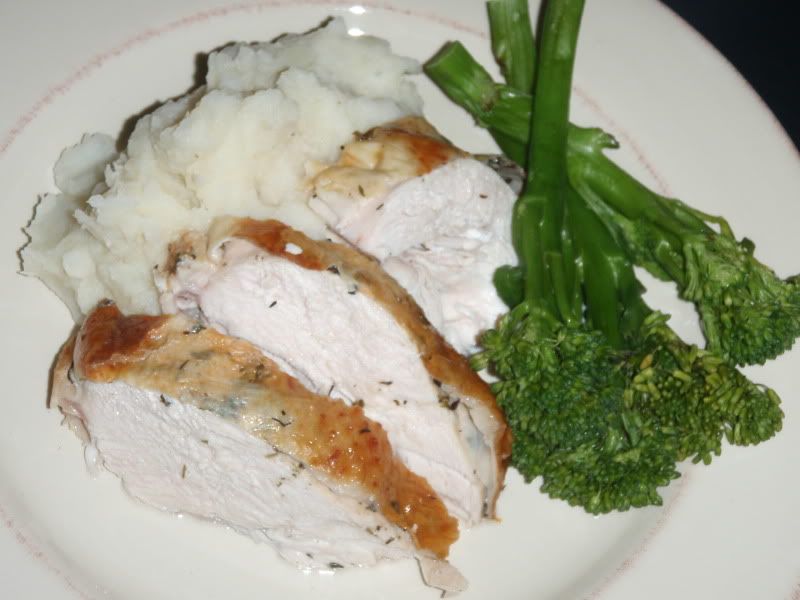
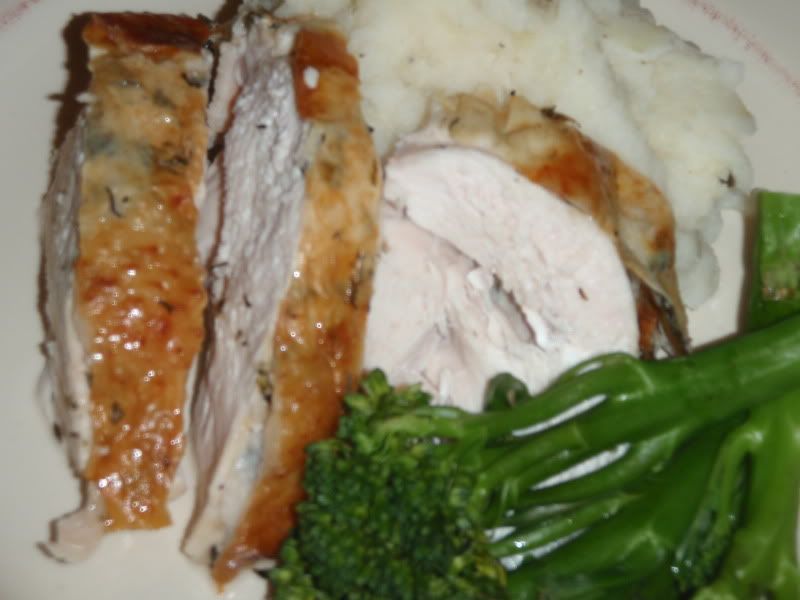
I was in the mood for Thanksgiving food, so I bought "turkey breast" pieces from the market. It wasn't as sketchy as it sounds, but unfortunately turned out to be only a half breast. None the matter, I did my butter herb rub and baked it for about an hour. I paired it with garlic mashed potatoes and some broccolini for a very Thanksgivingy meal.
Photobucket

Ingredients

turkey breast
2-4 tbs softened butter
2 tbs minced fresh herbs (tsp if using dried) - I used sage and thyme
salt and pepper

2 lbs potatoes, diced and boiled until tender
4 tbs butter
1 head garlic, roasted skin-on, wrapped in foil with turkey until soft and spreadable
1/2 c milk, half&half or cream
salt and pepper to taste

Directions

1. Combine herbs, about 1/2-1 tsp salt and pepper, and softened butter into a paste. Work mixture under the skin of the turkey breast, then rub liberally all over the bird. Salt and pepper cavity, if desired.

2. Bake uncovered until internal temp reaches 165 degrees, about an hour. Tent with foil if skin begins to over-brown. Alternatively, cook covered for 45 minutes, then remove cover and brown for last 15 minutes. (I'm working with my new (old) oven and am still learning how evenly or not-evenly it heats).

3. Allow turkey to rest out of the oven for about 10 minutes before carving.

4. Drain potatoes and sprinkle with salt and pepper. Expel garlic from skins. Dot with butter.

5. Using potato masher, combine mixture together with a little milk at a time until desired consistency is achieved. Adjust seasoning to taste.

Serves 2-4
Photobucket

Monday, November 15, 2010

Happy Fall Kid Muffin Bags

Sorry for the long delay in blogging. The move was finally completed last week. However, this is the first bit of crafting I've done since unpacking my craft room a couple days ago. Despite having a craft "room," I share it with my husband's gear and lack my big desk and shelving from Chicago. Still, even though it's cozy, I think it will work nicely. These treat bags were made for my auntie's friends at her Sunday cooking class. The recipe and more pictures of the muffins can be found on my kitchen blog here.

Photobucket

Photobucket

Photobucket

Photobucket

Photobucket

I used the Simply Charmed and Paper Doll Dress Up cartridges for the die cuts, as well as my Corner Chomper. Adhesive included my pink ATG, score tape, Zig two-way glue pen, and Xyron.

Pumpkin Muffins with Raisins and Walnuts

Sorry for such a long break in blogging. I finally completed my move from Chicago to Hawaii and having been enjoying having my husband back. We moved into a cute little cottage in Kaneohe. No dishwasher, but decent kitchen for now. I actually have been both cooking and baking, but haven't posted until now. I did take pictures, and will hopefully get around to posting them. These muffins were made for my auntie's friends at her weekly cooking classes. Hope they liked them. I adapted a recipe found here at Food.com.

Photobucket
Printable Version

Ingredients

1.5 c all-purpose flour
1 c oatmeal (quick)
1 TBS baking powder
1/2 tsp baking soda
1.5 tsp pumpkin pie spice
3/4 c dark brown sugar
1 c raisins
1/2 c walnuts, chopped
1 egg, beaten
1/3 c canola oil
3/4 c skim milk
1 c pumpkin (I used canned)

Directions

1. Preheat oven to 400 degrees.

2. Whisk flour through brown sugar together.

3. Make a well in the center and whisk in egg, milk, canola oil, and pumpkin.

4. Stir in raisins and walnuts.

5. Pour batter into prepared muffin cups.

6. Bake for 20-25 minutes or until cooked through.

7. Remove from tins and cool completely on wire rack.

Makes 12-14 regular muffins


Photobucket

Photobucket

Saturday, October 23, 2010

External Hard Drive Cozy

Not that I'm procrastinating or anything from all the work I have to do, but I wanted share this little cozy I crocheted for my portable hard drive. Since I'll be putting my desktop into storage for the next two months at least, I wanted to back up my computer. This little pouch whipped up in about 15 minutes and consists of 11 rows of hdc and 10-11 rows of dc starting from the side. I began with a chain of about 20 using a J hook. I then just did a quick sc around the sides. It fits my little hard drive and its connector cord. I'm thinking of adding some sort of closure like a button or ribbon, but really must get back to work!

Photobucket

Photobucket

Friday, October 22, 2010

New Cricut Cartridges Released in October

Yesterday was Hello Thursday, and Provocraft announced six new Cricut cartridges! See all of them at here. These two are the niftiest and will go on my wishlist.

Sesame Street Seasons Cartridge
Photobucket

Wrap it Up
Photobucket

I know that the Sesame cartridge seems like an odd choice for me as I'm pretty much Disney all the way. However, this cartridge offers some neat 3-D items like a snowman, picture frame, and even a backpack that probably could hold a mini-album. It also has cute seasonal images with everyone's favorite, Elmo!

Thursday, October 21, 2010

Moving

Cross-posted

There may not be a new post for the next couple weeks. I'm moving back to Hawaii, at least temporarily. I'm excited that my husband's coming home from Afghanistan but quite sad to leave Chicago. Here are a couple pictures of my apartment packed up (mostly packed as I still have a few things left to clear out, including my scrap supplies).

Photobucket

Photobucket

Now all my furniture's gone and I'm sleeping on an air mattress and reclining in a lawn chair! I'll try to take a few more pictures before I leave. I did start a Halloween mini last weekend, but in light of all the real work I have to do, we'll see if that happens.

Moving

Cross-posted

There probably won't be a new post for at least a couple weeks. I'm moving back to Hawaii, at least temporarily. I'm excited that my husband's coming home from Afghanistan but quite sad to leave Chicago. Here are a couple pictures of my apartment packed up (mostly packed as I still have a few things left to clear out).

Photobucket

Photobucket

Now all my furniture's gone and I'm sleeping on an air mattress and reclining in a lawn chair! I'll try to take a few more pictures before I leave, but we'll see.

Wednesday, October 13, 2010

Zucchini Pancakes

I've been wanting to make this recipe for awhile now and twice bought a large zucchini for shredding from the farmer's market. Apparently, the larger a zucchini becomes, the less desirable it is for general snacking. Perfect for baking. Anyway, I printed this recipe from Tasteofhome.com, but believe I saw it first on someone's blog. Since I was out of sour cream, I served the pancakes with apple sauce (like potato pancakes), which worked well enough for breakfast.

Photobucket
Printable Version

Ingredients
1/2 c all-purpose flour
1/2 c grated Parmesan cheese
1/2 tsp dried oregano, salt, and pepper

1.5 c shredded zucchini, water drained
1 egg, lightly beaten
1/4 c chopped onion, sauteed (the recipe called for raw, I don't like the bite)
2 TBS mayo (FF works great)

Directions
Whisk flour, spices, and cheese together. In a separate bowl, combine zucchini, onion, egg, and mayo. Gently combine wet and dry ingredients.

On a skillet or griddle coated with cooking spray or melted butter, drop half cupfuls and cook until browned and firm on each side. (About 2-3 min per side).

Serve warm with sour cream (or apple sauce).

2-4 servings

Photobucket

Photobucket

Tuesday, October 12, 2010

Fall Paper Bag Mini Album (In Progress)

This weekend was a three day weekend in observance of Columbus Day. Although I should have spent the entire time packing, I naturally had to take a little time to start a new project. This is my first fall mini album and my first album made with paper bags (which were trendy about 6 months ago). I used various K&Co papers from the summer and fall, which I found at Michaels. The cover die cuts are from the Simply Charmed cartridge, along with brads and flowers from my stash. I still have to decorate it with leaves, ribbon, and bling, but I think it's off to a good start. The basic style is from one of Laura Denison's Youtube videos from earlier this year.

Photobucket

Photobucket

A few of the pocket pages.
Photobucket

Photobucket

Photobucket

Last look at the cover.
Photobucket

Friday, October 8, 2010

Meatless Chili

Updated with picture

As I mentioned in my previous post, I changed up my standard chili recipe just a tad, mainly to use fresh tomatoes that I got a the farmers' market and no meat.

Photobucket

Ingredients
1.5 c black beans
1.5 c or 1 can of northern beans
3 lbs fresh tomatoes, diced
1.5 c sweet onion, diced
4 cloves garlic
8 oz tomato sauce
1 c corn, frozen okay
1 c green bell pepper, diced
1/4 c chili powder (or to taste)
salt, pepper, olive oil

Directions
Saute onions until soft in olive oil. Add garlic and cook for 1 minute. Add tomatoes and sprinkle with salt and pepper. Allow the tomatoes to break down some, about 5 minutes, before adding beans, sauce, and chili powder. Bring to a simmer and cook covered for 20 minutes or until tomatoes are softened.

Raise temperature to medium and add bell pepper and corn. Cook for another 10 minutes until veggies are softened.

Serve in bowls with cornbread.

Serves 4-6

Super Easy Cornbread Muffins

Happy Friday! Although it's supposed to be a bright, beautiful, and warm weekend, today's posts will be comfort food in case it isn't quite as toasty where you are--Chili and cornbread muffins. Here's the cornbread recipe which is from Bon Apetit, November 2009. The chili recipe will post later today.

Photobucket

Ingredients
1 c cornmeal
1/2 c all-purpose flour
3 Tbs sugar
2 tsp baking powder
1/2 tsp salt
3/4 c creamed corn (this is sweet, so you could omit the sugar)
1/4 c butter, melted
1 egg

Directions
Preheat oven to 400 degrees. Whisk dry ingredients together. Place egg in a well in the center and beat slightly. Combine dry with butter and creamed corn until well-mixed. The mix will be thick. Pour into 9 regular muffin cups or an 8" square pan that has been sprayed with cooking spray. Bake for 20-25 minutes until cooked through.

Makes about 9 muffins or slices

Photobucket

Wednesday, October 6, 2010

Printable versions

For the last three recipes posted, I've created printable versions using Google Docs. The links appear just past the main picture before the recipe begins. I will work on the rest in my dubious free time.

Apple Oat Muffins

As you may know, I went apple picking on Sunday at the Countyline Orchard in Hobart, Indiana. To make apple muffins, I decided to modify this blueberry-oat muffin recipe. I also had some ground flax in the fridge, which I added for extra protein and fiber. It changed the color of the muffins to a dusty brown that I didn't much care for, so I added a sprinkle of sugar on top. These were a big hit at work.

Photobucket

Printable version

Ingredients
1/2 c butter, melted
1/2 c + 1 tbs brown sugar
1/2 c granulated

2.25 c all-purpose flour
1/4 c to 1/2 c ground flax
2 tsp baking powder
1 tsp cinnamon
1/2 tsp salt

1 egg + 2 egg whites
1 c 2% milk

1 - 1.5 c apples, peeled and diced
1/2 c oatmeal

1 tbs butter, melted
1 tbs granulated sugar

Directions
1. Preheat oven to 375.

2. Mix butter and sugars together until fluffy. Add eggs.

3. Whisk flour through salt together in another bowl.

4. Add flour mixture to butter mixture, alternating with the milk.

5. Stir in apples and oatmeal.

6. Pour into prepared muffin tins. Bake for 25-30 minutes until cooked through.

7. Upon removing from oven, brush with melted butter and sprinkle with sugar. Cool completely on a wire tack.

Makes 12-14 muffins.

Photobucket

1st Xmas Mini Albun

Here's my first completed holiday mini album. It's fairly simply, but cute. Plus, it allowed me to use up most of my leftover holiday paper from last year. The die cuts are from the Simply Charmed cartridge, ribbon and all embellishments are from Michaels. Warning, there are a ton of pictures in this post.

Cover
Photobucket

Mr. Penguin
Photobucket

Pages for photos. Each ornament is only adhered half-way so photos may be slipped underneath.
Photobucket

Photobucket

Photobucket

Photobucket

Photobucket

Pocket page for a tag
Photobucket

Big photo tags
Photobucket

These tags open like cards
Photobucket

These tags have photo mats on the reverse. I ran the top layer through my Cuttlebug with the Snowflakes embossing folder.
Photobucket

Tags tucked in
Photobucket

Photobucket

Photobucket

Above view
Photobucket

Tuesday, October 5, 2010

Scrapbookpal.com Goodies

Later today, I'll post more pictures of my Xmas Mini Album. It's almost complete, except for three more tags and possibly some other embellishments. I haven't decided whether I will add pictures from last year or save it for this year. Anyway, here's what was waiting for me in my mailbox from Scrapbookpal.com. I love ordering from this vendor because just like Amazon, shipping is free over $25.

Photobucket

The two Cuttlebug folders are "Seeing Spots" and "Candy Cane Stripe."
ColorBox Chalk ink in "Charcoal" and "Ice Blue"
Ranger's Distress Ink in "Aged Mahogany" and "Black Soot"
A box of daubers for the distress inks (I now have six colors and six coordinating daubers)
Plain assorted flowers to stamp or and glimmer mist.