Tuesday, September 14, 2010

Fourth Recipe Box

Here's the fourth recipe box that I finished over the weekend. As you will see from the last picture, I did a little criss-cross in the back as I really wanted to show off my ribbon. The paper is still from the K & Co Citronella stack and Nana's Kitchen. The ribbon was recently found in the dollar section at Michaels. Love it!

Photobucket
Front

Photobucket
Profile

Photobucket
Inside

Photobucket
Back

Monday, September 13, 2010

Easy Roast Chicken with Onions and Garlic

This recipe was inspired by a crockpot recipe from Stephanie O'Dea that can be found here. In the future, I will probably try it in the crockpot for a longer roasting time, although you generally have to babysit chicken in a crockpot because chicken falls apart much faster than beef. I omitted the paprika (mainly because I forgot it). Super simple, plus it fills the house with yummy roasted garlic smells. Tonight, I will probably serve this with a simple veg and starch.

Photobucket
Printable Version

2 lbs chicken pieces
2 medium onion, sliced (about 1.5 cups)
1 head of garlic, minced (or a handful of cloves whole)
1 tsp each of salt, pepper, paprika
Drizzle of olive oil

1. Preheat oven to 375 degrees.

2. In a baking pan of appropriate size (I used 9 x 13"), layer onions, garlic, and chicken on a rack.

3. Drizzle with olive oil and sprinkle with spices.

4. Cover with foil and bake for 1 hour.

5. Uncover and cook until browned, about 15-30 minutes.

Serves 4.

Third Recipe Box

Here's the third recipe box. I'm on my way to six! Check yesterday's post for details on how it's made. I used paper from the We R Memory Keepers "Write Out" Collection.

Photobucket
Front

Photobucket
Profile

Photobucket
Inside

Photobucket
Folders

Sunday, September 12, 2010

Second Recipe Box

Grrrr, I was having trouble with Photobucket and have been trying all morning to do this post. Back to the regularly scheduled program....

I'm making six recipe boxes! Please visit this post on Laura's blog (Following the Paper Trail ) for complete instructions and a link to her UStream class. While I haven't figured out all the decorating details, the structure is in place, so I'm put them together one by one. Yesterday, I cut out all my chipboard and selected all my paper. I need to work from "kits" in the future as there's something really satisfying about sitting down to a project with all the supplies you will need at the ready. Unfortunately, that's more difficult to do with Cricut cuts, but I'm working on it.

Photobucket
Front

Photobucket
Inside

Photobucket
Back

Photobucket
Profile

Photobucket
Folders

Friday, September 10, 2010

What I've been working on....

Happy Friday, everyone!

Here's a peek at what I've been working on these past couple days. It's not finished yet, but it's coming along. This is my version of Laura's (Following the Paper Trail) recipe box that she did on a UStream class in August. See her post and a link to her UStream here. I still have to decorate the outside of the box and the folders, but the basics are in place. I used K&Co's Citronella paper pad that you might recognize from Kaylee's wall mini album last month for the outside of the box and DCWV's Nana's Kitchen for the photo mats and tabs, ribbon from Michaels, and a Tim Holtz hitch post. Sorry the photos are so bad. I took them before work in full sunlight, which isn't my friend.

Photobucket
Inside the box

Photobucket
Closed box

Photobucket
Profile

Photobucket
This is one of the folders. At the moment, all I have in place is a photo mat on the outside and a tab, but I hope to put recipe cards on the inside.

Let me know what you think.

Thursday, September 9, 2010

Happy Fall Kids

The Simply Charmed cartridge has so many fantastic images for all seasons. These straw kids are so cute! I'm looking forward to making more fall cards featuring them. After I had assembled the kids, sentiment, and hay, the card seemed to need just a little something, so I dug up an old punch. The leaves added the perfect touch. I'm still in the mood for lighter colors, which is why they are Raggedy Andy-esque. Next time, I hope to use warmer colors for a true "fall look."

Photobucket

Photobucket

Materials:
- Paper: A2 card base (Papertrey Ink--green), pattern paper (DCWV "Summer Dreams") 4 x 5.25"
- Cartridge(s): Simply Charmed (kids at 2.75", sentiment at 1"), PaperDoll DressUp (hay at 1.5", then trimmed to 5.25")
- Embellishments: hemp
- Adhesives: Pink ATG gun, Zig two-way glue pen, Xyron, glue dots
- Special Tools: Scor-Buddy, leaf punch (no idea the brand)


After I scheduled this post, I did two more cards using K & Co's Sera Sera's paper because it had darker colors and seemed more fallish. I also used vintage photo distress ink on the hill and on the lining.

Photobucket

Photobucket

Wednesday, September 8, 2010

When Life Hands You Lemons....

This card was inspired by another set of My Pink Stamper stamps called Fruit and Veggie Puns. I mixed up the lemonade images on the Simply Charmed cartridge. I'm not 100% happy with the colors I used, but they turned out generally cute. Thanks for visiting!

Photobucket

Photobucket

Photobucket

Photobucket


Materials:
- Paper: A2 card base (Papertrey Ink--yellow and cream cardstock), two strips of blue and red cardstock cut at 1.5" before punching
- Cartridges: Simply Charmed (pencil at 3", sentiment at 1")
- Embossing Folder: Cuttlebug Herringbone
- Punch(es):MS Scalloped Dots, Fiskars Apron Lace
- Embellishments: ribbon
- Stamp(s): My Pink Stamper "Fruit and Veggie Puns" using Memento Ink
- Adhesives: Pink ATG gun, Zig two-way glue pen, Xyron
- Special Tools: Scor-Buddy, Cuttlebug

Tuesday, September 7, 2010

Back to School

I missed the "Back to School" deadline for Operation Write Home, which I think was sometime in July. Thus, I was very excited to make this card for a teacher friend of mine who starts tomorrow. I used DoodleCharms and Simply Charmed and, of course, my Gypsy to make the shaped card, which fit in an A2 envelope. Sorry for the splotch on the inside of the card. I wrote my message and then decided to add the pencil, so I had to hide what I had written.

Photobucket

Photobucket

Photobucket

Materials:
- Cartridges: Simply Charmed (pencil at 3", sentiment at 1"), DoodleCharms (backpack at 2", apple at 1", bus at 4")
- Adhesives: Pink ATG gun, Zig two-way glue pen, glue dots, Xyron
- Special Tools: Scor-Buddy

Monday, September 6, 2010

You're Very Sweet

Happy Labor Day! It's wonderful to have an extra day off. I am definitely in favor of 4-day work weeks (even at 10 hr days) if I had a long weekend every week. Anyway, my first order from Papertrey Ink came on Saturday. It makes a HUGE difference, especially for my card bases. I don't have to worry about lining them just to make them sturdier. I haven't ran any through my Cricut yet, but I might use the cheap cardstock from Michaels for the layering Cricut images because the act of layering adds sturdiness and save the nice Papertrey Ink for card bases and other things. We'll see. I got a mixed pack of 50 sheets, but there are only two of each color, so I will soon need more of the basics, I'm sure.

Photobucket

Photobucket

Photobucket

Photobucket

Materials:
- Paper: A2 cardbase (pink and white), pattern paper (DCWV Summer Dreams) 4 x 5.25", 1" strip (before punching)
- Cartridges: Simply Charmed (strawberries at 3.5")
- Stamp(s): My Pink Stamper "Fruit and Veggie Puns," stamped using Memento Ink.
- Punch(es):MS Scalloped Dots
- Embellishments: various ribbon from my stash
- Adhesives: Pink ATG gun, Zig two-way glue pen, glue dots, Xyron
- Special Tools: Scor-Buddy

Sunday, September 5, 2010

Holiday Penguin

When I was working on my entry for the My Pink Stamper's "It's Cold Outside" Challenge, I initially cut this penguin thinking that I could put the winter hat from Simply Charmed on him. That didn't work out, so I had a fully cut and assembled penguin staring at me all week, just begging to be put on a card. So, I found him a home and even made him two more friends. Slowly but surely, I'm building my holiday stash.

Photobucket

Photobucket

Photobucket

Photobucket

Photobucket

Photobucket


Materials:
- Paper: A2 cardbase (red, silver, and blue), 2 pieces white cardstock 4 x 5.25", pattern paper (DCWV Summer Dreams) 5.25 x 1.5"
- Cartridges: Simply Charmed (penguin cut at 3", sentiments 1")
- Embossing Folder(s):: Cuttlebug Snowflakes (two cards are embossed side up, the other is negative side. All look cute)
- Embellishments: ribbon
- Adhesives: Pink ATG gun, Zig two-way glue pen, foam tape, Xyron
- Special Tools: Scor-Buddy, Cuttlebug, snowflake punch

Gruyere Mac and Cheese

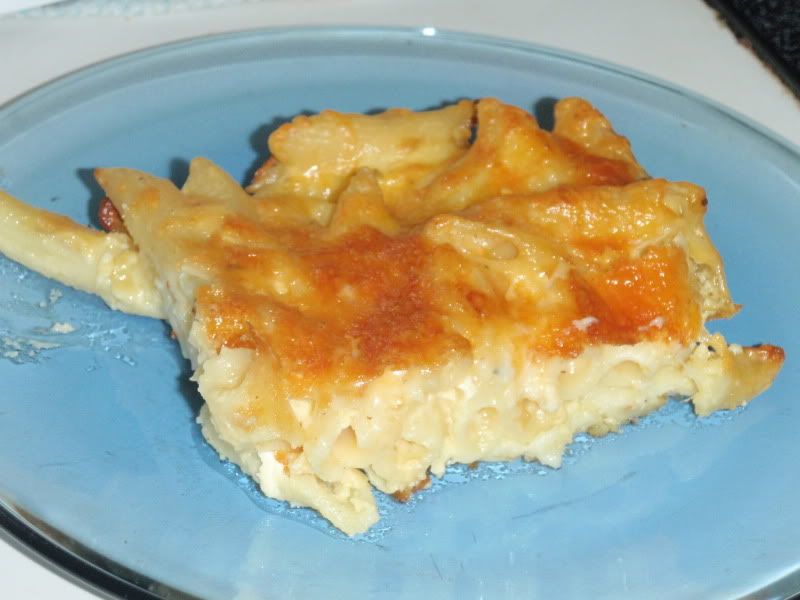
What an absolutely beautiful, fall-like, Sunday morning. Apologies for the overdue post, but if you follow my crafts blog, you know I've been busy with holiday cards and other goodies. I had planned to make this recipe on Tuesday, but didn't get around to it until Saturday evening. I was lucky the milk was still good since I bought higher fat milk (2%) just for this recipe. Here's what I made:
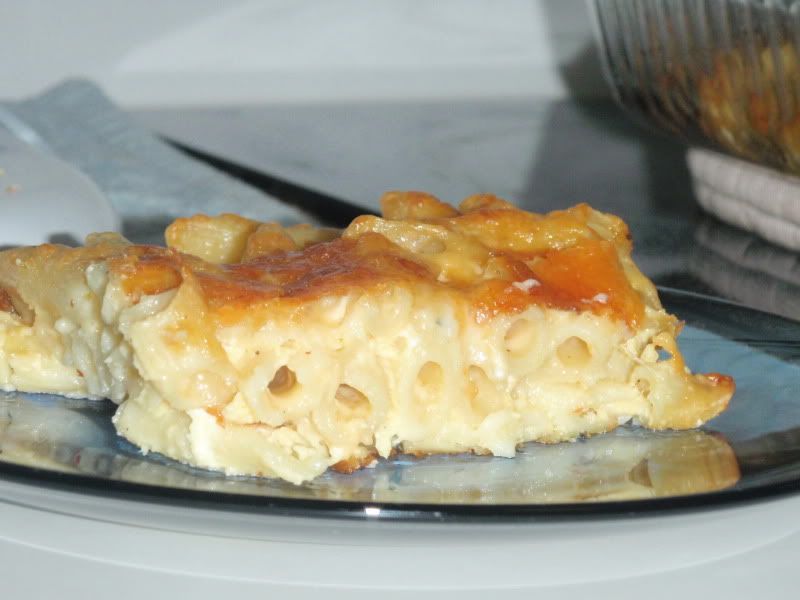
Photobucket
Printable Version

Ingredients

1.5 c Gruyère, shredded
1.75 c cheddar, shredded
2 c 2% milk
3 tbs butter
3 tbs flour
1/2 tsp salt, pepper
1 tsp basil
3/4 lb penne pasta
2 eggs, slightly beaten

Directions

1. Preheat oven to 350 degrees.
2. Cook pasta until al dente. Drain.
3. In a sauce pan, melt butter over medium heat. Whisk in flour. Form a roux and cook for 1-2 minutes.
4. Whisk in milk. Cook while stirring until mixture is bubbly and thickened. This may take around 5 minutes.
5. Reserving about a cup (good handful of both cheeses) stir in cheeses, pepper, and basil. Continue stirring and cooking until smooth and creamy.
6. Mix cheese sauce, 2 eggs, and penne. Add salt and a little more pepper, if desired.
7. Pour mixture into a 9 x 13" pan that has been sprayed with cooking spray. (This would probably fit in a 9" square because it makes a thin layer, but that allows it to cook faster.)
Sprinkle with reserved cheeses.
8. Bake, uncovered, until cheese on top has melted to a golden brown and liquidness has evaporated, about 30 minutes.

Serves 4-6
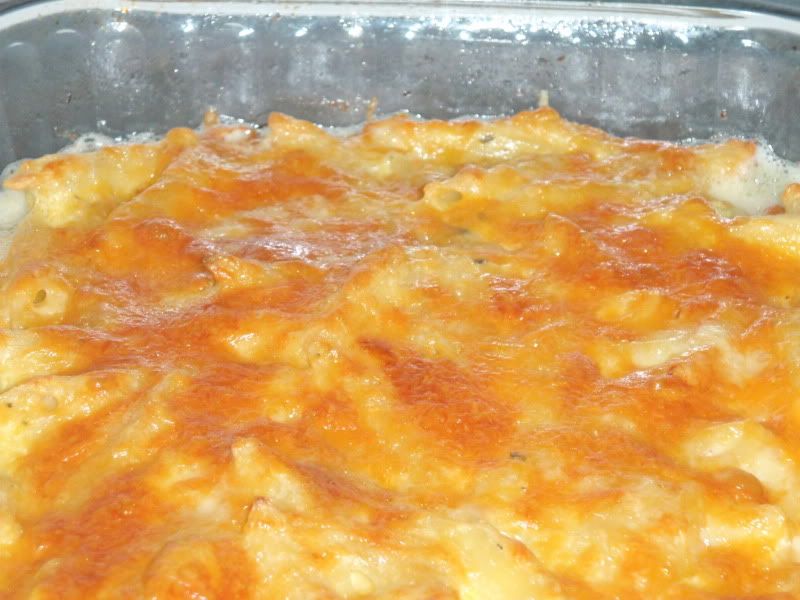
Photobucket

Photobucket

Saturday, September 4, 2010

More loot!

Do you think this is enough scrapbooking and cardmaking loot to keep me busy this weekend? I think it is. I only placed two orders myself and the rest is from my wonderful auntie.

Photobucket

Photobucket

Photobucket

Where I got it all:

Scrapadabadoo.com: Tim Holtz Hitch Fasteners, an Ek Success Adhesive Remover (left out of the picture, but it's an eraser for adhesive), black and metalic eyelets

Papertrey Ink: (My first order!) Paper Basics - Stamper's Select White Cardstock (for stamping),
Fresh Snow 3/8" Twill Tape Ribbon (5 yards), 2009 Perfect Match Cardstock Sampler, True Black 5/8" Grosgrain Ribbon (5 yards)

Custom Crops: My Pink Stamper's Spooky Puns and More Punnylicious

Happy Birthday Robot!

Happy Labor Day weekend! Sorry I didn't get a post up yesterday. I actually finished 4 cards--3 multiples and the one shown in this post, but didn't follow through with the post. As you may know, it take a bit of time to throw a post up, especially if you used a number of elements in your project or might have made it awhile ago. On the other hand, some posts are easy because they're simple or just in your head ;) I cut this robot from the B is for Boy cartridge back when I was making the Baby Boy Mini Album, but cut him too big. However, since he was assembled and Mod-Podged, I decided to keep him to make a card later. This is an incredibly simple card, but would probably be perfect

Photobucket

Materials:
- Paper: White 5 x 7" card base, green cardstock 4.75 x 6.75", pattern paper 4.5 x 6.5--Recollections, Sprockets collection.
- Cartridge(s): B is for Boy (robot cut at 5")
- Stamps: free stamp with my Papercraft Inspirations mad, stamped using Colorbox chalk ink.
- Adhesives: Pink ATG gun, Mod-Podge, foam tape, glue dots
- Embellishments and Tools: brads, Crop-a-Dile


Photobucket
Photobucket

Thursday, September 2, 2010

Two More Beary Best Friend Cards

I made two more easel cards like the one I made this morning. The biggest change was to shorten the easel's angle. Instead of scoring at 3", I scored at 1.5". I also used the flower punch from Recollections.

Photobucket

Photobucket

Photobucket