Wednesday, January 29, 2014

Kitchen Stand Mixer Cozy

 photo DSC02470.jpg

I prefer my appliances to be covered. There's nothing I hate more than discovering a fine, grimey film of dust on one my beautiful kitchen appliances when I want to use it. Most of my appliances currently have crochet covers made with cotton yarn. They're mostly cream with a few blocks of pink and brown. They work, but have zero structure and dull as can be. My current crafty personality is all about color and patterns so I couldn't wait to make a new cover.

Enter my new hobby: sewing! Okay, it's a not a new hobby. I've been fiddling on and off with a sewing machine since I was a kid, but with the birth of my son I've really gotten back into it. It might have something to do with the time investment for the return product--much less time is required than for crocheting and I can make large statement pieces unlike with paper-crafting. Over the past year I've made a set of soft blocks, a tag-style lovey, a sleeping bag, and a nap mat for my son, plus numerous throw pillow covers for around the house. Those projects mostly involved cutting squares or rectangles and didn't involve a pattern or much more than straight lines. With this project, not only did I venture into the world of curves but I also did a bit of quilting!

I followed this mini tutorial from a blog called Heart of Mary. She includes a simple pattern for the curved part, as well as detailed directions. For the most part, I'm very pleased with my result although the bias tape along the top edges was a huge pain as two quilted layers plus the bias tape was a bit much for my novice skills. From a distance it looks great, plus it's also reversible so if I truly hate the imperfections, I can always flip it. Since I plan on covering all my appliances and have a hoard of new fabric from a recent Joann shopping spree, no doubt my skills will improve.

Here are a few more shots of the finished cosy. My apologies for the messy work space in the background and poor lighting but I was anxious to get this posted and the new cover on my machine.

 photo DSC02471.jpg

 photo DSC02472.jpg

Next up will be my spring pillow covers, though I might get around to sharing the winter ones before I take them down. I also have holiday fabric ear-marked for the kitchen since I actually hoped to make this project in December but time got away from me. There's a possibility I'll make a holiday one before I work on covering the rest of the appliances. We'll see.

Have a great rest of the week!

Friday, January 17, 2014

Chocolate Hazelnut Cream Puffs

Happy Friday! How about a super easy dessert? These cream puffs are deceptively easy and so delicious. This recipe comes from the blog One Perfect Bite. I followed the recipe pretty much to the letter, except for the omission of chopped nuts. I made both mini puffs, as the recipe suggests, and 6 bigger ones, but will stick to minis in the future. Much more satisfying to polish off 2-3 at a time then be restricted to just one :) Plus, the big ones took longer to bake and it wasn't as easy to tell when they were done. Though none were left to freeze, I've been freezing bakery ones for some time so I feel pretty confident that these would freeze--either with or without the filling. Enjoy!

 photo chocolatecreampuffs1.jpg

Chocolate Hazelnut Cream Puffs

Filling
6 ounces mascarpone cheese
2 tablespoons sugar
2/3 cup chocolate hazelnut spread (e.g. Nutella--I used Wegman's storebrand)
1/4 cup heavy whipping cream
1/2 cup chopped hazelnuts or pecans, toasted (I omitted)

Pastry
1 cup all-purpose flour
3 tablespoons baking cocoa
2 tablespoons sugar
1 cup water
1/2 cup butter
1/4 teaspoon salt
4 eggs

To Prepare Filling
Beat mascarpone cheese with sugar until smooth. Gradually add heavy cream and hazelnut spread and beat into smooth. Stir in nuts, if using. Cover and refrigerate until puffs have cooled.

To Prepare Puffs
Preheat oven to 400 degrees. Line baking sheets with parchment paper.

Whisk together flour, cocoa and sugar in a small bowl and set aside. In a medium saucepan bring water, butter and salt to a boil. Stir in flour mixture and stir until a smooth ball forms. Remove from heat and let stand for 5 minutes. Add eggs, one at a time, beating well after each addition.

Drop dough by rounded tablespoons 2" apart. Bake for 20-25 minutes or until puffs are set and slightly browned. Remove to wire racks and cool completely.

Slice each puff in half or about 3/4ths of the way. Use a piping bag and to fill with filling. (Alternatively, you can scoop out some of the dough before they cool, but the dough is light and airy so there was plenty of room to fill.)

Refrigerate or freeze any leftovers.

Makes about 2 dozen mini cream puffs

 photo chocolatecreampuffs2.jpg

 photo chocolatecreampuffs3.jpg

Thursday, January 16, 2014

2014 Crochet Progress

Inspired by the 2014 Crochet Mood Blanket group on Facebook and Instagram, I decided to start working on a blanket that I could make in a piecemeal fashion. Initially, I planned it out so I would finish this in a year, doing about 3 squares per week, but then I realized that I was in a crochet mood. Also, what was the likelihood of me sticking to one craft all year long, despite my best intentions? Not very high. And I'm okay with that, so long as I'm crafting something. Anyway, I selected the Patchwork Motif Afghan which is a free pattern from Lionbrand.

I haven't done too many hexagonal patterns before, so I thought it would be something new. Today's January 16th and I've finished 10 squares. I'm a little behind if my goal is one square a day, but actually I'm doing a couple at a time, whenever the mood strikes me. Hey, I guess in that way it's a "mood" blanket, right? Here's my progress to date:

 photo BF2939D4-1A81-4918-B11E-870C779EE2E6-1278-00000263F0819876_zps1b3c9459.jpg

I'm working with a single color now. I might regret that when it comes time to put the blanket together, but for now it's easier to keep a single skein of yarn out at a time.

Stay tuned...

Saturday, January 11, 2014

Another wet and dreary day

It's hard to tell in this shot, but it's raining cats and dogs. This day two of rain, rain, rain. I love the rain, but this time of year it's should be snow, darnit! On the bright side, it's deliciously warm...the trouble is I'd probably be a bad mommy if I took my little one outside to play in it for very long.

 photo DSC02443.jpg

I guess my goals for the day will include mostly puttering about the house, hanging with the little one, and maybe a little baking.

Thursday, January 9, 2014

Happy New Year!

It's another year--can you believe it? I know, I know, I'm already a week and a half late, but oh well. As you may have guessed from the new blog URL (thefishieskitchenandhome.com), some changes are afoot. Assuming I can stick with them, that is. Last night, I merged my craft blog with my kitchen blog and purchased a shiny new domain name. If you're in the market for a new domain name, GoDaddy is having a super 99 cents sale so I recommend checking them out.

Since my son came along, my time for hobbies decreased dramatically. I've experienced a fair amount of guilt for neglecting the blogs, but not enough to really make much headway in getting any of them on track. Don't worry, I still try new recipes on a weekly basis and find time every now and then to craft. By merging my blogs, I can also share just about anything I want in one forum that's not kid-related. At the moment I intend to keep my kid-related posts separate on ProjectLittleBlueberry.com simply for organization purposes, but I have a lot of catching up to do there as well.

In the next week or so, hopefully I'll get things here organized and maybe even come up with a blogging schedule. I still take random photos of what I bake, cook or craft so I've definitely got some material to share. I also plan on sharing more random life-musings such as my list of 2014 goals. Fingers crossed that I'll stick with it.

Until then, ta ta for now!

Wednesday, January 8, 2014

Panzer Tank Slippers

 photo IMG_2511.jpg They're finally finished! I can't believe I thought I could make these in a weekend. They took an entire week to make. Each day I devoted at least an hour or more, some days it felt like I spent the entire day. The probably was not so much that they were complicated to do, I'm just mostly a blanket and scarf kind of hooker. Sure, I've made hats, shawls, and even some fitted clothing over the years, but off the top of my head I can't think of any amigurumis or stuffed animals that I've completed. Making cute, small items requires greater attention to detail than I usually approach crochet projects. Anyway, I managed. And they're cute.

I used a pattern found on Etsy, which my husband found and asked me to make for him. For the most part, the pattern is extremely well-written--lots of pictures, however I think the author became a bit tired of pattern-writing towards the end, especially when it came time for assembly. Either that or it's a common sense thing that I'm just lacking. By the time I started assembling the second slipper, I had figured most things out, but the first one was rather tedious.

Here are a couple more shots of the slippers.
 photo IMG_2512.jpg

As you can see in this last picture, I "embroidered" an iron cross on the side of each tank. I use quotes because I did a really messy job here. I so wanted to be done with these things and just wasn't thinking that you could easily see the messy side if someone wasn't wearing them. Oh well. Maybe in another 7 years I'll make my husband a neater pair.  photo IMG_2516.jpg

Tuesday, December 3, 2013

Another Pecan Pie Recipe

Well, hello there! After nearly three months, I decided it was time to dust of the blog and start posting a bit more. I can't say that there will be many more posts to follow, but I will try to do as I did last year, which is to end the year with a more organized slate. Trouble is that this year we'll be in a cabin in woods which, though very nice, doesn't have wifi. However, we'll be back in Chicago for a couple of days after the new year before we head home so I might get some quality blogging in then. Maybe.

On to today's post. For Thanksgiving, I wanted four different pies--chocolate cream, pumpkin, apple, and pecan. However, as I learned a few weeks ago when I made pecan pie squares, many desserts that I made years ago are now too sweet for my taste buds. I didn't want to lose too much sweetness, though, so I combined a Cooking Light recipe and the one from the Karo Syrup website. Results were good, though still a little too sweet for me to eat as much as I'd like. (Probably not a terrible thing, I know :). I used my regular dough recipe, so rest assured it definitely wasn't a low-cal affair. Also, although I used 1 1/2 cups of pecans, it still only made enough to fill a regular pie dish not a deep dish plate, which is what I used. Yes, I have at least 6-8 pie plates, but two were occupied by the chocolate cream pies, one held a pumpkin pie, and another was in the dishwasher, so all I had left was a metal plate, a couple clear Pyrex ones, and this deep dish plate that seemed to match the best. To address the problem of too much space, I simply rolled down the dough and made a crostada-like crust.

Another Pecan Pie Recipe
 photo PecanPie.jpg

1 cup corn syrup
2 eggs
2 egg whites
2/3 cup brown sugar
2 tablespoons butter, melted
1 tsp vanilla
pinch of salt
1 1/2 cup pecans, halves and chopped
1 regular pie crust
Egg wash, if desired

Preheat oven to 350 degrees. Roll pie dough and place in pie plate, if not using frozen. There is no need to par-bake the crust.

Blend together corn syrup through butter until well mixed. Stir in vanilla, salt, and pecans. Pour into pie. If desired, give the crust a brush with an egg wash.

Bake for 60 - 70 minutes until center of pie is set (i.e. no more jiggling) and nuts are lightly browned.

Cool for at least 30 minutes, then serve with whipped cream.

Friday, September 13, 2013

Baking for the Freezer

One of the more unusual things I've been buying lately is prepared bread items. No, I'm not buying sandwich bread and still make my trusty Egg Sandwich Bread each week, but I have bought English muffins and more than my share of bagels. I've decided that that has to stop. This weekend, I'm going to do my best to stock the freezer with ready to eat baked goodies. Tonight, I made English muffins using a recipe from my favorite bread machine cookbook, the Bread Machine Bible.

Chocolate Chip Cherry Scones.

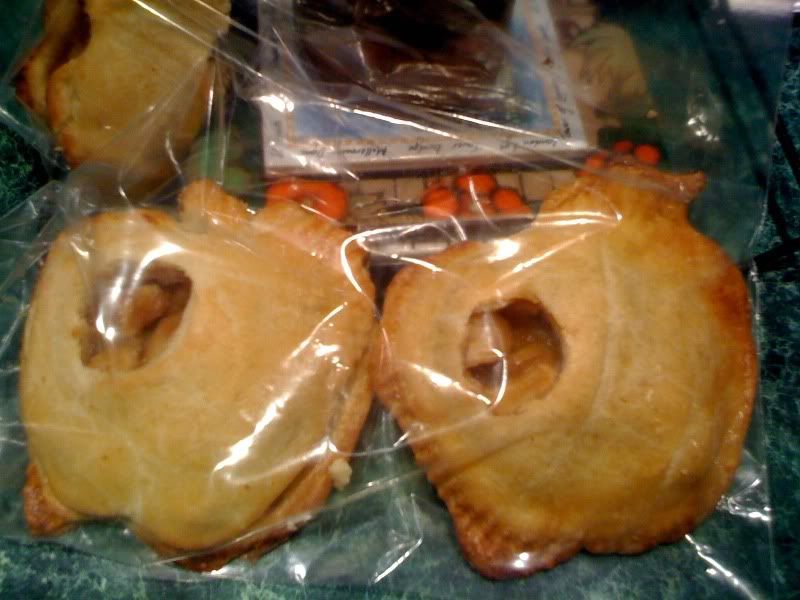
And Apple Pie Pocket Pies. This picture is from a few years ago. Since I was getting tired, I cut three apples, then made the rest fold-overs. Pie definitely don't need to be cute to be yummy.

Unfortunately, I then ran out of both all purpose and white whole wheat flour so I couldn't keep going. Tomorrow I hope to make bagels and at least one flavor of muffins, but that depends upon when I make it to the store. Also on the cooking agenda for staples is chicken stock, which I'm in desperate need of, yogurt, and bread.

What's cooking in your kitchen this weekend?

Wednesday, August 21, 2013

Roasted Vegetable Stock + Post-Moving Update

Well, hello there! It's good to see you again. As I anticipated, with moving went the death of my brief return to regular blogging. I can't promise that now that we're (nearly) settled in I'll improve, but I will promise to try. I do have several new recipes to share with you, albeit several are without pictures.

In general, the move went as well as to be expected. This was my first experience with a full-service move (i.e., they do the packing for you). In the past, I'd always had boxes and boxes ready to go and a bunch of sweaty guys simply loaded them up, disassembled a few pieces of furniture, and did the same thing at the destination. This time instead I had to deal with 4 sweaty guys taking ages to pack and load. In my previous 6 moves, I'd only had one experience where it ever took the movers longer than about five hours to be in and out of my life. (The previous time was when we left Hawaii and they point-blank told me that I was their only assigned job for the day and would be killing time so they weren't sent out on another.) Anyway, many things I never had to worry about or be annoyed about were involved in this move. For example, that they left the largest packing task (my kitchen) to a single guy, who obviously had no clue about how to pack efficiently as he packed about three dishes an hour, was maddening. Moreover, the foreman kept promising that they'd be done in a day. He promised this all the way up until 5:00 p.m., when I finally told him there was no way it was going to happen as my kitchen was still NOT packed! Other than their sluggishness during the loading, breaking a lamp with a CFL bulb 3 minutes after they arrived (a minor hazmat issue, btw), and numerous other minor annoying things like adding extra padding to a pack of rubber erasers and placing my super heavy bed frame in the wrong position twice (naturally I didn't notice the second screw-up until after they left), things generally went okay. Northern Virginia with its terrible congestion (think H-1 during rush hour) is a dimming memory.

Unpacking has taken quite awhile. My aunt and my husband's parents were in town for a week or two to help out so much got done while they were here. However, my husband and I moved into an "old" house (it's nearly 40, which I don't consider old seeing as I'll be that age by the end of this decade, but it's old) and there were a lot of little things that claimed our attention. Thus, instead of our extended family helping just with unpacking and picture-hanging (which they did do a lot of), they built a stand-alone pantry because apparently much cabinet space wasn't needed in the 1970s, and went to Lowes a dozen times for patio, lawn and garden gear. Speaking of which, I finally got my very own grill!!! This meant that all I needed to do most of my cooking was a cutting board, knives, and tongs. I even now make our weekly pizza on the grill. In short, we began making the house our home right off the bat, which didn't leave quite as much time for unpacking as I'd hoped.

However, Friday will be our 1-month anniversary of moving into the house and I'm determined to finish unpacking if it kills me, which it very well may seeing as it's now Wednesday and I haven't touched a box since the weekend. Despite all my complaints about the move, we're really loving this house. It's not a whole lot of space, but it's a lot more than we had. My son has nearly an entire room for his play area, as well as his bedroom, a portion of his Daddy's office, and assuming I ever get it unpacked a place in my craft room. We don't have a proper yard, but we do have a good-sized deck for his slide, picnic table, and other toys. What's best of all about this area is that there are sidewalks galore! We can walk to two libraries, a park, two farmer's markets, two lakes, a very nice mall, several play lots, and the neighborhood pool. Sadly, we cannot walk to either the Trader Joe's or the Wegmans as they are just over 3 miles away and across a major highway, but there are two grocery stores that we can walk to in a pinch. Plus, my husband's about 10 minutes away from work which means he turns up quite often during the day.

Wow, that was a much longer bit that I'd intended. Enough chatter and onto the recipe. One of the only downsides of this area that I've noticed thus far is that food prices are slightly higher than they were back in Northern VA. On the plus side, there are regular farmer's markets all the way till Thanksgiving so that takes a bit of the sting out of my weekly produce bill which was getting out of hand. (I'm willing to trade some organics for the farm-to-table experience and several vendors at the market are at least low-chemical, even if they are not certified organic). Anyway, in efforts to save a little, I'm again trying to front-load my meat and other major pantry-stocking purchasing to the beginning of the month. Since the freezer's still full, that I have no whole chicken to make chicken stock shouldn't mean a trip to the market. Enter vegetable stock. It's absolutely beautiful! As the title of this post suggests, I roasted my veggies first per this recipe, then simmered away as I usually do for chicken or beef stock. I haven't tried cooking with it yet, but I'm sure it will work splendidly for soups, rice, and other grains. The basic recipe is again more of a method, but I'll include what veggies I used below. If you check out the Food Network recipe I roughly followded, it has suggestions for "summer" and "winter" varieties.
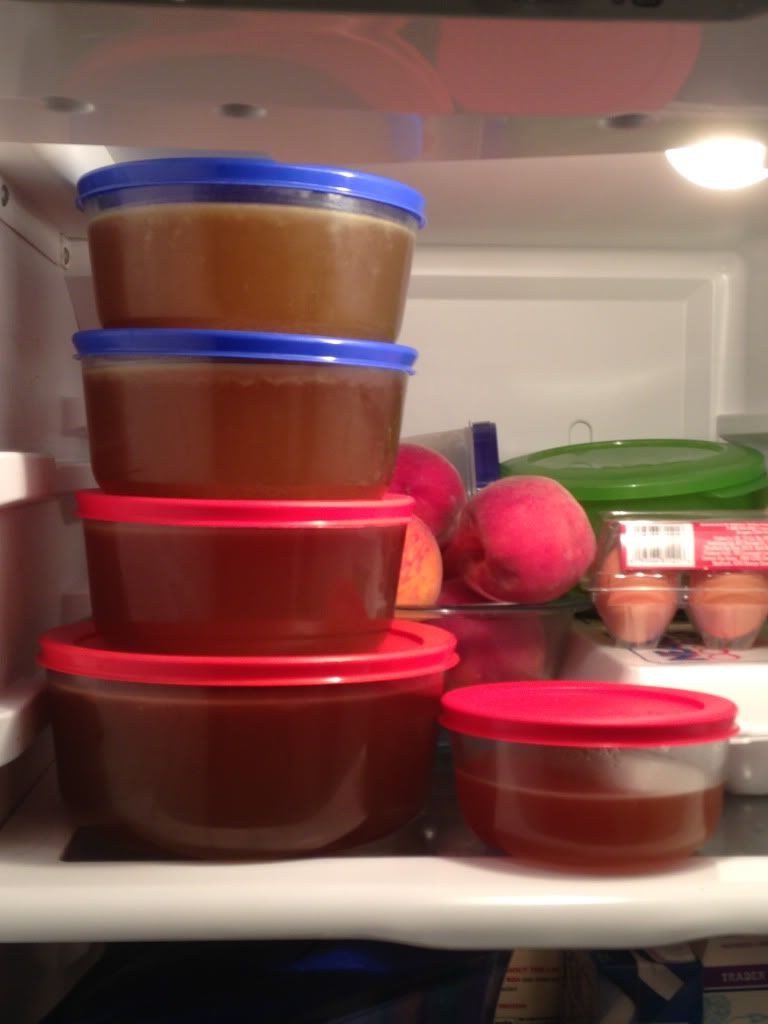
 photo photo-1.jpg
Did I mention it's beautiful? As you can see, there's next to no yucky fat to skim off.

Roasted Vegetable Stock
4 onions, quartered
4 carrots, cut into chunks
3 stalks celery, cut into chunks
8 garlic cloves, crushed
2 leeks, washed, rough stems removed and cut into chunks
Olive oil
1 TBS black peppercorns
Few springs fresh thyme
1 tsp dried rosemary (or large fresh spring)
2 tsp salt
1-2 bay leaves
3-4 quarts water

Preheat oven to 400 degrees. Toss veggies in olive oil and place on a sheet pan in a single layer. Roast for 45 minutes.

Add veggies and remaining ingredients to a large stock pot and fill with water. Bring to a boil, then cover and simmer for and hour or two until the stock is a lovely golden color. Strain and cool before refrigerating or freezing.

I haven't portioned mine out but it looks like I got at least 14-16 cups worth.

Friday, July 12, 2013

Turkey Pot Pie + Update

After nearly a week of regular blogging, I fear I will again take another hiatus. Hopefully not too long of one, but I make no promises.

We're moving again. This time from Northern Virginia to Columbia, Maryland. I think this is my fourth move in three years. I can't really blame military life as my move from Chicago to Hawaii in 2010 was a bit overdue. For those of you who don't know, my husband and I spent the first nearly four years of our marriage living hundreds to thousands of miles away from one another. I was working in Baltimore when he was stationed in North Carolina. Then I moved to Chicago and he was transferred to Hawaii where he frolicked on the beach when he wasn't deployed to Iraq, then Iraq again, and finally Afghanistan for 6-7 months at a time. Fortunately, my work in Chicago allowed me visit him roughly once every other month or so and I didn't go quite too nuts during these numerous deployments. Naturally, once we decided that enough was enough and I relocated to Hawaii, took the bar there, and found a great job, boom, he was transferred to Northern Virginia. To be fair, move number 3 wasn't the military's fault. Last spring we moved on our own to a larger apartment in preparation for the arrival of our son.

In truth, we're excited about this move. Our new home will be an actual house, but not too much house for our first non-apartment experience. There's no basement and the yard looks manageable (fingers crossed that I'm right on that), but we will be getting a living room, a family room, and a separate dining area. The trade-off is the loss of an open-concept design, a closed-off kitchen (but with windows!) and smaller bedrooms. Assuming I remember, I'll try to post pictures in the coming weeks.

Okay, that's enough rambling. Onto today's post. It's not really new as I made this recipe with chicken last year. However, I did take new pictures so it's worth a separate entry.

 photo photo-2.jpg

Turkey Pot Pie

Crust
2 1/2 cups all-purpose flour
1 teaspoon salt
1 cup butter, cold and cut into small pieces
1/4 cup ice water

Filling
2 cups cooked turkey
3-4 med carrots, diced
1 med onion, diced
1/2 c corn
1/2-1 c peas and or green beans, if desired
1/3 cup butter
1/3 cup all-purpose flour
1/2 teaspoon salt
1/4 teaspoon black pepper
1/2 teaspoon garlic powder
1/2 teaspoon dried thyme
1 3/4 cups of chicken broth
1 cup milk

1 egg, mixed with 1 tsp water

To Make Crust
Using a pastry cutter or in the bowl of a food processor, combine flour and salt.

Cut in or pulse butter until mixture resembles coarse crumbs. Add in ice water a tablespoon at a time until the dough holds together without being wet or sticky.

Turn out dough onto a floured work surface. Wrap in plastic, and refrigerate at least 1 hour or overnight.

To Make Filling
Preheat oven to 425 degrees F. Remove dough from fridge.

In a saucepan, melt butter and saute onions and carrots until onions are soft and translucent. Whisk in flour, salt, pepper, and spices and cook for a minute. Slowly stir in 1 3/4 cup chicken broth and milk. Simmer over medium-low heat until thickened. Gently stir in turkey, corn green beans, and peas. Cook for 2-3 minutes to bring everything to the same temperature.

Remove from heat and cool.

Assembly
Divide dough in half (if you haven't done so already) and roll into a large circle. Line the base of your pie pan. Roll the other half into a circle large enough to cover the pie. If possible, put both in the freezer for about 10 minutes. Spoon filling into pie. Cover with remaining dough and crimp edges with a fork (or fancy pie tool) to seal. Cut several slits to vent and brush with egg wash. Bake for about 30 minutes until golden brown.

Serves 4

 photo photo.jpg

Wednesday, July 10, 2013

Cherry Mini Pies

It's summer time and cherries are in season! No, we haven't been cherry-picking this year. Somehow berry picking in the summer turns out to be more difficult to schedule than apple picking in the fall. In June, the weekend we had planned to go turned out to the be the off weekend between strawberries and cherries. Since then the unbearable heat has made being outside for any length of time not ideal. Still, summer means fruit pies and I just so happened to have some frozen sweet cherries in the freezer.

A brief note on sweet cherries. Most pie recipes tend to call for sour cherries, but all I had were sweet. Fortunately, I stumbled upon this recipe for cherry pie filling from My Baking Addiction and these turned out great. A healthy dose of lemon juice provided some needed tartness. In general, I imagine you could just use less sugar in whatever pie filling recipe you use if it calls for sour cherries.

I also used a lighter crust than my usual pie crust with tasty results.

 photo D9BBD355-B1BD-43F3-B05A-9944EA05F26A-10025-00000BAA109E0341.jpg

Cherry Mini Pies

Dough
1 1/2 cups all-purpose flour
1/2 teaspoon sugar
1/4 teaspoon kosher salt
1/2 cup butter, cut into 1/2-inch pieces
1/4 cup ice water

Filling
5 to 6 cups fresh pitted cherries, about 2 1/2 to 3 pounds (or 16 oz frozen)
1/2 cup water
2 tablespoons lemon juice
2/3 cup granulated sugar
4 tablespoons cornstarch
1/4 teaspoon almond extract

Also
1 large egg, whisked with 1 teaspoon water
1 tablespoon raw sugar

To make dough whisk together flour, salt, and sugar. Add butter and cut in with a pastry cutter until coarse crumbs form. Add in water gradually until dough comes together, adding more water if too dry. (Alternatively, you can do this in a food processor.) Make a flat disc, wrap in plastic and chill for at least 2 hours.

To make filling, in a saucepan over medium heat, combine cherries, water, lemon juice, sugar and cornstarch. Bring to a boil, then reduce heat to low and cook, stirring frequently, for about 10 minutes until thickened. Stir in extract. Cool.

Preheat oven to 375 degrees.

Roll dough to 1/8"-1/4" thickness. Cut or slice into pieces for 6-10 pies. (My pies were about 3 x 2" and I got 10). Spoon a tablespoon or so of filling into each pie, add top layer of dough, and crimp shut. Place on a baking sheet covered with parchment paper. Make a couple slits in each pie to allow steam to escape. Brush with egg wash and dust with sugar. Tip: Freeze pies for about 10 minutes before baking for flakier crusts.

Bake pies for 35 minutes until golden brown and filling is bubbly.

Makes 6-10 pies

 photo 05C19D87-1CB0-41AF-B872-494E7AFF75C7-10025-00000BAA187B8D40.jpg
Note: I didn't bake this many pies on one tray, only put them there for the photo. You should space your pies a couple inches apart as they may ooze filling during baking.

Tuesday, July 9, 2013

Butternut Squash Ravioli with Sage Brown Butter

My husband loves, loves, loves raviolis. Even certain veggies that he does care for (e.g. mushrooms), he'll eat in raviolis. Hmmm, I wonder if I could put roasted beets in them? Anyway, I've been making this recipe for several years now, but just realized that it's never made it to my blog. It's an Emeril recipe from over a decade ago and I pretty much follow it precisely except to omit a suggested pinch of nutmeg and substitute 1/2 and 1/2 for the heavy cream. The recipe calls for shallots, but if I'm out, I'll often use a bit of onions and garlic.

When I first started making this recipe, I used premade wonton wrappers for the ravioli dough. Then two years ago we moved to Virginia and the ones from the local grocery store tasted weird. Ever since, I've always made my own dough using another Food Network recipe. I have a set of pasta rollers for my KitchenAide mixer, but when I'm feeling too lazy to haul out the entire apparatus, I just use a rolling pin and we eat a little thicker pasta.

A couple ways I speed this recipe along is to roast the butternut squash ahead of time and keep it in my freezer. Actually, for a good-sized squash, say 2-3 lbs, this recipe only requires half. So I might roast the squash, use half the same day, and freeze the rest to make the dish in another month. I'll also make the filling earlier in the day and chill it in the fridge till I'm ready to make the raviolis in the evening. That only shaves about 10 minutes of time, but eliminates an extra pan and chopping board. Pasta dough can also be frozen.

Wow, that's a bit more blathering about a dish than I usually do. On to the actual recipes!

 photo FD10661E-E3CE-49D7-B6BD-5EF632361644-10025-00000BA9E1495A2C.jpg
As you can see, the pasta's a little thick because I used my rolling pin last night, but I did punch cute little ravioli shapes for you, which I wouldn't ordinarily do.

Butternut Squash Ravioli with Sage Brown Butter

Ravioli Dough
2 c all purpose flour
1 tsp salt
3 eggs
1 TBS olive, plus a drizzle for later

Filling
1/2 c + 1 TBS butter, divided
3 TBS minced shallots
1 c roasted butternut squash, mashed
3 TBS half and half
3 TBS grated Parmesan or Parmigiano-Reggiano cheese, plus 2 more for serving, if desired
salt, pepper
12 fresh sage leaves (or more), rinsed and dried

To make the dough using an electric mixer, please see the original recipe for directions. My method is as follows: Mix the flour and salt together and dump onto a clean counter top, forming a mound. (You can use a large bowl too, but you'll dump it later for kneading so I just use my counter.) Make a well in the center (think volcano) and add all the eggs and 1 TBS of olive oil. Whisk the wet items together. Carefully draw the flour from the base of the volcano towards the well and incorporate the mixture together. In a couple of minutes, all of the flour should be incorporated and it shouldn't be too sticky. Keep kneading and folding the dough until it is smooth and elastic, about 10 minutes. (Note: if your dough isn't coming together, add a drizzle of water or more olive oil. Conversely, if it's too wet, you can add a little more flour.) Drizzle your ball of dough with olive oil and wrap in plastic wrap. Allow to rest for 30 minutes while you make your filling.

To make filling, melt butter in large saute pan over medium heat. Add shallots and cook for 1-2 minutes. Add the squash and cook until the mixture is slightly dry, about 2 to 3 minutes. Season with salt and pepper. Stir in the half and half and continue to cook for 2 minutes. Remove from the heat and stir in 3 tablespoons cheese. Season again with salt and pepper, if necessary. Cool completely.

To assemble your raviolis, roll dough out to 1/8" thinness or less. (Original recipe states 1/4" but it's simply your personal preference so long as the dough isn't so thin that it won't hold your filling). Cut into your preferred size of ravioli. The picture shows 1.5" squares, though I tend to make mine about 2 x 2" or larger when I'm free-handing cutting them. Drop about 2-3 teaspoons of filling per ravioli. Lightly wet the edges to seal the ravioli. Place on a sheet covered in parchment paper and freeze for 5-10 minutes. (This step helps them hold together).

Cook raviolis in boiling salted water for about 3 minutes until they float to the top and are pale in color. Drain and keep warm.

To make the brown butter sauce, melt 1/2 cup of butter in a saucepan. Add sage leaves and continue cooking until butter begins to brown. Remove from the heat.

Spoon butter sauce over raviolis and sprinkle with cheese for serving.

Serves 4

Monday, July 8, 2013

Monday Breakfast

Good Monday morning! Finally, it's a decent temperature outside--mid-70s. While it won't stay that way long, it's a very nice break from the horrible heat we've had of late. Hopefully we'll be able to take a nice walk in a bit before it gets too hot.

Here's my simple breakfast:


view full image

Blueberries, bananas and toast.

Chicken Fried Steak with Gravy

I have no idea what brought about this craving, but one afternoon about a week ago I had the urge to make chicken fried steak. The thing is, I'm not sure I've ever had chicken fried steak. It certainly isn't a dish I've ever made before or had at a friend or family member's house. Southern cooking, other than the occasional cornbread (and chili, if that's considered southern), just isn't in my food routine. I may have ordered the dish on a whim years ago at a chain restaurant such as Cracker Barrel, but I honestly don't remember.

Anyway, I had a nice piece of sirloin which I had intended to use to make beef with broccoli, but I just wasn't in the mood for that. After a quick Google search, I decided upon a recipe from The Pioneer Woman and one from Alton Brown. Essentially, I followed the Alton Brown recipe but applied Ree's method of battering the meat.

The results:

Fantastic gravy! I'd never made a white gravy until now and will definitely make it again. (The only gravy I'd made before is my caramelized onion-balsamic gravy that I serve with turkey.) Pounding the meat was fun, though a meat mallet would have worked a lot better than my rolling pin. Pan-frying wasn't nearly as intimidating as I thought it would be. The only real negative was a slightly oily crust, which was due to the double batter method from the Pioneer Woman and my not keeping my oil the right temperature. My husband gave it a thumbs up and I enjoyed leftovers the next day.

Chicken Fried Steak with Gravy
2 lbs sirloin (or bottom round)
2 teaspoons kosher salt (seasoned salt would be tasty too if you can find a brand without MSG)
1 teaspoon freshly ground black pepper
1 cup + 3 tablespoons all-purpose flour
2-3 eggs, beaten
1/4 cup oil
1 tablespoon of butter
2 cups chicken broth
1/2 cup milk (I used half and half for added richness)
1/2 -1 teaspoon dry or fresh thyme leaves

Cut steaks into 8-10 portions. I only had about 1.5 lbs of meat so I cut roughly 6 four-ounce pieces. Pound meat evenly to a height of 1/4". Sprinkle with salt and pepper.

Whisk about a teaspoon of salt, 1/2 teaspoon of pepper, and 1/2 teaspoon of dried thyme with 1 cup of flour. Set up an assembly line and dredge meat first in flour, then in egg, and then again in flour. If you're more proficient that I am at pan-frying, do one more round in the egg and flour. Allow meat to rest for 10-15 minutes before frying.

In a heavy skillet, heat the oil over medium-high heat until it's shimmery. Test it with a pinch of flour which should sizzle immediately when it hits the oil. Fry steaks about 4 minutes per side until golden brown. Be careful not the overcrowd the pan which will cause the oil temperature to plummet and your breading to become greasy.

Allow meat to drain a bit on a rack and rest while you make the gravy.

Discard all but 1 tablespoon of oil from the pan. Melt butter over medium high heat. Whisk in 3 tablespoons of flour and make a roux. Add the chicken broth and deglaze the pan. Whisk until the gravy comes to a boil and begins to thicken. Reduce heat and add the milk and thyme. Whisk until the gravy coats the back of a spoon, approximately 5 to 10 minutes. Season to taste. Serve the gravy over the steaks.

Serves 4-6

Sunday, July 7, 2013

Breakfast Sunday

86 degrees with a heat index of 93 on this gorgeous Sunday morning and it's oatmeal for breakfast again.

Index Updated!

Since I've been posting a lot this weekend, I decided to give the Recipe Index a needed update. I still want to figure out a better and more attractive way of organizing the index, but at least most of my recipe collection is now linked from there. If you can't find something, please use the search box in the upper right corner of the page. Thanks for visiting my kitchen!

Mocha Chip Ice Cream

With the temps hitting the 90s each day, it was time to make some ice cream! I made this recipe a couple times last summer, but with the new little one, food blogging took a break. Last summer I generally followed this recipe from My Recipes.com and made coffee ice cream with chocolate chips. Yesterday, I decided to add even more chocolate and mixed the chocolate shavings right into the ice cream base. Then when churning I added another three ounces of shaved chocolate to recover the missing crunch. Fantastic!

 photo BF9A4942-59BD-4DFD-8F26-75F66E8C3849-8376-000009881B753BCD.jpg

Mocha Chip Ice Cream
1/2 cup granulated sugar
2 tablespoons cornstarch
1/8 teaspoon salt
2 cups milk (I've used 2% and whole)
1 cup half-and-half
1 egg yolk, beaten
2 tablespoons instant espresso
6 oz shaved semisweet or dark chocolate (only 3 oz if making coffee chip ice cream)

1. Whisk together sugar, cornstarch, and salt in a large heavy saucepan. Whisk in milk and half-and-half. Cook over medium heat, stirring constantly, 8 to 10 minutes or until mixture thickens slightly. Remove from heat.

2. Temper egg yolk with about 1/4 c of hot milk mixture, then return to pot, whisking briskly. Whisk in espresso. Whisk in half of chocolate. (Skip this step if you prefer coffee ice cream with chocolate chip.) You may need to return the mixture to the heat over low to get the chocolate to melt smoothly.

3. If necessary, strain mixture to remove any solids. Pour into a bowl and cool for about an hour. Place plastic wrap directly on cream mixture; chill 8 to 24 hours.

4. Pour mixture into freezer container of a 1 1/2-qt. ice-cream maker, and freeze according to your machine's directions; stir in remaining chocolate halfway through freezing.

Makes about 3 cups

Saturday, July 6, 2013

Skirt Steak with Red Wine/Thyme Sauce (and Gorgonzola Polenta)

Hmmm, I thought this was a spring/summer recipe but a quick search on Cooking Light informed me that this recipe was found in the December 2012 issue. I guess I'm more behind on my magazine pile than I thought. Oh well. I've now made this recipe twice and each time I pan-seared the steak but you could easily throw it on the grill. I loved that this recipe allows the meat to shine, but also has a nice pan sauce that adds a touch of sweetness. As for the Gorgonzola polenta [NOT PICTURED], it was definitely interesting, but I much prefer my regular version which uses Parmesan cheese instead. All in all, a tasty and quick meal.

 photo SkirtSteakRedWine1.jpg
The gorgonzola polenta is obviously not pictured. I served it with the steak the first time I made the dish but didn't particularly care for it so we had it with brown rice the second time. However, since the two recipes are paired together by CL, I figured I'd share them both.

Skirt Steak with Red Wine/Thyme Sauce and Gorgonzola Polenta
2 cups plus 1 TBS chicken broth, divided
1 c milk (I used skim)
2/3 c quick-cooking polenta
1 oz Gorgonzola cheese, crumbled (about 1/4 cup)
1 lb skirt steak, trimmed and cut into 4 pieces
1 tsp butter
1 TBS finely chopped shallots
1/2 cup dry red wine
1 tsp chopped fresh thyme
1 1/2 tsp honey
1/4 tsp cornstarch (I increased this to at least 1/2 tsp, which is why the sauce pictured is so thick)

1. Combine 2 cups broth and milk in a medium saucepan over medium heat; bring to a boil. Gradually whisk polenta into broth mixture, stirring constantly. Reduce heat to medium-low; cook until most of the liquid is absorbed, stirring frequently, about 10-20 minutes. Remove from heat. Stir in cheese and sprinkle with salt and pepper. Cover; let stand 5 minutes.

2. Heat a large skillet over medium-high heat. Lightly oil pan or spritz with cooking spray. Sprinkle steak with salt and pepper. Add to hot pan and cook 3 minutes on each side or until desired degree of doneness. You could also grill it. Transfer to a cutting board and let rest.

3. Melt butter in skillet over medium-high heat. Add shallots; sauté 1 minute. Add wine, thyme, and honey; bring to a boil. Cook until reduced by half (about 2 minutes). Combine remaining 1 tablespoon broth and cornstarch in a small bowl, stirring with a whisk. Add cornstarch mixture to skillet; cook 1 minute or until sauce slightly thickens.

Serves 4

Friday, July 5, 2013

What's for breakfast today?

Let's see, it's 87 degrees outside with a heat index of 94 and what am I having for breakfast?

 photo F5FD0C25-58DE-448D-A8CD-F715E6E92830-8121-00000950553AA389.jpg
Oatmeal with strawberries and walnuts

Weekly Chocolate Pudding

Posting my chocolate pudding recipe is long overdue. I've been making this pudding recipe every single week (sometimes twice a week) for about three months now. It's simple and relatively idiot-proof once you get the hang of it and so very yummy.

 photo pudding1.jpg

How did this begin? I have no idea idea. Pudding used to be a once-in-awhile treat in my house and always either from a mix or the refrigerated section of the market. Then one day in February, I got a craving for something chocolate, specifically pudding. As I often do for sweet treats, I turned to Martha Stewart and for the first couple weeks made this recipe. It was tasty, but not quite as rich as I'd like. Plus, 4 eggs meant a whole lot of fat and whatnot. Next I tried this recipe from A Cup of Jo. I liked that it only called for two egg yolks but still was richer due to the addition of chocolate chips, which I ignore for calorie and fat purposes ;) The only problem was that the result was runny as soup! Cooking it forever obtained the desired consistency, but was just too inconvenient. I was about to abandon the recipe when on a whim I tried the method used in the Martha Stewart recipe, i.e. adding everything including the eggs to the milk mixture right from the start. Success!

In general, though the pudding will thicken some when it cools, do not remove it from the heat until it thickly coats the back of your mixing spoon. This pudding tastes like a rich piece of chocolate cake and pairs wonderfully with bananas or strawberries.

Chocolate Pudding

3 cups milk (I use skim)
1/3 cup granulated sugar
2 TBS cornstarch
2 heaping TBS unsweetened cocoa powder
1/4 tsp salt
2 large egg yolks
3 oz. dark or semi-sweet chocolate chips
1 tsp vanilla extract

In a medium heavy saucepan, whisk together sugar, cornstarch, cocoa powder and salt. Whisk in milk and egg yolks. Cook over medium heat, stirring frequently, until mixture thickly coats the back of a spoon.

Remove from heat and stir in vanilla and chocolate chips until chocolate is melted. Portion into equal servings or pour into a bowl. Cool before refrigerating. If storing in a large bowl, cover with plastic wrap touching the pudding. Chill for at least 6-8 hours.

Makes about 6 half cup servings.